Konica Minolta bizhub PRESS C71hc bizhub PRESS C1060/C1070/C1070P/C71hc/PRO C1
Konica Minolta bizhub PRESS C71hc Manual
 |
View all Konica Minolta bizhub PRESS C71hc manuals
Add to My Manuals
Save this manual to your list of manuals |
Konica Minolta bizhub PRESS C71hc manual content summary:
- Konica Minolta bizhub PRESS C71hc | bizhub PRESS C1060/C1070/C1070P/C71hc/PRO C1 - Page 1
- Konica Minolta bizhub PRESS C71hc | bizhub PRESS C1060/C1070/C1070P/C71hc/PRO C1 - Page 2
- Konica Minolta bizhub PRESS C71hc | bizhub PRESS C1060/C1070/C1070P/C71hc/PRO C1 - Page 3
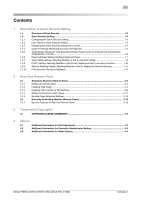
Contents 1 Description of Quick Security Setting 1.1 1.2 1.2.1 1.2.2 1.2.3 1.2.4 1.2.5 1.2.6 1.2.7 1.2.8 1.2.9 1.2.10 Overview of Quick Security...1-2 Quick Security Setting ...1-3 Configuring the Quick Security Setting 1-3 List of Items in Quick Security Setting 1-3 Displaying the Quick - Konica Minolta bizhub PRESS C71hc | bizhub PRESS C1060/C1070/C1070P/C71hc/PRO C1 - Page 4
MEMO Contents-2 bizhub PRESS C1070/C1070P/C1060, bizhub PRO C1060L - Konica Minolta bizhub PRESS C71hc | bizhub PRESS C1060/C1070/C1070P/C71hc/PRO C1 - Page 5
1 Description of Quick Security Setting - Konica Minolta bizhub PRESS C71hc | bizhub PRESS C1060/C1070/C1070P/C71hc/PRO C1 - Page 6
functionality of Web Utilities which might cause problems without ensuring the security management. - PSWC security setting. For details, contact your service representative. NOTICE In the case of using image controller, refer to the users guide supplied with Image Controller IC-415 or Image - Konica Minolta bizhub PRESS C71hc | bizhub PRESS C1060/C1070/C1070P/C71hc/PRO C1 - Page 7
1.2 Quick Security Setting 1 1.2 Quick Security Setting 1.2.1 Configuring the Quick Security Setting The features of Quick Security Setting can be configured on the [Quick Security Setting Menu] screen. The [Quick Security Setting Menu] screen can be accessed in one of the following three ways. - Konica Minolta bizhub PRESS C71hc | bizhub PRESS C1060/C1070/C1070P/C71hc/PRO C1 - Page 8
1 1.2.3 Quick Security Setting 1.2 Displaying the Quick Security Setting Menu Screen There are three ways to access the [Quick Security Setting Menu] screen. This section describes the procedure to access the screen via the [UTILITY] screen. 1 Press the Utility/Counter key. 2 Press [Quick Security - Konica Minolta bizhub PRESS C71hc | bizhub PRESS C1060/C1070/C1070P/C71hc/PRO C1 - Page 9
1.2 Quick Security Setting 1 4 The [Quick Security Setting Menu] screen is displayed. To return through the hierarchy of the Utility menu when you complete various settings, press [Close] until the desired screen appears. 1.2.4 Quick IP Filtering: Restricting Access to the Machine Restrict - Konica Minolta bizhub PRESS C71hc | bizhub PRESS C1060/C1070/C1070P/C71hc/PRO C1 - Page 10
set here is fixed to 8 one-byte characters. NOTICE Be sure not to forget the password. If you forget it, please contact your service representative. 1 Follow the procedure on page 1-4 to display the [Quick Security Setting Menu] screen. 2 Press [Administrator Password] on the [Quick Security Setting - Konica Minolta bizhub PRESS C71hc | bizhub PRESS C1060/C1070/C1070P/C71hc/PRO C1 - Page 11
1.2 Quick Security Setting 1 3 Press [Current Password] to enter the password currently used, then press [OK]. 4 Press [New Password] to enter your new password, then press [OK]. % Enter 8 one-byte characters for the administrator password. 5 Press [Input Confirmation] to enter your new password - Konica Minolta bizhub PRESS C71hc | bizhub PRESS C1060/C1070/C1070P/C71hc/PRO C1 - Page 12
1 Quick Security Setting 1.2 2 Press [Password Rules Setting] on the [Quick Security Setting Menu] screen. 3 Select either [Enable] or [Disable]. % If you press [Enable] with the condition that the default administrator password is kept unchanged or the administrator password does not comply with - Konica Minolta bizhub PRESS C71hc | bizhub PRESS C1060/C1070/C1070P/C71hc/PRO C1 - Page 13
functionality of Web Utilities. d Reference For details about Web Utilities, refer to [Application] - [Overview of Web Utilities] in the HTML User's Guide. 1 Follow the procedure on page 1-4 to display the [Quick Security Setting Menu] screen. 2 Press [WebUtilities Setting] on the [Quick Security - Konica Minolta bizhub PRESS C71hc | bizhub PRESS C1060/C1070/C1070P/C71hc/PRO C1 - Page 14
IC-602. d Reference For details about PageScope Web Connection, refer to [Application] - [Overview of PageScope Web Connection] in the HTML User's Guide. 1 Follow the procedure on page 1-4 to display the [Quick Security Setting Menu] screen. 2 Press [PSWC Setting] on the [Quick Security Setting - Konica Minolta bizhub PRESS C71hc | bizhub PRESS C1060/C1070/C1070P/C71hc/PRO C1 - Page 15
1.2 Quick Security Setting 1 1.2.9 Security Warning Display: Selecting Whether or Not to Display the Security Warning Select whether or not to display the Security Setting Warning screen. Selecting [Display] displays the Security Setting Warning screen when the machine is in the following - Konica Minolta bizhub PRESS C71hc | bizhub PRESS C1060/C1070/C1070P/C71hc/PRO C1 - Page 16
1 Quick Security Setting 1.2 1.2.10 If the Security Warning Is Displayed General users and administrator use different methods of operation. Follow the applicable procedure below. General user's operation 1 Press [Set Later]. The default (initial) screen is displayed to allow you normal - Konica Minolta bizhub PRESS C71hc | bizhub PRESS C1060/C1070/C1070P/C71hc/PRO C1 - Page 17
Counter] - [User Setting] - [System Setting] - [Default Screen Setting: Selecting the First Screen to Be Displayed] in the HTML User's Guide. Administrator's operation The administrator needs to change the administrator password to a new one in [Quick Security Setting] - [Administrator Password] and - Konica Minolta bizhub PRESS C71hc | bizhub PRESS C1060/C1070/C1070P/C71hc/PRO C1 - Page 18
1 3 Change the administrator password to your desired one. Quick Security Setting 1.2 % For details on how to set up the administrator password , see page 1-6. % If you want to select [Enable] in [Password Rules Setting] in step 4, an administrator password com- pliant with the password rules - Konica Minolta bizhub PRESS C71hc | bizhub PRESS C1060/C1070/C1070P/C71hc/PRO C1 - Page 19
2 Real-time Remote Panel - Konica Minolta bizhub PRESS C71hc | bizhub PRESS C1060/C1070/C1070P/C71hc/PRO C1 - Page 20
- [Remotely Controlling and Monitoring Machine] in the HTML User's Guide. Setting Up Real-time Remote Panel To use Real-time Remote • iOS 5 or later • Android ver. 4.0.3 or later Application VNC Viewer supporting 16 bit color display and RFB protocol version 3.8 or later The following applications - Konica Minolta bizhub PRESS C71hc | bizhub PRESS C1060/C1070/C1070P/C71hc/PRO C1 - Page 21
2.1 Setting Up Real-time Remote Panel 2 Setup procedure To use Real-time Remote Panel in a browser, set up the regular remote panel first before installing the exclusive plugin. - For details about how to set up the regular remote panel, refer to page 2-3. - For details about the installation - Konica Minolta bizhub PRESS C71hc | bizhub PRESS C1060/C1070/C1070P/C71hc/PRO C1 - Page 22
of the computer to be used for the remote panel. Up to 3 addresses can be specified. Real-time remote panel, however, does not support the concurrent connection from multiple computers. 6 Click [Registration]. The [Registered as follows] screen is displayed. The new data is registered to the - Konica Minolta bizhub PRESS C71hc | bizhub PRESS C1060/C1070/C1070P/C71hc/PRO C1 - Page 23
2.1 Setting Up Real-time Remote Panel 2 Downloading software 1 Display the [Main page] screen of Web Utilities. 2 Click on [Remote Panel]. Remote Panel is displayed in the browser. 3 Click [Download Page] in the upper right of the screen. The [Download Real-time Remote Panel plugin] page is - Konica Minolta bizhub PRESS C71hc | bizhub PRESS C1060/C1070/C1070P/C71hc/PRO C1 - Page 24
2 Setting Up Real-time Remote Panel 2.1 Extracting installation file 1 Right-click the installation file, and select [Extract All...] from the pull-down menu. The [Select a Destination and Extract Files] screen is displayed. 2 As the destination of extraction, specify the folder in which the - Konica Minolta bizhub PRESS C71hc | bizhub PRESS C1060/C1070/C1070P/C71hc/PRO C1 - Page 25
2.1 Setting Up Real-time Remote Panel 2 Check that the following two folders are saved in the folder specified as the destination of extraction. [libraries] [plugins] NOTICE Be sure to store the two folders extracted from RealTime_Remote_Panel_InstallFile.zip ([libraries] and [plugins]) and the - Konica Minolta bizhub PRESS C71hc | bizhub PRESS C1060/C1070/C1070P/C71hc/PRO C1 - Page 26
2 Setting Up Real-time Remote Panel 2.1 4 Select [I accept the agreement] after checking the content, and then click [Next]. % If you disagree, you will not be able to install. % By selecting from the drop-down list, you can change the language of the license agreement. 5 Check the copyright - Konica Minolta bizhub PRESS C71hc | bizhub PRESS C1060/C1070/C1070P/C71hc/PRO C1 - Page 27
2.1 Setting Up Real-time Remote Panel 2 7 Click [Finish]. The installation is complete. % When uninstalling the plugin, follow the instructions provided for each OS. 2.1.3 Enabling VNC Function of the Machine Set up the VNC Function of the machine in the Machine Manager Setting of Web - Konica Minolta bizhub PRESS C71hc | bizhub PRESS C1060/C1070/C1070P/C71hc/PRO C1 - Page 28
2 Setting Up Real-time Remote Panel 2.1 4 Click on [Remote Panel Setting/Job History Setting]. The [Remote Panel Setting/Job History Setting] screen is displayed. % To enable the SSL encrypted communication, click [Enable] for [SSL Setting]. To re-disable the SSL encrypted communication, click [ - Konica Minolta bizhub PRESS C71hc | bizhub PRESS C1060/C1070/C1070P/C71hc/PRO C1 - Page 29
procedure is an example showing how to set up the VNC Viewer for iPad "Remoter VNC." 1 Start Remoter VNC. 2 Tap [Discovery List]. 3 Tap [Add Session Manually]. bizhub PRESS C1070/C1070P/C1060, bizhub PRO C1060L 2-11 - Konica Minolta bizhub PRESS C71hc | bizhub PRESS C1060/C1070/C1070P/C71hc/PRO C1 - Page 30
2 Setting Up Real-time Remote Panel 2.1 4 Tap [Select] of "Server Type," and then select [VNC/ScreenSharing]. 5 Enter the IP address of the machine for "VNC Hostname," and the VNC password for "VNC Password." 6 Tap [Save] in the upper right of the window. The connection to the machine is - Konica Minolta bizhub PRESS C71hc | bizhub PRESS C1060/C1070/C1070P/C71hc/PRO C1 - Page 31
2.1 Setting Up Real-time Remote Panel 2 2.1.5 Remote Panel Advanced Settings The [Remote Panel Advanced Settings] screen is provided to disable Real-time Remote Panel or to set the time for the session timeout. 1 Follow the procedure in page 2-9 to display the [Remote Panel Advanced Settings] - Konica Minolta bizhub PRESS C71hc | bizhub PRESS C1060/C1070/C1070P/C71hc/PRO C1 - Page 32
2 Remotely Controlling Machine (Remote Panel) 2.2 2.2 Remotely Controlling Machine (Remote Panel) 1 Display the [Main page] screen of Web Utilities. 2 Click on [Remote Panel]. The browser window displays the touch panel screen and control panel currently displayed on the machine. 3 Using a mouse - Konica Minolta bizhub PRESS C71hc | bizhub PRESS C1060/C1070/C1070P/C71hc/PRO C1 - Page 33
2.2 Remotely Controlling Machine (Remote Panel) 2 When Real-time Remote Panel is disabled: % Clicking [Lock Real Panel] activates the Operation Panel Lock function to void any operation from the touch panel and control panel. In this case, the machine operation is available from the remote panel - Konica Minolta bizhub PRESS C71hc | bizhub PRESS C1060/C1070/C1070P/C71hc/PRO C1 - Page 34
2 Remotely Controlling Machine (Remote Panel) 2.2 % Also for other connection errors or communication errors, the above error scree is displayed. Clicking [Retry] connects to Real-time Remote Panel again. NOTICE Even when the machine enters the low power mode and the display on the touch panel - Konica Minolta bizhub PRESS C71hc | bizhub PRESS C1060/C1070/C1070P/C71hc/PRO C1 - Page 35
2.2 Remotely Controlling Machine (Remote Panel) 2 In the control panel area, you can also recognize them to see whether the characters [Start] and [C] are colored or additional input operation keys are provided. Real-time Remote Panel has colored [Start] and [C], while additional input operation - Konica Minolta bizhub PRESS C71hc | bizhub PRESS C1060/C1070/C1070P/C71hc/PRO C1 - Page 36
2 2.2.1 Remotely Controlling Machine (Remote Panel) 2.2 Security Features of Real-time Remote Panel When connected to the Real-time Remote Panel, the touch panel of the main body displays the same screen as the panel. Therefore, when either Remote Panel or Main Panel is operated, the operator of - Konica Minolta bizhub PRESS C71hc | bizhub PRESS C1060/C1070/C1070P/C71hc/PRO C1 - Page 37
2.2 Remotely Controlling Machine (Remote Panel) 2 Remote Panel Connection Warning Screen When the Real-time Remote Panel is connected during an operation on the touch panel and control panel of the main body, a warning screen regarding the connection is displayed on the touch panel. The operator - Konica Minolta bizhub PRESS C71hc | bizhub PRESS C1060/C1070/C1070P/C71hc/PRO C1 - Page 38
2 Remotely Controlling Machine (Remote Panel) 2.2 Shut Off Warning Screen When the panel is locked or the connection warning/connection refused screen is displayed and the sub power switch of the main body is turned off, the touch panel of the main body displays the screen to notify you the shut- - Konica Minolta bizhub PRESS C71hc | bizhub PRESS C1060/C1070/C1070P/C71hc/PRO C1 - Page 39
Initializes the selection of destinations and job settings Initializes the settings concerning the connected external applications NOTICE If the service call failure is occurring, the [Service Call] screen continues to be displayed even when the Real-time Remote Panel is disconnected. If the Real - Konica Minolta bizhub PRESS C71hc | bizhub PRESS C1060/C1070/C1070P/C71hc/PRO C1 - Page 40
2 MEMO Remotely Controlling Machine (Remote Panel) 2.2 2-22 bizhub PRESS C1070/C1070P/C1060, bizhub PRO C1060L - Konica Minolta bizhub PRESS C71hc | bizhub PRESS C1060/C1070/C1070P/C71hc/PRO C1 - Page 41
3 Trademarks/Copyrights - Konica Minolta bizhub PRESS C71hc | bizhub PRESS C1060/C1070/C1070P/C71hc/PRO C1 - Page 42
/Copyrights] [SOFTWARE LICENSE AGREEMENT] in the HTML User's Guide. SOFTWARE LICENSE AGREEMENT The following information needs to be added OFL) are to stimulate worldwide development of collaborative font projects, to support the font creation efforts of academic and linguistic communities, and to - Konica Minolta bizhub PRESS C71hc | bizhub PRESS C1060/C1070/C1070P/C71hc/PRO C1 - Page 43
3.1 SOFTWARE LICENSE AGREEMENT 3 5) The Font Software, modified or unmodified, in part or in whole, must be distributed entirely under this license, and must not be distributed under any other license. The requirement for fonts to remain under this license does not apply to any document created - Konica Minolta bizhub PRESS C71hc | bizhub PRESS C1060/C1070/C1070P/C71hc/PRO C1 - Page 44
3 MEMO SOFTWARE LICENSE AGREEMENT 3.1 3-4 bizhub PRESS C1070/C1070P/C1060, bizhub PRO C1060L - Konica Minolta bizhub PRESS C71hc | bizhub PRESS C1060/C1070/C1070P/C71hc/PRO C1 - Page 45
4 Others - Konica Minolta bizhub PRESS C71hc | bizhub PRESS C1060/C1070/C1070P/C71hc/PRO C1 - Page 46
of the curl adjustment, refer to [Machine Information] - [Curl Adjustment] - [Curl Adjustment: Reducing Curl (Relay Unit RU-509)] in the HTML User's Guide. Curl ) Adjustment direction Strength level [+0.5][+1][+1.5][+2] [-0.5][-1][-1.5][-2] 4-2 bizhub PRESS C1070/C1070P/C1060, bizhub PRO C1060L - Konica Minolta bizhub PRESS C71hc | bizhub PRESS C1060/C1070/C1070P/C71hc/PRO C1 - Page 47
in the HTML User's Guide. - All software switches are set to Off by default. Switch from Off to On in order to solve the problem. - Never switch from should be supported. The print quantity specified in PJL is prioritized. Setting value: Off: Do not support the staple setting On: Support the - Konica Minolta bizhub PRESS C71hc | bizhub PRESS C1060/C1070/C1070P/C71hc/PRO C1 - Page 48
Options Relay Unit RU-516 and Authentication Unit AU-201S (IC Card Type) are added as options provided for this machine. For details, contact your service representative. 4-4 bizhub PRESS C1070/C1070P/C1060, bizhub PRO C1060L - Konica Minolta bizhub PRESS C71hc | bizhub PRESS C1060/C1070/C1070P/C71hc/PRO C1 - Page 49
4.3 Additional Information for Other Options 4 MEMO bizhub PRESS C1070/C1070P/C1060, bizhub PRO C1060L 4-5 - Konica Minolta bizhub PRESS C71hc | bizhub PRESS C1060/C1070/C1070P/C71hc/PRO C1 - Page 50
4 MEMO Additional Information for Other Options 4.3 4-6 bizhub PRESS C1070/C1070P/C1060, bizhub PRO C1060L - Konica Minolta bizhub PRESS C71hc | bizhub PRESS C1060/C1070/C1070P/C71hc/PRO C1 - Page 51
- Konica Minolta bizhub PRESS C71hc | bizhub PRESS C1060/C1070/C1070P/C71hc/PRO C1 - Page 52
http://konicaminolta.com
-
 1
1 -
 2
2 -
 3
3 -
 4
4 -
 5
5 -
 6
6 -
 7
7 -
8
-
9
-
10
-
11
-
12
-
13
-
14
-
15
-
16
-
17
-
18
-
19
-
20
-
21
-
22
-
23
-
24
-
25
-
26
-
27
-
28
-
29
-
30
-
31
-
32
-
33
-
34
-
35
-
36
-
37
-
38
-
39
-
40
-
41
-
42
-
43
-
44
-
45
-
46
-
47
-
48
-
49
-
50
-
51
-
52
 |
 |