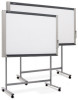
Konica Minolta magicolor plus magicolor plus Captureboard C-12 Series Tool Box - Page 15
Click the, Scan Button of the Menu, Click [Yes], Click, Save to Save, E-15
 |
View all Konica Minolta magicolor plus manuals
Add to My Manuals
Save this manual to your list of manuals |
Page 15 highlights
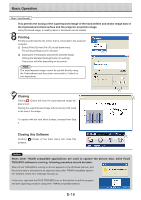
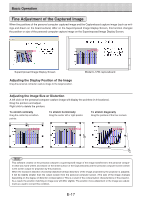
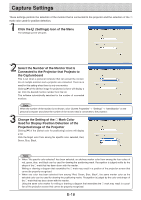
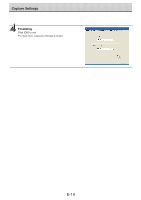
Basic Operation Click the (Scan) Button of the Menu Displays the projection image superimposed screen. Click [Yes] The sheet surface of the Captureboard will be scrolled, the capture will start and be completed. Then the hand written and drawn image will be transferred to the personal computer. In a little while the superimposed image display screen will open. When the personal computer capture image and the Captureboard capture image are shifted on the superimposed image display screen, see "Fine Adjustment of the Captured Image" on Page E-17. If you do not want to combine the hand-drawn image on the sheet surface with the projector's projected image, click "No". When "No" is clicked, the captureboard capture image preview is displayed. Note • Black and white is set if "Prohibit Color Mode" is set to "On" in "Machine Settings". • Use the Density button on the main unit's control panel to set the scanning density. • When "Header/Footer" is set to "On" in "Hardware Setup" (see page E-22), the header/footer information is dis- played on the combined image. In this case, this information is saved and printed. Click (Save) to Save • When saving for the first time, clicking will display the personal computer [Save as] box. Select "Save location" "File type", enter the file name, then click the [Save] button. • Select the file type ("PNG", "JPG" or "PDF") using the ▼ button. • A file name consisting of the model name, date and serial num- ber (ex. C-12_081021_01) is displayed automatically. Change it if necessary. • If a file with the same name already exists, the old file is overwritten. • To create a new folder, click [Create new folder] or click the icon, enter the folder name in the newly created folder, then click [Open]. Next, select the file type, enter the file name, then click [Save]. • [Save] or [Save as] can be selected from [File] of the menu bar. E-15 Continued on next page
-
 1
1 -
2
-
3
-
4
-
5
-
6
-
7
-
8
-
9
-
 10
10 -
 11
11 -
 12
12 -
 13
13 -
 14
14 -
 15
15 -
 16
16 -
 17
17 -
 18
18 -
 19
19 -
 20
20 -
21
-
22
-
23
-
24
-
25
-
26
-
27
-
28
-
29
-
30
-
31
-
32
 |
 |
