Kyocera FS-3140MFP FS-3140MFP Fax Operation Guide - Page 129
Changing and Deleting Reject FAX No., Address Recall/Pause, Clear, Reset, Right Select
 |
View all Kyocera FS-3140MFP manuals
Add to My Manuals
Save this manual to your list of manuals |
Page 129 highlights
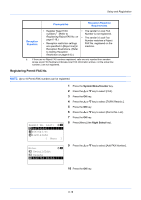
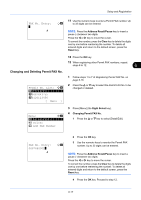
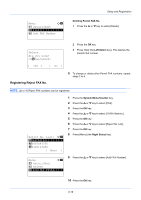
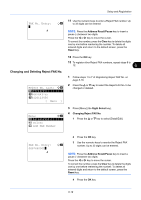
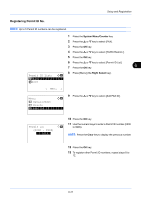
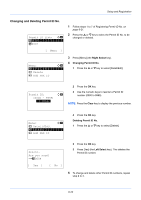
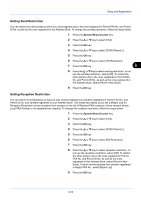
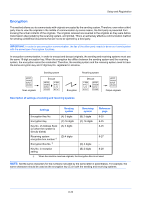
Setup and Registration FAX No. Entry: B b * S 11 Use the numeric keys to enter a Reject FAX number. Up to 32 digits can be entered. NOTE: Press the Address Recall/Pause key to insert a pause (-) between two digits. Press the Y or Z key to move the cursor. To correct the number, press the Clear key to delete the digits one by one before reentering the number. To delete all entered digits and return to the default screen, press the Reset key. Changing and Deleting Reject FAX No. Reject No. List: a b *b *0*6*6*7*6*4*0*0*0*1********** b 0667643755 b 0120123456 [ Menu ] 12 Press the OK key. 13 To register other Reject FAX numbers, repeat steps 8 to 12. 6 1 Follow steps 1 to 7 of Registering Reject FAX No. on page 6-18. 2 Press the U or V key to select the Reject FAX No. to be changed or deleted. Menu: a b *1 **D*e*t*a*i*l*/*E*d*i*t******** 2 Delete 3 Add FAX Number 3 Press [Menu] (the Right Select key). 4 Changing Reject FAX No. 1 Press the U or V key to select [Detail/Edit]. FAX No. Entry: A b 0667640001* S 2 Press the OK key. 3 Use the numeric keys to reenter the Reject FAX number. Up to 32 digits can be entered. NOTE: Press the Address Recall/Pause key to insert a pause (-) between two digits. Press the Y or Z key to move the cursor. To correct the number, press the Clear key to delete the digits one by one before reentering the number. To delete all entered digits and return to the default screen, press the Reset key. 4 Press the OK key. 6-19
-
 1
1 -
2
-
3
-
4
-
5
-
6
-
7
-
8
-
9
-
10
-
11
-
12
-
13
-
14
-
15
-
16
-
17
-
18
-
19
-
20
-
21
-
22
-
23
-
24
-
25
-
26
-
27
-
28
-
29
-
30
-
31
-
32
-
33
-
34
-
35
-
36
-
37
-
38
-
39
-
40
-
41
-
42
-
43
-
44
-
45
-
46
-
47
-
48
-
49
-
50
-
51
-
52
-
53
-
54
-
55
-
56
-
57
-
58
-
59
-
60
-
61
-
62
-
63
-
64
-
65
-
66
-
67
-
68
-
69
-
70
-
71
-
72
-
73
-
74
-
75
-
76
-
77
-
78
-
79
-
80
-
81
-
82
-
83
-
84
-
85
-
86
-
87
-
88
-
89
-
90
-
91
-
92
-
93
-
94
-
95
-
96
-
97
-
98
-
99
-
100
-
101
-
102
-
103
-
104
-
105
-
106
-
107
-
108
-
109
-
110
-
111
-
112
-
113
-
114
-
115
-
116
-
117
-
118
-
119
-
120
-
121
-
122
-
123
-
 124
124 -
 125
125 -
 126
126 -
 127
127 -
 128
128 -
 129
129 -
 130
130 -
 131
131 -
 132
132 -
 133
133 -
 134
134 -
135
-
136
-
137
-
138
-
139
-
140
-
141
-
142
-
143
-
144
-
145
-
146
-
147
-
148
-
149
-
150
-
151
-
152
-
153
-
154
-
155
-
156
-
157
-
158
-
159
-
160
-
161
-
162
-
163
-
164
-
165
-
166
-
167
-
168
-
169
-
170
-
171
-
172
-
173
-
174
-
175
-
176
-
177
-
178
 |
 |
