Kyocera KM-5530 Scan System (D) Operation Guide (Setup) - Page 16
Date/Time and Time Difference
 |
View all Kyocera KM-5530 manuals
Add to My Manuals
Save this manual to your list of manuals |
Page 16 highlights
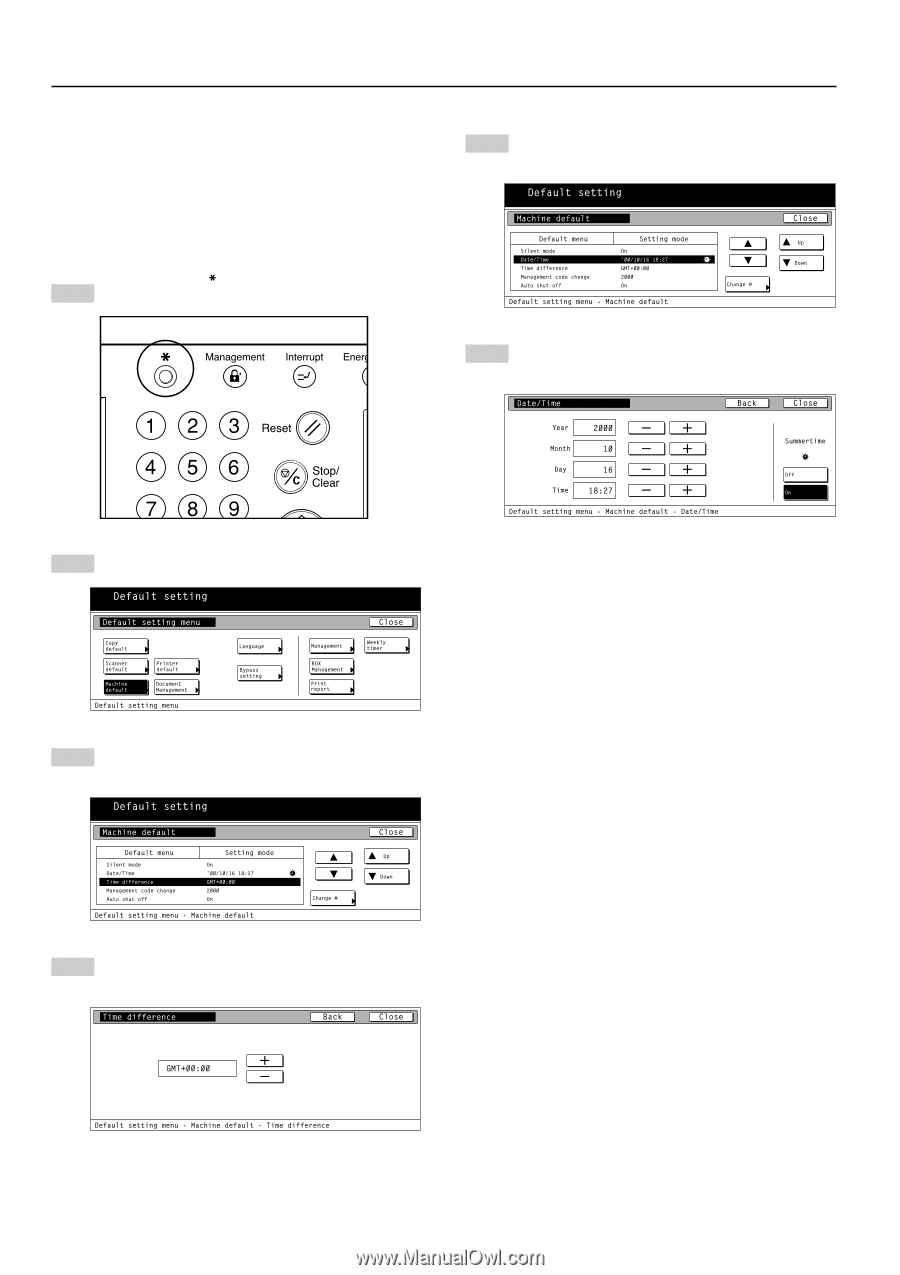
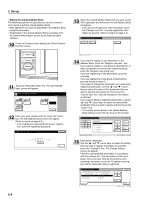
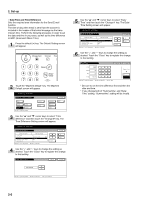
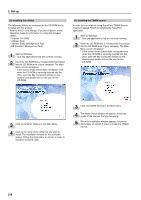
2. Set-up • Date/Time and Time Difference Sets the required area information for the Send E-mail function. The time of day when email is sent from the scanner is included in the header of that email message as the transmission time. Perform the following procedure in order to set the date and time in your area, as well as the time difference to GMT (Greenwich Mean Time). 1 Press the default ( ) key. The Default Setting screen will appear. 5 Use the "L" and "M" cursor keys to select "Date/ Time" and then touch the "Change #" key. The Date/ Time Setting screen will appear. 6 Use the "+" and "-" keys to change the setting as desired. Touch the "Close" key to register the change to that setting. 2 Touch the "Machine default" key. The Machine Default screen will appear. * Be sure to set the time difference first and then the date and time. * If you change both of "Summertime" and "Date/ Time" setting, "Summertime" setting will be invalid. 3 Use the "L" and "M" cursor keys to select "Time difference" and then touch the "Change #" key. The Time Difference Setting screen will appear. 4 Use the "+" and "-" keys to change the setting as desired. Touch the "Close" key to register the change to that setting. 2-6
-
 1
1 -
2
-
3
-
4
-
5
-
6
-
7
-
8
-
9
-
10
-
 11
11 -
 12
12 -
 13
13 -
 14
14 -
 15
15 -
 16
16 -
 17
17 -
 18
18 -
 19
19 -
 20
20 -
 21
21 -
22
-
23
-
24
-
25
-
26
-
27
-
28
-
29
-
30
-
31
-
32
 |
 |