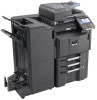
Kyocera TASKalfa 4500i File Management Utility Operation Guide - Page 11
Front Panel Template, Workflow, Adding a Workflow - default password
 |
View all Kyocera TASKalfa 4500i manuals
Add to My Manuals
Save this manual to your list of manuals |
Page 11 highlights
4 Front Panel Template A customized button can be displayed on the operation panel of an MFP to trigger a custom workflow. The front panel template specifies what text is shown on the button. Workflow FMU enables the user to create custom workflows for handling scanned documents. These workflows can be triggered by pressing a customized button on the MFP touch screen. Adding a Workflow To add a workflow while the device is enabled with authentication, the Login user name and Password for the MFP must be correctly set in Communication settings as required. Note: Login user name and login password may not be entered in the Windows XP Workgroup environment (step 4). 1 Select the MFP in the main list, and click Front Panel Template. 2 Click Add workflow. 3 On the Workflow and scan default tab, set Workflow information and Scanner default settings. 4 Enter the Workflow name, Owner name, Publish settings, Password, IP address (if the link local address does not work, use the global address), Share name, Login user name, Login password, and File name. 5 On the Workflow data list tab, click Add workflow item. 6 In the Index item category, select Select item, Comment, Enter value, and Date and time settings, and enter the Index item name and Instruction message. If Select item is selected, then you must enter the Item list fields and the Allowed selections. 7 Click Update workflow data list. The workflow appears in the Index item list. 8 Use the Move up and Move down buttons to set the position of the workflow in the list. Workflows are displayed on the MFP operation panel in the same order as this list. File Management Utility 4-1
-
 1
1 -
2
-
3
-
4
-
5
-
 6
6 -
 7
7 -
 8
8 -
 9
9 -
 10
10 -
 11
11 -
 12
12 -
 13
13 -
 14
14
 |
 |
