LG L1404R Service Manual - Page 13
Air Handling Parts
 |
View all LG L1404R manuals
Add to My Manuals
Save this manual to your list of manuals |
Page 13 highlights
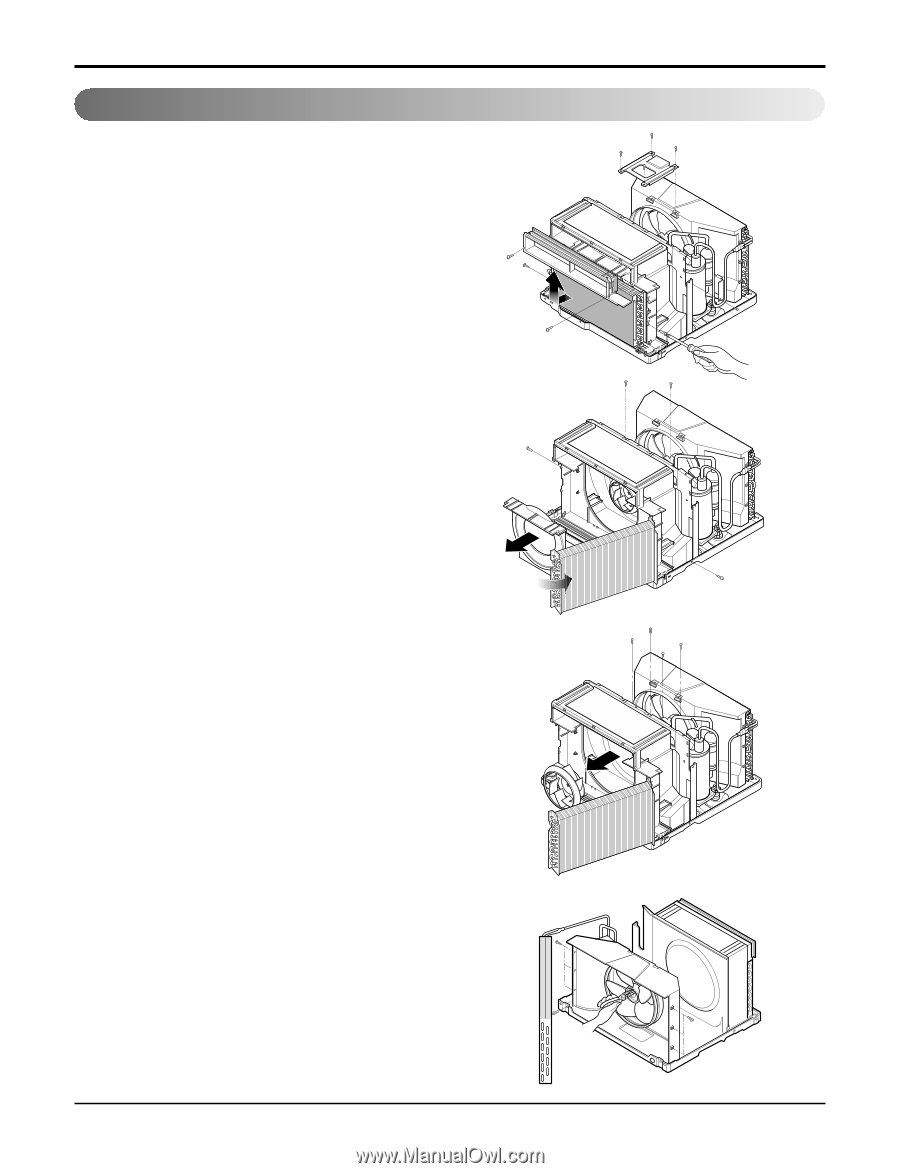
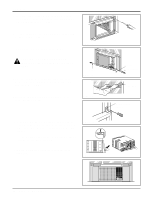
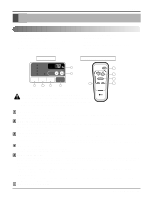
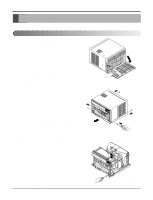
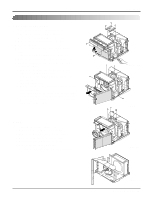
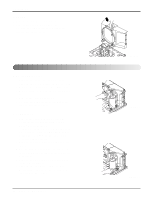
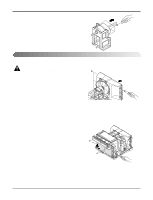
Air Handling Parts 4. Air Guide and Turbo Fan 1. Remove the front grille. (Refer to section 1) 2. Remove the cabinet. (Refer to section 2) 3. Remove the control box. (Refer to section 3) 4. Remove the 4 screws that fasten the brace. 5. Remove the brace. 6. Remove the 2 screws that fasten the air guide upper. 7. Remove the air guide upper.(See Figure 16) 8. Remove the 2 screws that fasten the evaporator. 9. Move the evaporator forward and pulling it upward slightly. (See Figure 17) 10. Pull out the hook of orifice by pushing the tabs and remove it. (See Figure 18) 11. Remove the clamp with a hand plier that secures the turbo fan. 12. Remove the turbo fan. 13. Remove the 2 screws that fasten the air guide from the base pan. 14. Move the air guide backward, and pull out from the base pan.(Move the air giude lower carefully.) 15. Re-install the components by referring to the removal procedure, above. 5. FAN 1. Remove the cabinet. (Refer to section 2) 2. Remove the brace (Refer to section 4) 3. Remove the 5 screws that fasten the condenser. 4. Move the condenser to the left carefully. 5. Remove the clamp that secures the fan. 6. Remove the fan. (See Figure 19) 7. Re-install by referring to the removal procedure. Disassembly Figure 16 Figure 17 Figure 18 Figure 19 Service Manual 13
-
 1
1 -
2
-
3
-
4
-
5
-
6
-
7
-
 8
8 -
 9
9 -
 10
10 -
 11
11 -
 12
12 -
 13
13 -
 14
14 -
 15
15 -
 16
16 -
 17
17 -
 18
18 -
19
-
20
-
21
-
22
-
23
-
24
-
25
-
26
-
27
-
28
-
29
-
30
-
31
-
32
-
33
-
34
-
35
-
36
-
37
-
38
-
39
 |
 |