LG LDCS24223S Owners Manual - Page 20
Reversing Door Opening Direction
 |
View all LG LDCS24223S manuals
Add to My Manuals
Save this manual to your list of manuals |
Page 20 highlights
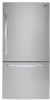
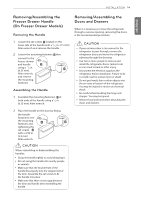
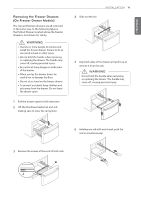
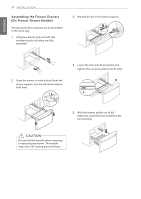
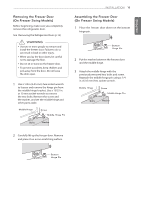
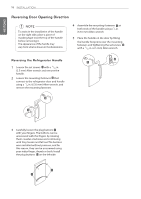
ENGLISH 19 INSTALLATION Reversing Door Opening Direction NOTE To assist in the installation of the handle on the right side, place a piece of masking tape near the top of the handle before removing it. The appearance of the handle may vary from what is shown in the illustrations. 4 Assemble the mounting fasteners at both ends of the handle using a 1/4 in. (6.35 mm) Allen wrench. 5 the handle footprints over the mounting fasteners and tightening the set screws with a 3/32 in. (2.5 mm) Allen wrench. Reversing the Refrigerator Handle 1 Loosen the set screws with a 3/32 in. (2.5 mm) Allen wrench and remove the handle. 2 Loosen the mounting fasteners that connect to the refrigerator door and handle using a 1/4 in. (6.35 mm) Allen wrench, and remove the mounting fasteners. 3 Carefully loosen the plug buttons 4 them counter-clockwise and continuing until they loosen and fall out The buttons were installed without pressure, and for this reason, they can be unscrewed using the plug buttons 5 on the left side. 4 5
-
 1
1 -
2
-
3
-
4
-
5
-
6
-
7
-
8
-
9
-
10
-
11
-
12
-
13
-
14
-
 15
15 -
 16
16 -
 17
17 -
 18
18 -
 19
19 -
 20
20 -
 21
21 -
 22
22 -
 23
23 -
 24
24 -
 25
25 -
26
-
27
-
28
-
29
-
30
-
31
-
32
-
33
-
34
-
35
-
36
-
37
-
38
-
39
-
40
-
41
-
42
-
43
-
44
-
45
-
46
-
47
-
48
-
49
-
50
-
51
-
52
-
53
-
54
-
55
-
56
 |
 |
