Lenovo 649319U User Guide - Page 31
Installing, configuring
 |
UPC - 883609857417
View all Lenovo 649319U manuals
Add to My Manuals
Save this manual to your list of manuals |
Page 31 highlights
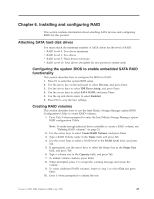
Chapter 6. Installing and configuring RAID This section contains information about attaching SATA devices and configuring RAID for this product. Attaching SATA hard disk drives You must attach the minimum number of SATA drives for the level of RAID. v RAID Level 0: Two drives minimum v RAID Level 1: Two drives v RAID Level 5: Three drives minimum v RAID Level 10: Four drives (Available for two-processor system only) Configuring the system BIOS to enable embedded SATA RAID functionality This section describes how to configure the BIOS for RAID. 1. Press F1 to enter the system BIOS setup. 2. Use the arrow key on the keyboard to select Devices, and press Enter. 3. Use the arrow keys to select IDE Drive Setup, and press Enter. 4. Use the arrow keys to select SATA RAID, and press Enter. 5. Use the up and down arrow to select Enabled. 6. Press F10 to save the new settings. Creating RAID volumes This section describes how to use the Intel Matrix Storage Manager option ROM Configuration Utility to create RAID volumes. 1. Press Ctrl+I when prompted to enter the Intel Matrix Storage Manager option ROM configuration Utility. Note: To make enough physical drives available to create a RAID volume, see "Deleting RAID volumes" on page 24. 2. Use the arrow keys to select Create RAID Volume, and press Enter. 3. Type a RAID Volume name in the Name field, and press Tab. 4. Use the arrow keys to select a RAID level in the RAID Level field, and press Tab. 5. If appropriate, use the arrow keys to select the Stripe Size in the Stripe Size field, and press Tab. 6. Type a volume size in the Capacity field, and press Tab. 7. To initiate volume creation, press Enter. 8. When prompted, press Y to accept the warning message and create the volume. 9. To create additional RAID volumes, return to step 3 or select Exit and press Enter. 10. Press Y when prompted to confirm the exit. © Lenovo 2005, 2008. Portions © IBM Corp. 2005. 23
-
 1
1 -
2
-
3
-
4
-
5
-
6
-
7
-
8
-
9
-
10
-
11
-
12
-
13
-
14
-
15
-
16
-
17
-
18
-
19
-
20
-
21
-
22
-
23
-
24
-
25
-
 26
26 -
 27
27 -
 28
28 -
 29
29 -
 30
30 -
 31
31 -
 32
32 -
 33
33 -
 34
34 -
 35
35 -
 36
36 -
37
-
38
-
39
-
40
-
41
-
42
-
43
-
44
-
45
-
46
-
47
-
48
-
49
-
50
-
51
-
52
-
53
-
54
-
55
-
56
-
57
-
58
-
59
-
60
-
61
-
62
-
63
-
64
-
65
-
66
-
67
-
68
-
69
-
70
-
71
-
72
 |
 |
