Lenovo ThinkCentre M55 Hardware Maintenance Manual - Page 382
Updating (flashing) BIOS from a diskette or CD-ROM - video drivers
 |
View all Lenovo ThinkCentre M55 manuals
Add to My Manuals
Save this manual to your list of manuals |
Page 382 highlights
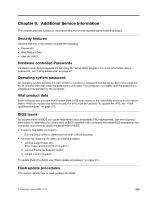
Updating (flashing) BIOS from a diskette or CD-ROM 1. If you are updating from a CD-ROM, insert the flash update CD-ROM in the optical drive before turning off the computer. 2. Shut down the operating system and turn off the computer. 3. If you are updating from a diskette, insert the flash update diskette in the diskette drive. Turn on the computer. The update begins. 4. When you are prompted to select a language, press the number on your keyboard that corresponds to the language; then press Enter. 5. When prompted to change the serial number, press Y, type the seven character serial number of your computer, and then press Enter. 6. When prompted to change the machine type/model, press Y, type the seven character machine type/model of your computer, and then press Enter. 7. Follow the instructions on the screen to complete the update. Updating (flashing) BIOS from your operating system Note: Due to constant improvements being made to the Lenovo Web site, Web page content (including the links referenced in the following procedure) is subject to change. 1. From your browser, type http://www.lenovo.com/think/support. 2. In the Use Quick path field, type your 4-digit machine type and click Go. 3. Under Browse by product, click Downloads and drivers. 4. Scroll down to the BIOS category and click on the Flash Bios Update. 5. On the Flash BIOS Update page, scroll down to locate the .txt file for the flash from the operating system version. Click the .txt file. 6. Print these instructions. This is very important because these instructions are not on the screen after the download begins. 7. From the browser, click Back to return to the list of files. Carefully follow the printed instructions to download, extract, and install the update. Recovering from a POST/BIOS update failure Attention: If an interruption occurs during a POST/BIOS update (flash update), the computer might not restart correctly. If this occurs, perform the following procedure (also known as a Boot-block recovery) Note: If your computer has no internal diskette drive, an optional USB diskette drive must be connected to use the BIOS flash diskette. 1. Open the cover. 2. Remove any parts necessary to gain access to the Clear CMOS/Recovery jumper. 3. Move the Clear CMOS/Recovery jumper from the standard position (pins 1 and 2) to pins 2 and 3. 4. Insert the BIOS flash diskette in the diskette drive. 5. Close the cover and reconnect the computer power cord to the computer and to an electrical outlet. Turn on the computer. 6. The recovery session takes two to three minutes. During this time you will hear a series of beeps. After the update session completes, the series of beeps ends and the computer automatically turns off. There is no video during the recovery session. 7. When the computer turns off, open the cover. 8. Move the Clear CMOS/Recovery jumper back to the original position (pins 1 and 2) 9. Remove the BIOS flash diskette from the diskette drive. 10. Close or install the cover and reconnect all external cables. 376 Hardware Maintenance Manual
-
 1
1 -
2
-
3
-
4
-
5
-
6
-
7
-
8
-
9
-
10
-
11
-
12
-
13
-
14
-
15
-
16
-
17
-
18
-
19
-
20
-
21
-
22
-
23
-
24
-
25
-
26
-
27
-
28
-
29
-
30
-
31
-
32
-
33
-
34
-
35
-
36
-
37
-
38
-
39
-
40
-
41
-
42
-
43
-
44
-
45
-
46
-
47
-
48
-
49
-
50
-
51
-
52
-
53
-
54
-
55
-
56
-
57
-
58
-
59
-
60
-
61
-
62
-
63
-
64
-
65
-
66
-
67
-
68
-
69
-
70
-
71
-
72
-
73
-
74
-
75
-
76
-
77
-
78
-
79
-
80
-
81
-
82
-
83
-
84
-
85
-
86
-
87
-
88
-
89
-
90
-
91
-
92
-
93
-
94
-
95
-
96
-
97
-
98
-
99
-
100
-
101
-
102
-
103
-
104
-
105
-
106
-
107
-
108
-
109
-
110
-
111
-
112
-
113
-
114
-
115
-
116
-
117
-
118
-
119
-
120
-
121
-
122
-
123
-
124
-
125
-
126
-
127
-
128
-
129
-
130
-
131
-
132
-
133
-
134
-
135
-
136
-
137
-
138
-
139
-
140
-
141
-
142
-
143
-
144
-
145
-
146
-
147
-
148
-
149
-
150
-
151
-
152
-
153
-
154
-
155
-
156
-
157
-
158
-
159
-
160
-
161
-
162
-
163
-
164
-
165
-
166
-
167
-
168
-
169
-
170
-
171
-
172
-
173
-
174
-
175
-
176
-
177
-
178
-
179
-
180
-
181
-
182
-
183
-
184
-
185
-
186
-
187
-
188
-
189
-
190
-
191
-
192
-
193
-
194
-
195
-
196
-
197
-
198
-
199
-
200
-
201
-
202
-
203
-
204
-
205
-
206
-
207
-
208
-
209
-
210
-
211
-
212
-
213
-
214
-
215
-
216
-
217
-
218
-
219
-
220
-
221
-
222
-
223
-
224
-
225
-
226
-
227
-
228
-
229
-
230
-
231
-
232
-
233
-
234
-
235
-
236
-
237
-
238
-
239
-
240
-
241
-
242
-
243
-
244
-
245
-
246
-
247
-
248
-
249
-
250
-
251
-
252
-
253
-
254
-
255
-
256
-
257
-
258
-
259
-
260
-
261
-
262
-
263
-
264
-
265
-
266
-
267
-
268
-
269
-
270
-
271
-
272
-
273
-
274
-
275
-
276
-
277
-
278
-
279
-
280
-
281
-
282
-
283
-
284
-
285
-
286
-
287
-
288
-
289
-
290
-
291
-
292
-
293
-
294
-
295
-
296
-
297
-
298
-
299
-
300
-
301
-
302
-
303
-
304
-
305
-
306
-
307
-
308
-
309
-
310
-
311
-
312
-
313
-
314
-
315
-
316
-
317
-
318
-
319
-
320
-
321
-
322
-
323
-
324
-
325
-
326
-
327
-
328
-
329
-
330
-
331
-
332
-
333
-
334
-
335
-
336
-
337
-
338
-
339
-
340
-
341
-
342
-
343
-
344
-
345
-
346
-
347
-
348
-
349
-
350
-
351
-
352
-
353
-
354
-
355
-
356
-
357
-
358
-
359
-
360
-
361
-
362
-
363
-
364
-
365
-
366
-
367
-
368
-
369
-
370
-
371
-
372
-
373
-
374
-
375
-
376
-
 377
377 -
 378
378 -
 379
379 -
 380
380 -
 381
381 -
 382
382 -
 383
383 -
 384
384 -
 385
385 -
 386
386 -
 387
387 -
388
 |
 |