Lexmark 912dn User's Reference - Page 117
Clearing paper jams, Identifying paper jam areas, Paper Jam, Check Areas A, B
 |
UPC - 734646479226
View all Lexmark 912dn manuals
Add to My Manuals
Save this manual to your list of manuals |
Page 117 highlights
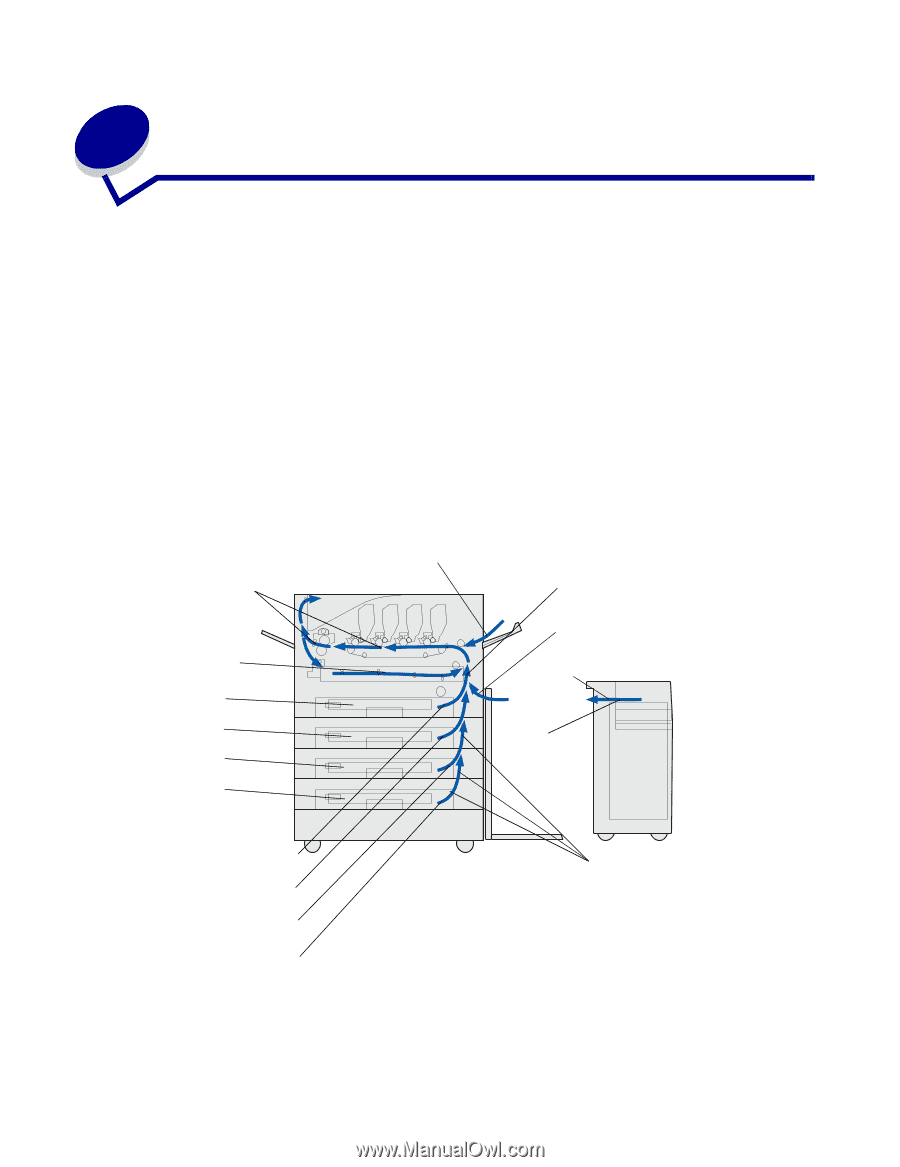
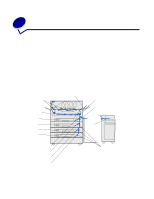
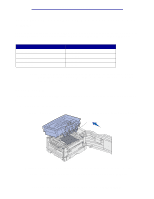
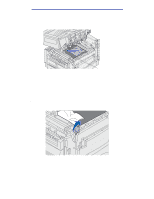
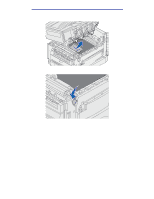
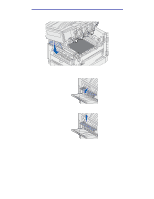
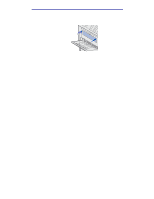
6 Clearing paper jams By carefully selecting print media and loading them properly, you should be able to avoid most paper jams. If jams do occur, follow the steps outlined in this section. To resolve the paper jam messages, you must clear the jammed area and then press Go to clear the message and resume printing. The printer prints a new copy of the page that jammed if Jam Recovery is set to On or Auto; however, the Auto setting does not guarantee the page will print. To clear paper jams in the Finisher, see the Finisher Manual to locate jam access areas. Identifying paper jam areas See the diagram below for the path the paper travels through the printer and options, and areas where jams may occur. The path varies depending on the paper source and output bin. Click a message below for more information. 200 Paper Jam Check Areas A,B 200 Paper Jam Check Area D T 1 T 2 T 3 T 4 240 Paper Jam 200 Paper Jam Check Areas C 200 Paper Jam Check Area F 249 Paper Jam T 3/T 5 (depending on configuration) 241 Paper Jam 242 Paper Jam 243 Paper Jam 244 Paper Jam 200 Paper Jam Check Area E Clearing paper jams 112
-
 1
1 -
2
-
3
-
4
-
5
-
6
-
7
-
8
-
9
-
10
-
11
-
12
-
13
-
14
-
15
-
16
-
17
-
18
-
19
-
20
-
21
-
22
-
23
-
24
-
25
-
26
-
27
-
28
-
29
-
30
-
31
-
32
-
33
-
34
-
35
-
36
-
37
-
38
-
39
-
40
-
41
-
42
-
43
-
44
-
45
-
46
-
47
-
48
-
49
-
50
-
51
-
52
-
53
-
54
-
55
-
56
-
57
-
58
-
59
-
60
-
61
-
62
-
63
-
64
-
65
-
66
-
67
-
68
-
69
-
70
-
71
-
72
-
73
-
74
-
75
-
76
-
77
-
78
-
79
-
80
-
81
-
82
-
83
-
84
-
85
-
86
-
87
-
88
-
89
-
90
-
91
-
92
-
93
-
94
-
95
-
96
-
97
-
98
-
99
-
100
-
101
-
102
-
103
-
104
-
105
-
106
-
107
-
108
-
109
-
110
-
111
-
 112
112 -
 113
113 -
 114
114 -
 115
115 -
 116
116 -
 117
117 -
 118
118 -
 119
119 -
 120
120 -
 121
121 -
 122
122 -
123
-
124
-
125
-
126
-
127
-
128
-
129
-
130
-
131
-
132
-
133
-
134
-
135
-
136
-
137
-
138
-
139
-
140
-
141
-
142
-
143
-
144
-
145
-
146
-
147
-
148
-
149
-
150
-
151
-
152
-
153
-
154
-
155
-
156
-
157
-
158
-
159
-
160
-
161
-
162
-
163
-
164
-
165
-
166
-
167
-
168
-
169
-
170
-
171
-
172
-
173
-
174
-
175
-
176
-
177
-
178
-
179
-
180
-
181
-
182
-
183
-
184
-
185
-
186
-
187
-
188
-
189
-
190
-
191
-
192
-
193
-
194
-
195
-
196
-
197
-
198
-
199
-
200
-
201
-
202
-
203
-
204
-
205
-
206
-
207
 |
 |