Lexmark C925 Quick Reference - Page 3
Linking and unlinking trays
 |
View all Lexmark C925 manuals
Add to My Manuals
Save this manual to your list of manuals |
Page 3 highlights
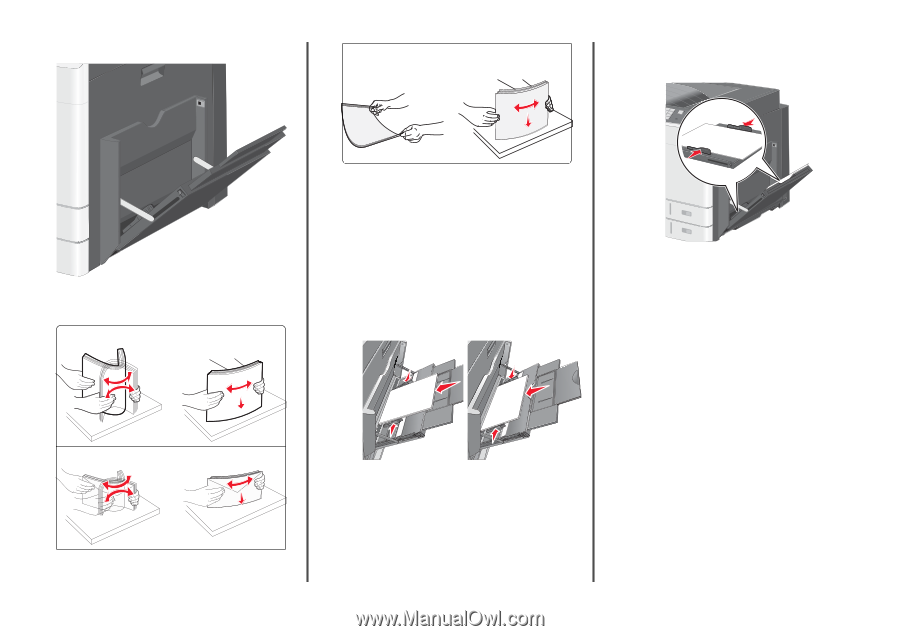
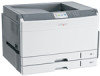
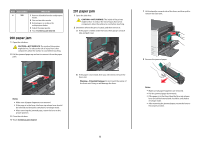
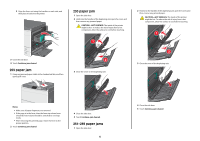
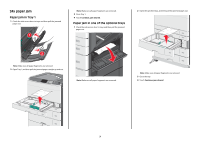
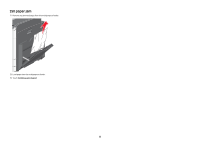
2 Gently pull the extension until it is fully extended. Transparencies Note: Avoid scratching or touching the print side. 5 Adjust the width guide to lightly touch the edge ofthe stack. Make sure the paper or specialty media fits loosely in the multipurpose feeder, lies flat, and is not bent or wrinkled. 3 Flex the sheets of paper or specialty media back and forth to loosen them. Do not fold or crease them. Straighten the edges on a level surface. Paper Envelopes 4 Load the paper or specialty media. Slide the stack gently into the multipurpose feeder until it comes to a stop. Notes: • Load A3-, A6-, 11x17, JIS B4-, Statement- and legal-size media in short-edge orientation. • Load A4-, A5-, Exec-, JIS B5- andletter-size media in long-edge orientation. • Load envelopes flap side up in short-edge orientation. • Do not exceed the maximum amount of media that the multipurpose feeder can hold. • Load only one size and type of paper at a time. Long-edge orientation Short-edge orientation Warning-Potential Damage: Never use envelopes with stamps, clasps, snaps, windows, coated linings, or self-stick adhesives. These envelopes may severely damage the printer. 6 From the printer control panel, set the Paper Size and Paper Type for the multipurpose feeder (MP Feeder Size and MP Feeder Type) based on the paper or specialty media loaded. Linking and unlinking trays Linking trays Tray linking is useful for large print jobs or for printing multiple copies. When one linked tray is empty, paper feeds from the next linked tray. When the Paper Size and Paper Type settings are the same for any trays, the trays are automatically linked. The Paper Size setting is automatically sensed according to the position of the paper guides in each tray except Tray 1 and the multipurpose feeder. The Paper Size setting for the multipurpose feeder must be set manually from the Paper Size menu. The Paper Type setting must be set for all trays from the Paper Type menu. The Paper Type menu and the Paper Size menu are both available from the Paper Size/Type menu. Unlinking trays Note: Trays that do not have the same settings as any other tray are not linked. Change one of the following tray settings: • Paper Type Paper Type names describe the paper characteristics. If the name that best describes your paper is used by linked trays, assign a 3
-
 1
1 -
 2
2 -
 3
3 -
 4
4 -
 5
5 -
 6
6 -
 7
7 -
 8
8 -
 9
9
 |
 |