Lexmark T652DTN Clearing Jams Guide - Page 3
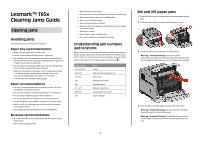
paper jams optional, external duplex unit
 |
UPC - 734646317368
View all Lexmark T652DTN manuals
Add to My Manuals
Save this manual to your list of manuals |
Page 3 highlights
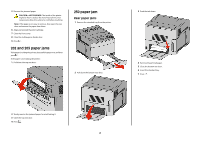
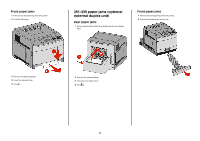
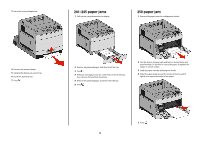
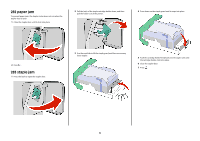
Front paper jams 1 Remove the standard tray from the printer. 2 Push the tab down. 231-239 paper jams (optional external duplex unit) Rear paper jams 1 Push in and hold the latch while pulling up the rear duplex door. Front paper jams 1 Remove the standard tray from the printer. 2 Remove the duplex jam access tray. 3 Remove the jammed paper. 4 Insert the standard tray. 5 Press . 2 Remove the jammed paper. 3 Close the rear duplex door. 4 Press . 3
-
 1
1 -
 2
2 -
 3
3 -
 4
4 -
 5
5 -
 6
6
 |
 |

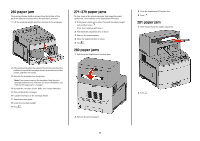
Front paper jams
1
Remove the standard tray from the printer.
2
Push the tab down.
3
Remove the jammed paper.
4
Insert the standard tray.
5
Press
.
231–239 paper jams (optional
external duplex unit)
Rear paper jams
1
Push in and hold the latch while pulling up the rear duplex
door.
2
Remove the jammed paper.
3
Close the rear duplex door.
4
Press
.
Front paper jams
1
Remove the standard tray from the printer.
2
Remove the duplex jam access tray.
3