Lexmark T652DTN Clearing Jams Guide - Page 4
paper jams, paper jam
 |
UPC - 734646317368
View all Lexmark T652DTN manuals
Add to My Manuals
Save this manual to your list of manuals |
Page 4 highlights
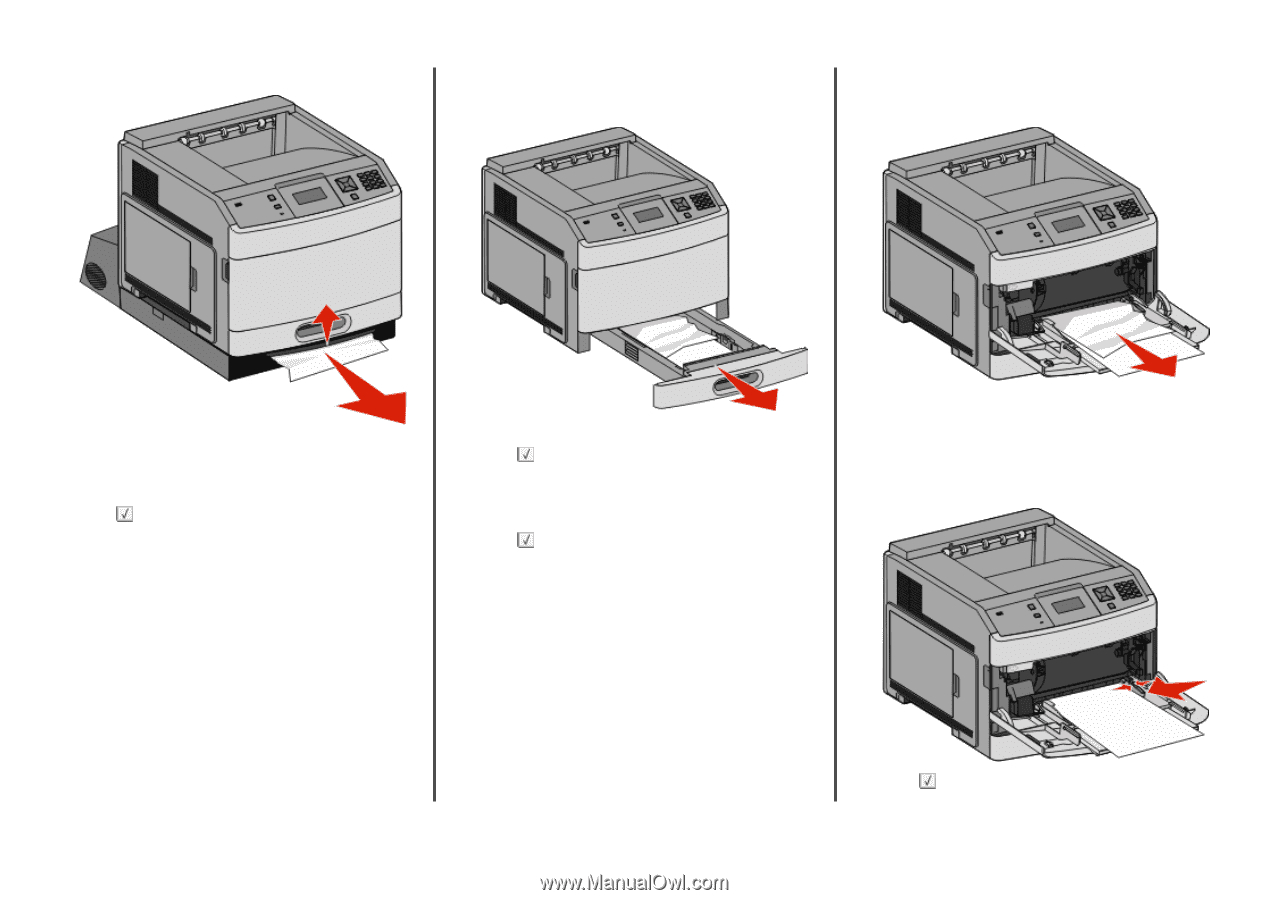
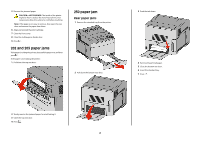
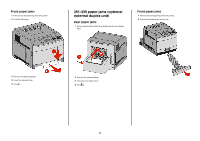
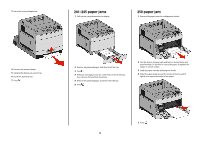
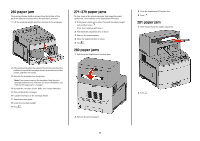
3 Raise the recessed duplex bar. 241-245 paper jams 1 Pull out the tray indicated on the display. 250 paper jam 1 Remove the paper from the multipurpose feeder. 4 Remove the jammed paper. 5 Replace the duplex jam access tray. 6 Insert the standard tray. 7 Press . 2 Remove any jammed paper, and then insert the tray. 3 Press . 4 If the jam message persists for a 250-sheet or 550-sheet tray, then remove the tray from the printer. 5 Remove the jammed paper, and then insert the tray. 6 Press . 2 Flex the sheets of paper back and forth to loosen them, and then fan them. Do not fold or crease the paper. Straighten the edges on a level surface. 3 Load the paper into the multipurpose feeder. 4 Slide the paper guide toward the inside of the tray until it lightly rests against the edge of the paper. 5 Press . 4
-
 1
1 -
 2
2 -
 3
3 -
 4
4 -
 5
5 -
 6
6
 |
 |