Lexmark X4650 Network Guide - Page 5
Changing wireless settings after installation - manual
 |
UPC - 734646064088
View all Lexmark X4650 manuals
Add to My Manuals
Save this manual to your list of manuals |
Page 5 highlights
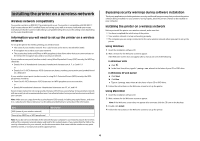
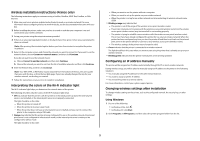
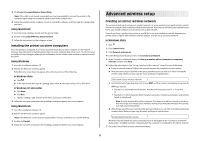
Wireless installation instructions (France only) The following instructions apply to customers using a LiveBox, AliceBox, N9UF Box, FreeBox, or Club Internet. 1 Make sure your box is wireless-enabled and activated to work on a wireless network. For more information about configuring the box to work wirelessly, see the documentation that came with your box. 2 Before installing the printer, make sure your box is turned on and that your computer is on and connected to your wireless network. 3 Set up your printer using the setup instructions provided. 4 If there is an associate/registration button on the back of your box, press it when you are prompted to choose a network. Note: After pressing the associate/register button, you have five minutes to complete the printer installation. 5 Return to the computer screen, and choose the network you want to connect to. If you want to use the network shown, choose Connect to , and then click Continue. If you do not want to use the network shown: a Choose Connect to another network, and then click Continue. b Choose the network you want to use from the list of available networks, and then click Continue. 6 Enter the Network key, and then click Continue. Note: Your WEP, WPA, or WPA2 key may be obtained from the bottom of the box, the user's guide that came with the box, or from the box Web page. If you have already changed the key for your wireless network, use the key you created. 7 Follow the instructions on your screen to complete installation. Interpreting the colors of the Wi-Fi indicator light The Wi-Fi indicator light helps you determine the network status of the printer. The following describes what the colors of the Wi-Fi indicator light mean. • Off may indicate that the printer is off, the printer is in the initial power-up state, the internal print server is not installed, or the internal print server is not properly connected. The light should be in this state: - When the printer is turned off - When the printer is in power saver mode - When the printer does not have an internal print server installed and you want to connect the printer to the computer using a USB cable • Orange may indicate that the printer is being configured for use on the wireless network, the internal print server is not configured in infrastructure mode, or the internal print server is waiting to be configured for ad hoc mode. The light should be in this state: - When you want to use the printer without a computer - When you want to set up the printer on your wireless network - When the printer is set up for an ad hoc network and is broadcasting its wireless network name (SSID) • Blinking orange may indicate that: - The printer is out of the range of the wireless access point (wireless router). - The printer is trying to communicate with the wireless access point (wireless router), but the wireless access point (wireless router) may be turned off or not working properly. - The printer is trying to establish communication with the wireless access point (wireless router). This is true if you have already configured the printer for use on your wireless network. When the printer has been configured, any time you turn the printer off and then turn it back on, the internal print server in the printer will try to connect to your wireless access point (wireless router). - The wireless settings of the printer may no longer be valid. • Green indicates that the printer is connected to a wireless network. The light should be in this state when you want to start using the printer that is already set up on your wireless network. • Blinking green indicates that the printer internal print server is being updated. Configuring an IP address manually The printer will be assigned an IP address automatically through DHCP on most wireless networks. During wireless setup, you will be asked to manually assign an IP address to the printer in the following situations: • You manually assigned IP addresses for the other network devices. • You want to assign a specific IP address. • You moved the printer to a remote subnet. For more information, contact your system support person. Changing wireless settings after installation To change wireless settings on the printer, such as the configured network, the security key, or other settings: Using Windows 1 Do one of the following: • In Windows Vista, click . • In Windows XP, click Start. 2 Click Programs or All Programs, and then select the printer program folder from the list. 5
-
 1
1 -
 2
2 -
 3
3 -
 4
4 -
 5
5 -
 6
6 -
 7
7 -
 8
8 -
 9
9 -
 10
10 -
 11
11 -
12
-
13
-
14
-
15
-
16
-
17
-
18
-
19
-
20
-
21
-
22
-
23
-
24
 |
 |
