Lexmark X864 Quick Reference - Page 6
x paper jam
 |
View all Lexmark X864 manuals
Add to My Manuals
Save this manual to your list of manuals |
Page 6 highlights
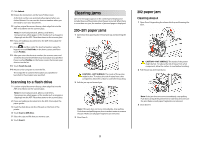
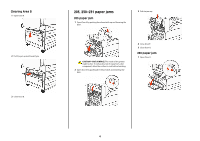
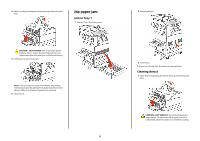
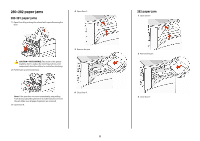
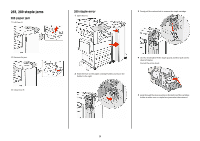
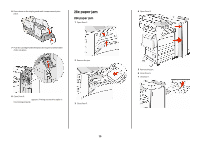
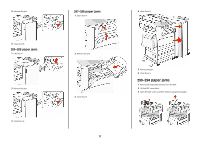
4 Open Door A by pushing the release latch up and lowering the door. 24x paper jam Jam in Tray 1 1 Remove Tray 1 from the printer. CAUTION-HOT SURFACE: The inside of the printer might be hot. To reduce the risk of injury from a hot component, allow the surface to cool before touching. 5 Pull the jam up and toward you. Note: If the jam does not move immediately, stop pulling. Push down and pull the green lever to make it easier to remove the jam. Make sure all paper fragments are removed. 6 Close Door A. 6 2 Remove the jam. 3 Insert Tray 1. If all jams are cleared, then the printer resumes printing. Clearing Area A 1 Open Door A by pushing the release latch up and lowering the door. CAUTION-HOT SURFACE: The inside of the printer might be hot. To reduce the risk of injury from a hot component, allow the surface to cool before touching.
-
 1
1 -
 2
2 -
 3
3 -
 4
4 -
 5
5 -
 6
6 -
 7
7 -
 8
8 -
 9
9 -
 10
10 -
 11
11 -
 12
12
 |
 |
