Linksys SPA922 Cisco Small Business IP Phone SPA9X1 Administration Guide - Page 92
Block Caller ID, 5.2 Block Anonymous Call, 5.3 Do Not Disturb, select, Block Caller ID No
 |
UPC - 745883570836
View all Linksys SPA922 manuals
Add to My Manuals
Save this manual to your list of manuals |
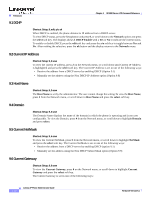
Page 92 highlights
Chapter 4 SPA900 Series LCD Command Reference 5 Preferences • 5.1 Block Caller ID • 5.2 Block Anonymous callers • 5.3 Do Not Disturb • 5.4 Secure Call • 5.5 Dial Assistance • 5.6 Preferred Audio Device • 7 Auto Answer Page • 8 Send Audio To Speaker • 9 Time Format • 10 Date Format • 11 Miss Call Shortcut • 12 Call Waiting To select the Preferences option, press the Setup button and then press 5 or scroll down to the Preference option, highlight it, and press the select soft key. To select an option from the Preferences menu, press the number of the selection or scroll down to the selection and press the select soft key. To enable or disable an option, toggle between Yes and No by pressing the y/n soft key. 5.1 Block Caller ID Shortcut: Setup, 5, edit, y/n, ok When Block Caller ID is enabled, the calling number does not appear to the called party. To select Block Caller ID, press the Setup button and then press 5 for preferences, or scroll down until Preferences is highlighted, and press the select soft key. With Block Caller ID No highlighted, press the edit soft key. Enable or disable the option by pressing the y/n soft key and press ok. The display returns to the Preferences Menu. 5.2 Block Anonymous Call Shortcut: Setup, 5, select, 2, edit, y/n, ok When this feature is enabled, calls from callers that do not present their Caller ID are not received. To select Block Anonymous Calls, press the Setup button and then press 5, or scroll down until the selection is highlighted and press the select soft key. Press 2 or scroll down until Block Anonymous Calls is highlighted and then press the edit soft key. Enable or disable the option by pressing the y/n soft key and press ok. The display returns to the Preferences Menu. 5.3 Do Not Disturb Shortcut: Setup, 5, 3, edit, y/n, ok Do Not Disturb routes the call to voicemail or presents a busy signal if voicemail is not available. Firmware Version 5.1 Linksys IP Phone Administrator Guide 4-5
-
 1
1 -
2
-
3
-
4
-
5
-
6
-
7
-
8
-
9
-
10
-
11
-
12
-
13
-
14
-
15
-
16
-
17
-
18
-
19
-
20
-
21
-
22
-
23
-
24
-
25
-
26
-
27
-
28
-
29
-
30
-
31
-
32
-
33
-
34
-
35
-
36
-
37
-
38
-
39
-
40
-
41
-
42
-
43
-
44
-
45
-
46
-
47
-
48
-
49
-
50
-
51
-
52
-
53
-
54
-
55
-
56
-
57
-
58
-
59
-
60
-
61
-
62
-
63
-
64
-
65
-
66
-
67
-
68
-
69
-
70
-
71
-
72
-
73
-
74
-
75
-
76
-
77
-
78
-
79
-
80
-
81
-
82
-
83
-
84
-
85
-
86
-
 87
87 -
 88
88 -
 89
89 -
 90
90 -
 91
91 -
 92
92 -
 93
93 -
 94
94 -
 95
95 -
 96
96 -
 97
97 -
98
-
99
-
100
-
101
-
102
-
103
-
104
-
105
-
106
-
107
-
108
-
109
-
110
-
111
-
112
-
113
-
114
-
115
-
116
-
117
-
118
-
119
-
120
-
121
-
122
-
123
-
124
-
125
-
126
-
127
-
128
-
129
-
130
-
131
-
132
-
133
-
134
-
135
-
136
-
137
-
138
-
139
-
140
-
141
-
142
-
143
-
144
-
145
-
146
-
147
-
148
-
149
-
150
-
151
-
152
-
153
-
154
-
155
-
156
-
157
-
158
-
159
-
160
-
161
-
162
-
163
-
164
-
165
 |
 |
