Maytag MGD6300TQ Use and Care Guide
Maytag MGD6300TQ - Bravos Gas Dryer Manual
 |
View all Maytag MGD6300TQ manuals
Add to My Manuals
Save this manual to your list of manuals |
Maytag MGD6300TQ manual content summary:
- Maytag MGD6300TQ | Use and Care Guide - Page 1
& CARE GUIDE p .% SECHEUSE A GAZ BRAVOS _ AVEC SYSTEME DE SOIN DES TISSUS GUIDE D'UTILISATION ET D'ENTRETIEN FOR QUESTIONS ABOUT FEATURES, OPERATION/PERFORMANCE, CAI.I.: 1.800.688.9900 IN CANADA, CAI.I.: 1.800.807.6777 PARTS, ACCESSORIES OR SERVICE VISIT OUR WEBSITE AI- WWW.MAYTAG.COM IN - Maytag MGD6300TQ | Use and Care Guide - Page 2
the Dryer Interior 22 Removing Accumulated I_int 23 Vacation and Moving Care 23 Changing the Drum Light 23 TROUBLESHOOTING ... 24 ASSISTANCE OR SERVICE ... 26 ACCESSORIES ... 26 WARRANTY ... 27 TABLE DES MATIERES SI_CURITI_ DE LA SI_CHEUSE 29 INSTRUCTIONS D'INSTALLATION - Maytag MGD6300TQ | Use and Care Guide - Page 3
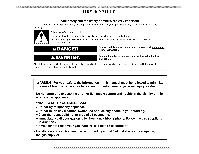
in this manual and on your appliance. Always read instructions are not followed. WARNING: For your safety, the information in this manual instructions. • If you cannot reach your gas supplier, call the fire department. - Installation and service must be performed by a qualified installer, service - Maytag MGD6300TQ | Use and Care Guide - Page 4
be exposed to the weather. [] Do not tamper with controls. [] Do not repair or replace any part of the dryer or attempt any servicing unless specifically recommended in this Use and Care Guide or in published user-repair instructions that you understand and have the skills to carry out. [] Do not - Maytag MGD6300TQ | Use and Care Guide - Page 5
INSTALLATION INSTRUCTIONS Gather the required tools and parts before cm) of either side of the dryer. See "Electrical Requirements." • A sturdy floor to support the total weight (dryer and load) of 200 Ibs (90.7 kg). The combined weight of a companion appliance should also be considered. • A - Maytag MGD6300TQ | Use and Care Guide - Page 6
servicing. • Additional clearances might be required for wall, door and floor moldings. • Additional spacing should be considered on all sides of the dryer from your dealer. • Mobile home Installation Kit Part Number 346764. See "Tools and Parts" section for information on ordering. • Special - Maytag MGD6300TQ | Use and Care Guide - Page 7
electrician or service representative or personnel if you are in doubt as to whether the dryer is properly grounded. Do not modify the plug provided with the dryer: if it will not fit the outlet, have a proper outlet installed by a qualified electrician. SAVE THESE INSTRUCTIONS Explosion Hazard - Maytag MGD6300TQ | Use and Care Guide - Page 8
. Do not use a metal foil vent. FaUure to follow these instructions can result in death or fire. WARNING: To reduce the risk of fire, this dryer MUST BE EXHAUSTED OUTDOORS. IMPORTANT: Observe all governing codes and ordinances. The dryer exhaust must not be connected into any gas vent, chimney - Maytag MGD6300TQ | Use and Care Guide - Page 9
rigid or flexible heavy metal vent. Review Vent system chart. Modify existing vent system by calling Maytag Services. For more information, see the "Assistance or Service" section. be fully extended and supported when the dryer is in its final problems and health problems. Clamps Good Better - Maytag MGD6300TQ | Use and Care Guide - Page 10
. clearance installations are shown. Refer to the manufacturer's instructions. Two close- .,]-T 7-IL: i L]! 1Lt Service" section to order. • Over-the-Top Installation: Part Number 4396028 are available for purchase. • Periscope Installation (For use with dryer vent to wall vent mismatch): Part - Maytag MGD6300TQ | Use and Care Guide - Page 11
until it is close to its final location. I.eave enough room to connect the exhaust vent or gas line. For mobile home use Gas dryers must be securely fastened to the floor. Mobile home installations require a Mobile Home Installation Kit. See "Tools and Parts" section for information on ordering. - Maytag MGD6300TQ | Use and Care Guide - Page 12
the gas pipe. 2. Using a wrench to tighten, connect the gas supply to the dryer. Use pipe-joint compound on the threads of all non-flared male fittings. If when the handle is parallel to the gas pipe. If the dryer is not level, prop up the dryer using a wood block. Use a wrench to adjust the legs - Maytag MGD6300TQ | Use and Care Guide - Page 13
flat, protected surface, with the inside of the door facing up. Remove remaining 2 loose screws from dryer front panel. Reinstall the door 1. Remove the 4 screws and 2 hinges from the dryer door. A. Door strike B. Cosmetic screw 3. Reinstall the door strike and cosmetic screw on the opposite side - Maytag MGD6300TQ | Use and Care Guide - Page 14
. Align bottom screw holes in hinge and door. Install two bottom screws. Tighten all hinge screws. \I 4° Install the 2 hinges to the front panel of the dryer using 4 screws. Use the non-slotted side to attach the hinge to the front panel. 7. Close door to engage door strike. 14 - Maytag MGD6300TQ | Use and Care Guide - Page 15
prong. Do not use an adapter. Do not use an extension cord. Failure to follow these instructions can result in death, fire, or electrical shock. 7. Remove any protective film or tape remaining on the dryer. NOTE: Glass door models have a protective film on the window that should be removed. 8. Read - Maytag MGD6300TQ | Use and Care Guide - Page 16
dryer. Do not dry anything that has ever had anything flammable on it (even after washing). Failure to follow these instructions explosion, or fire. can result in death, Fire Hazard No washer instructions can result in death or fire. This manual covers several different models. Your dryer may - Maytag MGD6300TQ | Use and Care Guide - Page 17
• Follow care [abe[ directions when they are available. • If desired, add a fabric softener sheet. Follow package instructions. • To reduce wrinkling, remove the load from the dryer as soon as tumbling stops. This is especially important for permanent press, knits and synthetic fabrics. • Avoid - Maytag MGD6300TQ | Use and Care Guide - Page 18
Settings chart (in the "Cycles" section) for a guide to drying various loads. • Drying temperature and dryness [ a Timed Cycle, wet items are not detected. The dryer will continue to run for the length of time selected, ease in handling. during the coo[ down part of the cycle. I.aundry cools for - Maytag MGD6300TQ | Use and Care Guide - Page 19
pressing the Timed Cycle Adjust up or down arrows. See "Changing Cycles, Modifiers and Options." NOTE: Timed Cycles may also be used with the dryer rack. See "Dryer Rack." Timed Dry Use this cycle to complete drying if items are still damp after a Sensor I)ry Cycle. Timed I)ry is also useful for - Maytag MGD6300TQ | Use and Care Guide - Page 20
of heat-free, periodic tumbling at the end of a cycle. Stop the WRINKI.E PREVENT at any time by pressing Wrinkle Prevent setting or opening the dryer door. For the Wrinkle Control Cycle, the Wrinkle Prevent setting is preset to ON. The other Sensor Dry Cycles will retain the Wrinkle Prevent setting - Maytag MGD6300TQ | Use and Care Guide - Page 21
out whether your model allows drying rack usage and for information on ordering, please refer to the front page of the manual or contact the dealer from whom you purchased your dryer. NOTE" The rack must be removed for normal tumbling. Do not use the automatic cycle with the drying rack. To - Maytag MGD6300TQ | Use and Care Guide - Page 22
rinse or wash screen to remove [int. Wet lint is hard to remove. Explosion Hazard Keep flammable materials and vapors, such as gasoline, away from dryer. Place dryer at least 18 inches (46 cm) above the floor for a garage installation. Failure to do so can result in death, explosion, or fire. Clean - Maytag MGD6300TQ | Use and Care Guide - Page 23
line pipe and remove fittings attached to dryer pipe. 4. Cap the open fuel supply line. 5. Make sure leveling legs are secure in dryer base. 6. Use masking tape to secure dryer door. 3. Turn bulb counterclockwise. Replace the bulb with a 1O-watt appliance bulb only. Replace the cover and secure - Maytag MGD6300TQ | Use and Care Guide - Page 24
service call... In U.S.A. www.maytag.com/help - In Canada www.maytag.ca. .._..._ 6:__'_ t'_ W__¸'_ Dryer problem continues, call an electrician. • Is the valve open on the gas supply line? Unusual sounds Has the dryer had a period of non-use? If the dryer these instructions can result in death - Maytag MGD6300TQ | Use and Care Guide - Page 25
ventilation openings at the top and bottom of the door. The rear of the dryer requires 51/2'' (1 4 cm) of airspace, and the sides and front of the dryer require a minimum of 1" (2.5 cm). See the Installation Instructions. Has the Air Fluff modifier been selected? Select the right temperature for the - Maytag MGD6300TQ | Use and Care Guide - Page 26
"Troubleshooting." It may save you the our website at www.maytag.ca. cost of a service ca[[. If you still need help, follow the instructions below. Our consultants provide assistance with: When calling, please know the purchase date and the complete mode[ and serial number of your appliance - Maytag MGD6300TQ | Use and Care Guide - Page 27
, when this major appliance is operated and maintained according to instructions attached to or furnished with the product, Maytag Corporation or Maytag Limited (hereafter "Maytag") will pay for Factory Specified Parts and repair labor to correct defects in materials or workmanship. Service must be - Maytag MGD6300TQ | Use and Care Guide - Page 28
- Maytag MGD6300TQ | Use and Care Guide - Page 29
instructions. Risque possible de d_cbs ou de blessure grave si vous ne suivez pas les instructions produire en cas de non-respect des instructions. AVERTISSEMENT • Pour votre securite, les renseignements de gaz d'un telephone voisin. Suivre ses instructions. • A,defaut de joindre votre fournisseur - Maytag MGD6300TQ | Use and Care Guide - Page 30
d'une recommandation specifique dans le guide d'utlilisation et d'entretien, ou publiee dans les instructions de reparation par I'utilisateur que vous la secheuse est utilisee pros d'eux. [] Avant d'enlever la secheuse du service ou la jeter, enlever la porte du compartiment de sechage. [] Ne pas - Maytag MGD6300TQ | Use and Care Guide - Page 31
rdfdrer _ [a section "Assistance ou service". Vous pouvez 6ga[ement contacter [e garage. Le non-respect de ces instructions peut causer un d_c_s, une explosion ou s6cheuse. Voir "Spdcifications 61ectriques'. Un plancher robuste capable de supporter un poids total (s6cheuse et charge) de 200 Ib - Maytag MGD6300TQ | Use and Care Guide - Page 32
D_gagements I.'emplacement s6cheuse. de s_paration _ respecter doit 6tre assez grand pour permettre d'ouvrir compl_tement la porte de la Dimensions de la s_cheuse II faut aussi prendre en compte I'espace requis entre les appareils voisins. Un espacement suppl6mentaire le c6t6 gauche ou droit. - Maytag MGD6300TQ | Use and Care Guide - Page 33
adaptateur. Ne pas utiJiser un c&ble de rallonge. Le non=respect de ces instructions peut causer un d6c_s, un incendie ou un choc 61ectrique. I_'appareil dolt 6tre signal6tique renseignements sur la commande la section "Assistance ou service". I'appareil pour I'utilisation d'un gaz diff6rent de - Maytag MGD6300TQ | Use and Care Guide - Page 34
Canalisation d'arriv_e de gaz I.a canalisation doit comprendre un connecteur obtur6 (filetage NPT de 1/8Houplus) accessible pour le raccordement de I'instrument de mesure imm6diatement en amont de la connexion d'alimentation en gaz de la s6cheuse (voir I'illustration). Un tuyau IPS de 1/2" est - Maytag MGD6300TQ | Use and Care Guide - Page 35
de rn_taio en plastique. en feuille Le non=respect de ces instructions un d_c_s ou un incendie. peut causer AVERTISSEMENT : Pour r6duire du marchand ou en t616phonant b_ Maytag Services. Pour plus de renseignements, voir la section "Assistance ou service". Conduit m_tallique rigide • Pour un - Maytag MGD6300TQ | Use and Care Guide - Page 36
qui peut provoquer : [] Dommages par I'humidite aux boiseries, meubles, peinture, papier-peint, tapis, etc. [] Problemes de nettoyage dans la maison et problemes de sante. ill ..G...... ........g . m A. Sdcheuse B. Coude C. Mur D. Clapet de dJcharge E. Brides £ Conduit m6tallique rigide ou - Maytag MGD6300TQ | Use and Care Guide - Page 37
installation. Deux installations _ d6gagement r6duit sont i[[ustrdes. Voir [es instructions du fabricant. A B C A. Installation au-dessus de la d6gagement est r6duit. Veui[[ez consulter [a section "Assistance ou service" de ce guide pour commander. • Installation au-dessus de [a s6cheuse : Pi6ce - Maytag MGD6300TQ | Use and Care Guide - Page 38
fix6es solidement au plancher. Risque du poids excessif UtiJJserdeux ou plus de personnes pour d_piacer et installer Jas_cheuse. Le non-respect de cette instruction peut causer une blessure au dos ou d'autre blessure. 1. Pour prot6ger [e so[, uti[iser un grand morceau plat de ['emba[[age en carton - Maytag MGD6300TQ | Use and Care Guide - Page 39
On doit utiliser une combinaison de raccords de tuyauterie pour raccorder la s6cheuse I'alimentation en gaz existante. On voit ci-dessous une illustration d'un raccordement recommand6. I_e raccordement peut varie_; selon le type d'alimentation, la dimension et I'emplacement. Contr6ler s6cheuse I - Maytag MGD6300TQ | Use and Care Guide - Page 40
...... I.e sens d'ouverture de la porte peut 6tre chang6 du c6t6 droit au c6t6 gauche, si d6sir6. 1. Placer une serviette ou un [inge doux sur [e dessus de [a s6cheuse ou du plan de travail pour prot6ger [a surface. D_pose de la porte 1. Ouvrir [a porte de [a s6cheuse. 2. Retirer [avis inf6rieure de - Maytag MGD6300TQ | Use and Care Guide - Page 41
R_installation de la porte 1. Retirer les quatre vis et les deux charni6res de la porte de la s6cheuse. 2. Replacer [es quatre vis dans [es m6mes trous. 5. Installer les vis dans les trous sup6rieurs de la porte destin6s b_la pose des charni6res. Ne pas serrer les vis. I.aisser les vis en retrait - Maytag MGD6300TQ | Use and Care Guide - Page 42
pas enlever la broche de liaison & la terre. hie pas utiliser un adaptateur. hie pas utiliser un c_ble de rallonge. Le non-respect de ces instructions peut causer un d_c_s, un incendie ou un choc _lectrique. 6. Brancher la s6cheuse sur une prise _ 3 broches reli6e _ la terre. Mettre I'appareil sous - Maytag MGD6300TQ | Use and Care Guide - Page 43
. Ne pas faire s_cher un article qui a d6j& 6t6 touch_ par un produit inflammable (m6me apr_s un lavage). Le non-respect de ces instructions peut causer un d6c_s, une explosion ou un incendie. Ce manuel couvre plusieurs mod6les diff6rents. Votre mod6le peut ne pas comporter I'ensemble des programmes - Maytag MGD6300TQ | Use and Care Guide - Page 44
REMARQUE : Une dur6e par d6faut est affich6e Iorsqu'un programme automatique est s6[ectionn6. Au cours des premi6res minutes du processus de s6chage, [a dur6e du programme peut varier automatiquement par rapport _ [a dur6e par d6faut en fonction du volume et du type de tissu de [a charge. Vers [a - Maytag MGD6300TQ | Use and Care Guide - Page 45
• Si ddsir6, ajouter une feuille d'assouplissant de tissu. Suiwe les instructions figurant sur ['emba[[age. • Pour rdduire le froissement, enlever la charge sdchage par ddtection ou minutds (b_[a section "Programmes") pour un guide de sdchage de charges diverses. I.a tempdrature de sdchage et le - Maytag MGD6300TQ | Use and Care Guide - Page 46
a la temp6rature recommandde. Un capteur d6tecte I'humidit6 de la charge et r&gle automatiquement la durde pour un s6chage optimal. Heavy Duty (service intense) Utiliser ce programme pour le s6chage _ temp6rature articles en coton et des jeans. 6levde des charges mixtes Iourdes, des Normal Uti - Maytag MGD6300TQ | Use and Care Guide - Page 47
Pr_r_glages des programmes mlnut_s Programmes minutes Type de charge TIMED DRY (s_chage minute) Articles [ourds et encombrants, v6tements de travail Temperature par d_faut High (6[ev6e) QUICK DRY (s#chage rapide) Petites charges FRESHEN UP (rafraichissement) Aide _ ap[anir [es faux p[is Medium ( - Maytag MGD6300TQ | Use and Care Guide - Page 48
Drum Light (lampe du tambour) Sur certains modules, s6lectionner Drum I.ight (lampe du tambour) pour allumer la lampe b_ I'intdrieur du tambour de la s6cheuse. Pendant un programme, si la fonction Drum I.ight est s61ectionn6e, la lampe du tambour s'allume et reste allum6e jusqu'_ ce qu'on appuie b_ - Maytag MGD6300TQ | Use and Care Guide - Page 49
Changement des modificateurs et options apr_s avoir appuy_ sur Start II est possible de changer une option ou un modificateur en tout temps avant que I'option ou le modificateur choisi ne commence. 1. Appuyer une fois sur PAUSE/CANCEl. (pause/annulation). 2. Choisir la nouvelle option et/ou les - Maytag MGD6300TQ | Use and Care Guide - Page 50
. Placer la s_cheuse au moins 46 cm (18 po) au-dessus du plancher pour une installation dans un garage. Le non-respect de ces instructions peut causer un d_c_s, une explosion ou un incendie. Me :tova e s a ck}aG e Nettoyer [e filtre _ charpie [a dur6e de s6chage. IMPORTANT : avant chaque charge - Maytag MGD6300TQ | Use and Care Guide - Page 51
Nettoyage avant chaque charge 1o I_e filtre _ charpie est situ6 au sommet de la s6cheuse. Tirer le filtre _ charpie vers soi. En[ever [a charpie du fi[tre en [a rou[ant avec [es doigts. Ne pas rincer ni [aver [e fi[tre pour en[ever [a charpie. I.a charpie moui[[6e s'en[6ve diffici[ement. 2. - Maytag MGD6300TQ | Use and Care Guide - Page 52
la FAQ (Foire aux questions) pour _viter le co_t d'un appel de service.., www.maytag.ca. Le s_cheuse ne fonctionne pas • Un fusible est-il grill_ ou _vacuation de m_tal. en plastique. en feuille Le non=respect de ces instructions un d_c?_s ou un incendie. peut causer Le conduit d'_vacuation ou - Maytag MGD6300TQ | Use and Care Guide - Page 53
[a s_cheuse. Placer la s_cheuse au moins 46 cm (18 po) au-dessus du piancher pour une installation darts un garage. Le non-respect de ces instructions peut causer un d_c?_s, une explosion ou un incendie. La s_cheuse se trouve-t-elle dans une piece o_ la temperature ambiante est inf_rieure 45 - Maytag MGD6300TQ | Use and Care Guide - Page 54
service, consulter la section "l)6pannage". Ce guide peut vous faire 6conomiser [e co@ d'une visite de service. Si vous avez encore besoin d'aide, suivre [es instructions fabrication de chaque nouve[ apparei[ MAYTAG - Maytag MGD6300TQ | Use and Care Guide - Page 55
installe dans un endroit inaccessible ou n'est pas installe conformement aux instructions d'installation fournies. 11. Le coQt des pieces de rechange et de Maytag autorise pour determiner si une autre garantie s'applique. Si vous avez besoin de service, voir d'abord la section "Depannage" du Guide - Maytag MGD6300TQ | Use and Care Guide - Page 56
All rights reserved. Tous droits reserves. MAYTAG and the "M" Symbol are registered trademarks of Maytag Limited in Canada. MAYTAG et le symbole "M" sont des marques deposees de Maytag Limited au Canada. All other marks are trademarks of Maytag Corporation. Toutes les autres marques de commerce
-
 1
1 -
 2
2 -
 3
3 -
 4
4 -
 5
5 -
 6
6 -
 7
7 -
8
-
9
-
10
-
11
-
12
-
13
-
14
-
15
-
16
-
17
-
18
-
19
-
20
-
21
-
22
-
23
-
24
-
25
-
26
-
27
-
28
-
29
-
30
-
31
-
32
-
33
-
34
-
35
-
36
-
37
-
38
-
39
-
40
-
41
-
42
-
43
-
44
-
45
-
46
-
47
-
48
-
49
-
50
-
51
-
52
-
53
-
54
-
55
-
56
 |
 |
IVI&YI-'AG®
BRAVOS _
FABRIC
USE
CARE SYSTEM GAS
& CARE GUIDE
DRYER
p
SECHEUSE
A GAZ BRAVOS _ AVEC
DE SOIN DES TISSUS
.%
SYSTEME
GUIDE
D'UTILISATION
ET D'ENTRETIEN
FOR
QUESTIONS
ABOUT
FEATURES,
OPERATION/PERFORMANCE,
PARTS, ACCESSORIES
OR SERVICE
CAI.I.:
1.800.688.9900
IN
CANADA,
CAI.I.:
1.800.807.6777
VISIT
OUR
WEBSITE
AI- WWW.MAYTAG.COM
IN CANADA,
WWW.MAYTAG.CA
AU
CANADA,
POUR
ASSISTANCE,
INSTAI.I.ATION
OU
SERVICE,
COMPOSEZ
I.E : 1.800.807.6777
OU
VISITEZ
NOTRE
SITE INTERNET
,_
WWW.MAYTAG.CA
PARA
OBTENER
ACCESO
AI. MANUAl.
DE USO
Y CUIDADO
EN ESPAIqOI.,
O
PARA
OBTENER
INFORMACION
ADICIONAI.
ACERCA
DE SU
PRODUCTO,
VISITE:
WWW.MAYTAG.COM
TENGA
I.ISTO
SU N(JMERO
DE MODEI.O
COMPI.ETO.
PUEDE
ENCONTRAR
El. N(JMERO
DE MODEI.O
Y DE SERIE DENTRO
DE I.A CAVIDAD
SUPERIOR
DE I.A PUERTA.
W10150660A