Maytag MGDC700VW Installation Instructions
Maytag MGDC700VW - Centennial Gas Dryer Manual
 |
UPC - 883049145754
View all Maytag MGDC700VW manuals
Add to My Manuals
Save this manual to your list of manuals |
Maytag MGDC700VW manual content summary:
- Maytag MGDC700VW | Installation Instructions - Page 1
GAS DRYERiNSTALLATiON iNSTRUCTiONS iNSTRUCTiONSPOUR L'{NSTALLAT{ONDE LA SECHEUSE A GAZ DE 27" (69 CM) Table of Confenfs/Table des mafi_res DRYER SAFETY 1 S¢:CURIT¢: DE LA S¢:CHEUSE 10 iNSTALLATiON iNSTRUCTiONS 2 Tools and Parts 2 Location Requirements 3 INSTRUCTIONS in this manual and on - Maytag MGDC700VW | Installation Instructions - Page 2
installation. Read and follow the instructions provided with any tools listed here. Parts supplied: Remove parts package from dryer drum. Check that all parts were included. [] 8" or 10" pipe wrench [] 8" or 10" adjustable wrench (for gas connections) [] Flat-blade screwdriver [] Adjustable - Maytag MGDC700VW | Installation Instructions - Page 3
exhaust installation. A gas dryer must be exhausted to the outdoors. See "Venting Requirements." [] A grounded electrical outlet located within 2 ft (61 cm) of either side of the dryer. See "Electrical Requirements." [] A sturdy floor to support the dryer and a total weight (dryer and load) of - Maytag MGDC700VW | Installation Instructions - Page 4
dealer or call the phone numbers referenced on the front page of the "Dryer User instructions." LP gas conversion: Conversion must be made by a qualified technician. No attempt shall be made to convert the appliance from the gas specified on the model/serial rating plate for use with a different - Maytag MGDC700VW | Installation Instructions - Page 5
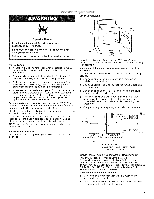
Code. It is recommended that an individual manual shutoff valve be installed within six (6) feet (1.8 m) of the dryer. The location should be easy to reach for opening and closing. A C E Dryer Gas Pipe [] The gas pipe that comes out through the rear of your dryer has a %" male pipe thread. 6W - Maytag MGDC700VW | Installation Instructions - Page 6
the toll-free number listed on the cover of the Dryer User Instructions. For more information, see the "Assistance or Service" section of the Dryer User Instructions. [] The dryer exhaust must not be connected into any gas vent, chimney, wall, ceiling, attic, crawlspace, or a concealed space of - Maytag MGDC700VW | Installation Instructions - Page 7
for close clearance alternate installations are available for purchase. Please reference the "Assistance or Service" section of the "Dryer User Instructions." [] Over-The-Top Installation: Part Number 4396028 [] Periscope Installation (For use with dryer vent to wall vent mismatch): Part Number - Maytag MGDC700VW | Installation Instructions - Page 8
dryer. Check levelness first side to side, then front to back. 3, Run vent to dryer location. Use the straightest path possible. See "Determine vent gas pipe. Mobile home installations require a Mobile Home installation Kit. For ordering information please reference the "Dryer User Instructions - Maytag MGDC700VW | Installation Instructions - Page 9
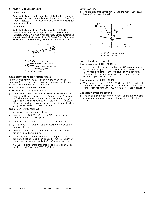
final position. Do not crush or kink vent. Make sure dryer is level. 3. (On gas models) Check to be sure there are no kinks in the flexible gas line. 8. Remove the 4 screws that attach 2 plugs (D) on the left side. Attach plugs to right side using the same 4 screws. 9. Insert screws into bottom - Maytag MGDC700VW | Installation Instructions - Page 10
potentiel et vous disent comment r6duire le risque de blessure et ce qui peut se produire en cas de non-respect des instructions. AVERTISSEMENT - "Risque d'incendie" m L'installation de la s_cheuse & linge doit _tre effectu_e par un installateur qualifi_. m installer la s_cheuse conforrn_rnent au - Maytag MGDC700VW | Installation Instructions - Page 11
Appeler immediatement le fournisseur de gaz d'un telephone voisin. Suivre ses instructions. = A defaut de joindre votre fournisseur de gaz, appeler entretien doivent _tre effectues par un installateur qualifie, une agence de service ou le fournisseur de gaz. AVERTISSEMENT : L'odorat ne permet pas - Maytag MGDC700VW | Installation Instructions - Page 12
pour une installation darts un garage. Le non-respect de ces instructions peut causer un deces, une explosion ou un incendie. Pi_ces foumies c6t_s de la s_cheuse. Voir "Sp6cifications _lectriques". Un plancher robuste capable de supporter un poids total (secheuse et charge) de 200 Ib (90,7 kg). - Maytag MGDC700VW | Installation Instructions - Page 13
. Ne pas utJliser un cable de rallonge. Le non-respect de ces instructions peut causer un deces, un Jncendie ou un choc electrique. L'appareil dolt 61ectrique ANSI/NFPA 70 ou au Code canadien d'61ectricit6, CSA C22.1. INSTRUCTIONS DE LIAISON A LA TERRE [] Pour une s6cheuse reli6e & la terre - Maytag MGDC700VW | Installation Instructions - Page 14
de gaz, et le personnel d'entretJen autoris& Le non-respect de ces instructions peut causer un deces, un explosion ou un incendie. Type de gaz Gaz conduit en acier inoxydable souple neuf (conception homologu6e par la American Gas Association ou la CSA International) pour raccorder la s6cheuse & la - Maytag MGDC700VW | Installation Instructions - Page 15
des instructions pour I'utilisateur de la s6cheuse. Pour plus de renseignements, voir la section "Assistance ou service" des "Instructions d'utilisation (305 m) d'augmentation de I'altitude. [] Problemes de nettoyage dans la maison et problemes de sant& Utiliser un conduit m_tallique Iourd. - Maytag MGDC700VW | Installation Instructions - Page 16
gris de minuJt) Contacter votre marchand local. Le non-respect de ces instructions peut causer un deces, un incendie, un choc electrique ou une blessure d_gagement est r_duit. Veuillez consulter la section "Assistance ou service" dans les 'qnstructions d'utilisation de la s_cheuse". [] Installation - Maytag MGDC700VW | Installation Instructions - Page 17
Dispositions sp_ciales pour les installations dans une maison mobile Le syst_me d'6vacuation dolt 8tre solidement fix6 b,une section non combust ble de la structure de la maison mobile et ne dolt passe terminer en dessous de la maison mobile. Faire en sorte que le syst_me d'6vacuation se termine & - Maytag MGDC700VW | Installation Instructions - Page 18
personnes pour deplacer et installer la secheuse. Le non-respect de cette instruction peut causer une blessure au dos ou d'autre blessure. 1= Pour n6ceasitent une trousse d'installation pour maison mobile. Voir les "Instructions d'utilisation de la s_cheuse" pour les renseignements de commande. - Maytag MGDC700VW | Installation Instructions - Page 19
et la section interne de la porte de telle maniere que la poign6e soit orient6e du c6t6 oQ les charnieres viennent d'etre enlev6es. 3. (Sur les modeles & gaz) V6rifier que le tuyau de gaz flexible n'est pas d6form6 ou 6cras6. On peut changer I'ouverture de la porte du c6t6 droit au c6t6 - Maytag MGDC700VW | Installation Instructions - Page 20
le courant. 7. Retirer la pellicule de protection bleue sur le panneau de commande et le ruban rest6 sur la s6cheuse. 8. Lire les "Instructions d'utilisation de la s6cheuse". 9. Essuyer soigneusement le tambour de la s6cheuse avec un chiffon humide pour 61iminer toute trace de poussiere. 10. R6gler
-
 1
1 -
 2
2 -
 3
3 -
 4
4 -
 5
5 -
 6
6 -
 7
7 -
8
-
9
-
10
-
11
-
12
-
13
-
14
-
15
-
16
-
17
-
18
-
19
-
20
 |
 |
27" (69
CM)
GAS DRYERiNSTALLATiON iNSTRUCTiONS
iNSTRUCTiONSPOUR L'{NSTALLAT{ONDE LA SECHEUSE
A GAZ DE27" (69 CM)
Table of Confenfs/Table
des mafi_res
DRYER
SAFETY
...............................................
1
S¢:CURIT¢: DE LA S¢:CHEUSE
.....................
10
iNSTALLATiON
iNSTRUCTiONS
...................
2
Tools and Parts
.............................................
2
Location
Requirements
................................
3
Electrical
Requirements
................................
4
Gas Supply
Requirements
............................
4
Venting
Requirements
...................................
6
Plan Vent System
..........................................
6
Install Vent System
........................................
8
Install Leveling Legs
......................................
8
Level Dryer
....................................................
8
Make Gas Connection
..................................
8
Connect
Vent
................................................
9
Reverse Door Swing (Optional)
...................
9
Complete
Installation
....................................
9
INSTRUCTIONS
D'INSTALLATION
..............
12
Outillage
et pi_ces n_cessaires
..................
12
Emplacement
d'installation
.........................
12
Specifications
_lectriques
...........................
13
Alimentation
en gaz
.....................................
14
Exigences
concernant
I'_vacuation
............
15
Planification
du syst_me d'_vacuation
.......
16
Installation
du conduit
d'_vacuation
...........
17
Installation
des pieds de nivellement
..........
18
Mise & niveau de la s6cheuse
.....................
18
Raccordement
au gaz
.................................
18
Conduit
d'_vacuation
..................................
19
Inversion
du sens d'ouverture
de la porte (facultatif)
..................................
19
Achever
I'installation
...................................
20
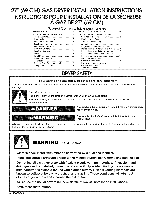
DRYER
SAFETY
Your
safety
and
the safety
of others
are very
important.
We
have
provided
many
important
safety
messages
in this
manual
and
on your
appliance.
Always
read
and
obey
all safety
messages.
This is the safety alert symbol.
This symbol alerts you to potential
hazards that can kilt or hurt you and others.
All safety messages
will follow the safety alert symbol and either the word "DANGER"
or
"WARNING."
These words mean:
You can be killed
or
seriously
injured
if you don't
immediately
follow
instructions.
You can
be killed
or
seriously
injured
if you
don't
follow
instructions.
All safety messages
wilt tell you what the potential
hazard is, tell you how to reduce the chance
of injury, and tell you what can
happen
if the instructions
are not followed.
WARNING
-
"Risk
of
Fire"
-
Clothes
dryer
installation
must
be
performed
by a qualified
installer,
-
install
the
clothes
dryer
according
to the
manufacturer's
instructions
and
local
codes.
- Do
not
install
a
clothes
dryer
with
flexible
plastic
venting
materials.
If flexible
metal
(foil
type)
duct
is installed,
it
must
be of a specific
type
identified
by the
appliance
manufacturer
as suitable
for
use with
clothes
dryers.
Flexible
venting
materials
are
known
to
collapse,
be
easily
crushed,
and
trap
lint.
These
conditions
will
obstruct
clothes
dryer
airflow
and
increase
the
risk
of fire.
- To reduce
the
risk
of severe
injury
or death,
follow
all
installation
instructions.
- Save
these
instructions.
W10088974A