Maytag MMV4205BAQ Installation Instructions
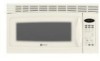
Maytag MMV4205BAQ - 2.0 cu. Ft. Microwave Manual
 |
View all Maytag MMV4205BAQ manuals
Add to My Manuals
Save this manual to your list of manuals |
Maytag MMV4205BAQ manual content summary:
- Maytag MMV4205BAQ | Installation Instructions - Page 1
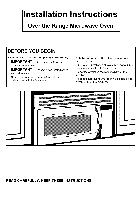
Installation Instructions Over the Range Microwave Oven BEFORE YOU BEGIN Read these instructions completely and carefully. • IMPORTANT -- Save these instructions for local inspector's use. • IMPORTANT -- Observe all governing codes and ordinances. • Note to Installer- Be sure to leave these - Maytag MMV4205BAQ | Installation Instructions - Page 2
Will Need 7 Mounting Space 7 C Outside Back Exhaust 18-21 Preparing Rear Wall 18 Attach Mounting Plate to Wall 18, 19 Preparation of Top Cabinet 19 Adjust Blower 19, 20 Mount the Microwave Oven 20, 21 Before You Use Your Microwave 22 Step-by-step installation guide Placement of Mounting - Maytag MMV4205BAQ | Installation Instructions - Page 3
a qualified electrician. CAUTION: For personal safety, remove house fuse or open circuit breaker before beginning installation to avoid severe or fatal shock injury. CAUTION: For personal safety, the mounting surface must be capable of supporting the cabinet load, in addition to the added weight - Maytag MMV4205BAQ | Installation Instructions - Page 4
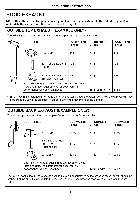
Installation Instructions HOOD EXHAUST NOTE: Read these next two pages only . = 41 Ft. * IMPORTANT: If a rectangular-to-round transition adaptor is used, the bottom corners of the damper will have to be cut to fit, using the tin snips, in order to allow free movement of the damper. OUTSIDE BACK - Maytag MMV4205BAQ | Installation Instructions - Page 5
Instructions NOTE: If you need to install ducts, note that the total duct length of 3¼" x 10" rectangular or 6" diameter round duct should not exceed 60 equivalent feet. Outside ventilation requires a HOOD EXHAUST DUCT. Read the following carefully. NOTE: It is important that venting be installed - Maytag MMV4205BAQ | Installation Instructions - Page 6
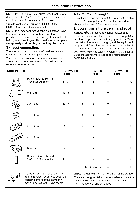
with the unit. Check to make sure you have all these parts. NOTE: Some extra parts are included. ADDITIONAL PARTS PART TOP CABINET TEMPLATE Top Cabinet Template QUANTITY 1 REAR WALL TEMPLATE Rear Wall Template Installation Instructions Separately Packed Grease Filters Exhaust adaptor 6 - Maytag MMV4205BAQ | Installation Instructions - Page 7
ranges up to 33" wide. • If you are going to vent your microwave oven to the outside, see Hood Exhaust Backsplash Section for exhaust duct preparation. • When installing the microwave oven beneath smooth flat cabinets be careful to follow the instructions on the top cabinet template for power - Maytag MMV4205BAQ | Installation Instructions - Page 8
1.PLACEMENT OF THE MOUNTING PLATE A. REMOVING THE MICROWAVE OVEN FROM THE CARTON/ REMOVING THE MOUNTING PLATE 1, Remove the installation instructions, Exhaust adaptor, filters, glass tray and the small hardware bag. Do not remove the Styrofoam protecting the front of the oven. 2. Fold back all - Maytag MMV4205BAQ | Installation Instructions - Page 9
Installation Instructions C. DETERMINING WALL PLATE LOCATION UNDER YOUR CABINET Plate position - beneath flat bottom cabinet Plate no back or side frame, install the mounting plate down the same distance as the front overhang depth. This will keep the microwave level. 1. Measure the inside depth - Maytag MMV4205BAQ | Installation Instructions - Page 10
Installation Instructions D. ALIGNING THE WALL PLATE i i REAR WALk TEMPLATE Centedine notches Draw a Vertical Line on Wall from Center __ _ - Maytag MMV4205BAQ | Installation Instructions - Page 11
Instructions 2. INSTALLATION TYPES (Choose A, B or C) This microwave oven is designed for adaptation to the following three types of ventilation: A. Recirculating (Non-Vented Ductless) B. Outside Top Exhaust (Vertical Duct) C. Outside Back Exhaust (Horizontal Duct) NOTE: This microwave - Maytag MMV4205BAQ | Installation Instructions - Page 12
Installation Instructions A. RECIRCULATING (Non-Vented Ductless) INSTALLATION OVERVIEW A1. Attach Mounting Plate to Wall A2. Prepare Top Cabinet A3. Mount the Microwave Oven + AI.__.ATTACH THE MOUNTING PLATE TO THE WALL Attach the plate to the wall using toggle bolts. At least one wood screw must - Maytag MMV4205BAQ | Installation Instructions - Page 13
Installation Instructions MOUNT THE MICROWAVE OVEN FOR EASIER INSTALLATION SAFETY, WE RECOMMEND INSTALL THIS MICROWAVE AND PERSONAL THAT TWO PEOPLE OVEN. IMPORTANT: Do not grip or use handle during installation. NOTE: If your cabinet is metal, use the nylon grommet around the power cord hole to - Maytag MMV4205BAQ | Installation Instructions - Page 14
Installation Instructions B. OUTSIDE TOP EXHAUST (Vertical Duct) INSTALLATION OVERVIEW B1. Attach Mounting Plate to Walt B2. Prepare Top Cabinet B3. Adjust Blower B4. Check Damper Operation B5. Mount Microwave Oven B6. Adjust Exhaust Adaptor B7. Connect Ductwork Blm ATTACH THE MOUNTING PLATE TO THE - Maytag MMV4205BAQ | Installation Instructions - Page 15
Installation Instructions B2. USE TOP CABINET TEMPLATE FOR PREPARATION OF TOP CABINET You need to drill holes for the top support screws, a hole large enough for the power cord to fit through, and a cutout barge enough for the exhaust adaptor. B3. ADAPTING MICROWAVE BLOWER FOR OUTSIDE TOP EXHAUST - Maytag MMV4205BAQ | Installation Instructions - Page 16
or lift oven by pulling cord. 1. Lift microwave, tilt it forward, and hook slots at back bottom edge onto four lower tabs of mounting plate. Exhaust Adaptor and Damper is shipped after being assembled to the filler-upper. 2, Slide exhaust adaptor following the instructions show in diagram. 3, Make - Maytag MMV4205BAQ | Installation Instructions - Page 17
of the microwave oven. (While tightening screws, hold the microwave oven in place against the wall and the top cabinet.) 1. Extend the house duct down to connect to the exhaust adaptor. 2, Seal exhaust duct joints using duct tape. // 8, Install grease filters. See the Owner's Manual packed with - Maytag MMV4205BAQ | Installation Instructions - Page 18
Cabinet | C4. Adjust Blower C5. Mount the Microwave Oven Clm PREPARING THE REAR WALL FOR OUTSIDE BACK EXHAUST You need to cut an opening in the rearwall for outside exhaust. C2m ATTACH THE MOUNTING PLATE TO THE WALL • Read the instructions on the REAR WALL TEMPLATE. • Tape it to the rear wall - Maytag MMV4205BAQ | Installation Instructions - Page 19
Installation Instructions C2.__A..TTACH THE MOUNTING TO THE WALL (cont.) To use toggle bolts" PLATE Spacing for Toggles More Than Wall Thickness Mounting Plate I Toggle Wings C4. ADAPTING MICROWAVE BLOWER FOR OUTSIDE BACK EXHAUST 1, Remove and save screw that holds btower Plate to microwave. - Maytag MMV4205BAQ | Installation Instructions - Page 20
should match exhaust openings on rear of microwave oven. 7, Secure screw. the blower unit to the microwave Blower-Plate with the Back of Microwave f _ From the Mounting Plate screw 8, Attach the exhaust adaptor to the rear of the oven by sliding it into the guides at the top center of the - Maytag MMV4205BAQ | Installation Instructions - Page 21
Installation Instructions C5.__M. OUNT THE MICROWAVE OVEN (cont.) Install grease filters. See the Owner's Manual packed with the microwave. Cabinet Front Cabinet Bottom Shelf Filler Block Depth of Cabinet -_ ERqeucievsalsent to gning Screw Microwave Oven Top 4. Attach the microwave oven to the top - Maytag MMV4205BAQ | Installation Instructions - Page 22
according to instructions. 6. Read the Owner's Manual. 2, Remove all packing material from the microwave oven. 3. Install turntable and ring in cavity. 4. Replace house fuse or turn breaker back on. 7, KEEP INSTALLATION INSTRUCTIONS THE LOCAL INSPECTOR'S USE. FOR 5, Plug power cord into - Maytag MMV4205BAQ | Installation Instructions - Page 23
NOTE Installation Instructions 23 - Maytag MMV4205BAQ | Installation Instructions - Page 24
Part No. : 8101 P710-60 Form No. : Code No. : DE68-03141B - Maytag MMV4205BAQ | Installation Instructions - Page 25
I'attention du consommateurVeuillez conserver ces instructions en vue d'une utilisation future. • Niveau de technicit_ requis - Uinstatlation de cet appareil requiert les connaissances mecaniques et etectriques de base. • L1nstaflateur est responsable de la bonne installation de cet appareil. • Les - Maytag MMV4205BAQ | Installation Instructions - Page 26
Instructions d'installation TABLE DES MATIERES Gdndralit s Importantes consignes de securit 3 Normes electriques 3 Evacuation 4, 5 Dommages - Transport/Installation ........... 6 Pi_ces fournies 6 Outils n_cessaires 7 Espace d'assemblage 7 C Evacuation exterieure par I' - Maytag MMV4205BAQ | Installation Instructions - Page 27
supporter le poids de I'armoire, ainsi que celui du produit (59 livres) et de son futur contenu (jusqu'& 50 livres), ce qui repr_sente un poids suppl_mentaire total de 109 livres. bonne mise la terre avant la mise en service installes par un etectricien agree et _tre conforme aux specifications - Maytag MMV4205BAQ | Installation Instructions - Page 28
Instructions d'installation EVACUATION REMARQUE : Lisez ces deux pages uniquement si vous envisagez une de ces pieces ont 6t6 calcutees d'apres des test reels pour une bonne ventilation quel que soit le modele de hotte utitis¢. x (2) Longueur totale = 20 pied = 63 pied REMARQUE : Dans le cas - Maytag MMV4205BAQ | Installation Instructions - Page 29
Instructions d'installation REMARQUE : Si vous 6tes amene & installer des tuyaux, notez que la Iongueur totale du conduit rectangulaire de 3¼" x 10" ou du conduit de 6" de diametre ne dolt pas exceder un equivalent de - Maytag MMV4205BAQ | Installation Instructions - Page 30
oreilles) (sh6" X 3") Vis de mecanique a 3 autoreglage (¼"-28 x 3¼") Guide en nylon 2 _ (pour armoires metalliques) Vous trouverez toutes ces pieces dans un DU MUR ARRtERE Gabarit du mur arriere Instructions d'installation Fittres & graisse embatles separement Adaptateur d'evacuation - Maytag MMV4205BAQ | Installation Instructions - Page 31
Instructions d'installation OUTILS NECESSAIRES Toumevis Phillips n ° 1 et 2 Crayon Regle ou galon et e de entre le four et i'armoire superieure si necessaire (utilise dans le cas d'installations sous des armoires encastrees uniquement) Lunettes de protection Niveau Ruban-cache et ruban - Maytag MMV4205BAQ | Installation Instructions - Page 32
Instructions d'installation 1.POSITIONNEMENT DE LA PLAQUE DE MONTAGE A. DEBALLAGE DU FOUR A MICRO-ONDES/DE LA PLAQUE DE MONTAGE 1. Sortez les instructions d'instaltation, I'adaptateur d'evacuation, les filtres, le plateau en verre et le petit sac de pieces de quincaillerie. N'enlevez pas le - Maytag MMV4205BAQ | Installation Instructions - Page 33
Instructions d'installation C. POSITIONNEMENT DE LA PLAQUE MURALE SOUS L'ARMOIRE Emplacement de la de la table _te Sur certaines armoires, des garnitures peuvent g6ner I'installation du four a micro-ondes. Retirez-tes pour installer le four correctement et le mettre de niveau. LE FOUR A MICRO - Maytag MMV4205BAQ | Installation Instructions - Page 34
Instructions d'installation D. ALIGNEMENT DE LA PLAQUE MURALE i i REAR WALL TEMPLATE Encoches au niveau Tracez une li.qneverticale sur,lemur pa_ant du centre de I'axe __ vis & bois pour que le poids du four & micro-ondes soit correctement supporte. Mettez la plaque de montage de c6t_. 10 - Maytag MMV4205BAQ | Installation Instructions - Page 35
Instructions d'installation 2. TYPES D'INSTALLATION (Choisissez A, B ou C) Ce four a micro-ondes s'adapte sur les foumi : il est fixe a I'appareil. Choisissez le type de ventilation requis pour votre installation et reportez-vous & la section correspondante. A.__R.ECYCLAGE DE L'AIR (SYSTEME SANS - Maytag MMV4205BAQ | Installation Instructions - Page 36
Instructions d'installation A. RECYCLAGE DE L'AIR (syst_me sans conduit non ventild) PRESENTATION DE L'INSTALLATION A1. Fixez la plaque de & ailette dans les trous prevus & cet effet. • Consuttez les instructions relatives au GABARIT DE L'ARMOIRE SUPERIEURE. • Collez-tes sous l'armoire superieure - Maytag MMV4205BAQ | Installation Instructions - Page 37
ET POUR VOTRE PROPRE SECURITE, IL EST RECOMMANDE D'ETRE DEUX POUR INSTALLER CE PRODUIT. IMPORTANT : N'utilisez pas de griffe de levage ni de poign_e au cours de rinstallation. REMARQUE : Si votre armoire est metatlique, ptacez le guide en nylon autour du trou prevu pour le passage du cordon - Maytag MMV4205BAQ | Installation Instructions - Page 38
Instructions d'installation B, EVACUATION EXTERIEURE PAR LE HAUT (conduit vertical) PRESENTATION DE L'INSTALLATION B1. Fixez la plaque de montage au mur B2. Preparez I'armoire su )erieure B3. Reglez le ventilateur B4. Test du registre | B5. Montez le four a - Maytag MMV4205BAQ | Installation Instructions - Page 39
Instructions d'installation B2.m.U. TILISEZ LE GABARIT DE L'ARMOIRE SUPERIEURE POUR PREPARER ventilateur dans le four & microondes. 2. Soulevez la plaque du ventitateur. • Consultez les instructions relatives au GABARIT DE L'ARMOIRE SUPERIEURE. • Cotlez-tes sous I'armoire superieure. • Percez - Maytag MMV4205BAQ | Installation Instructions - Page 40
CE PRODUIT. IMPORTANT : N'utilisez pas de griffe de levage ni de poign_e au cours de I'installation. REMARQUE : Si votre armoire est metatlique, ptacez le guide en nylon autour du trou prevu pour le passage du cordon d'alimentation pour que ce dernier ne se coupe pas. REMARQUE : II est recommande - Maytag MMV4205BAQ | Installation Instructions - Page 41
Instructions d'installation ONDES (suite) Facade de I'armoire Fond de I'armoire Cale profondeur du I reqnufoivnacleemntendt e ldae I'armoire Visa autoreglage Haut du four a micro-ondes 4. Fixez le four & micro- - Maytag MMV4205BAQ | Installation Instructions - Page 42
Instructions d'installation C, EVACUATION EXTERIEURE PRESENTATION DE L'INSTALLATION Cl. Preparez lemur arriere C2. Fixez la plaque de vers I'exterieur. C2._.FIXEZ LA PLAQUE DE MONTAGE AU MUR • Consultez les instructions relatives au GABARIT DU MUR ARRIERE. • Cottez le gabarit sur lemur arriere. - Maytag MMV4205BAQ | Installation Instructions - Page 43
et se casser. Tenez le cas externe quand le ventilateur est enleve et re-install& 4, Deposez les - Maytag MMV4205BAQ | Installation Instructions - Page 44
Instructions d'installation 6. Reptacez le ventilateur darts I'ouverture. Extremit6 A C5. MONTEZ LE FOUR pas de griffe de levage ni de poign_e au cours de I'installation. REMARQUE : Si votre armoire est metallique, ptacez le guide en nylon autour du trou prevu pour le passage du cordon d' - Maytag MMV4205BAQ | Installation Instructions - Page 45
Instructions d'installation C5.__M. ONTEZ LE FOUR A MICROONDES (suite) Instatlez les filtres a graisse. Reportez-vous au manuel d'utilisation livre avec le four & micro-ondes. Fa£ade de I' - Maytag MMV4205BAQ | Installation Instructions - Page 46
. 2, IE'intlerviezur toduuslefosur. materiaux d'embatlage I ptaces & 7, CONSERVEZ LES INSTRUCTIONS D'INSTALLATION EN VUE DE LEUR UTILISATION PAR UN CONTROLEUR LOCAL. 3, gInusidtaatgleez. le plateau (prise dedi6e). & une prise / Verifiez la bonne mise ia terre avant la raise en service 22 - Maytag MMV4205BAQ | Installation Instructions - Page 47
REMARQUE Instructions d'installation 23 - Maytag MMV4205BAQ | Installation Instructions - Page 48
Ref6rence : 8101 P710-60 N° formulaire :A/08/05 Code n ° : DE68-03141B - Maytag MMV4205BAQ | Installation Instructions - Page 49
Instrucciones de instalacibn Para toda la gama de hornos microondas ANTES DE EMPEZAR Lea estas instrucciones completa y detenidamente • IMPORTANTE: Guarde estas instrucciones para referencia det inspector local. • IMPORTANTE: Tenga en cuenta todas las normativas locales. • Nota para el - Maytag MMV4205BAQ | Installation Instructions - Page 50
posterior al exterior 18-21 Preparaci6n de la pared posterior 18 Acoplamiento de la placa de montaje a la pared 18, 19 Preparaci6n de la parte superior de la unidad 19 Ajuste del ventilador 19, 20 Montaje del microondas 20, 21 Antes de utilizar el microondas 22 Guia de instalacion - Maytag MMV4205BAQ | Installation Instructions - Page 51
produzca una descarga el_ctrica. Si el recept&culo fuese uno est&ndar de dos orificios, es muy importante que un electricista cualificado Io sustituya e instale uno de tres, con toma de tierra. BAJO NINGUNA CIRCUNSTANCIA CORTE, DEFORME NI RETIRE NINGUNA DE LAS PATILLAS DEL CABLE DE ALIMENTACION. NO - Maytag MMV4205BAQ | Installation Instructions - Page 52
Instrucciones de instalacibn DIFUSOR DE ESCAPE NOTA: Lea las dos p&ginas siguientes sblo si desea que el escape de ventilacibn se dirija al exterior. Si desea que recircule el aire de nuevo hacia la habitacibn, consulte la p&gina 11. ESCAPE SUPERIOR AL EXTERIOR (EJEMPLO) El diagrama siguiente - Maytag MMV4205BAQ | Installation Instructions - Page 53
Instrucciones de instalacibn NOTA: Si necesita instalar conducciones, tenga en cuenta que la longitud total de la conducci6n rectangular de 8,25 x 25,40 cm o la conducci6n redonda de 15,24 cm no debe superar los 18,29 metros equivalentes. La ventilaci6n exterior requiere una conducci6n difusora de - Maytag MMV4205BAQ | Installation Instructions - Page 54
Instrucciones de instalacibn adaptador de transici6n de ectangular *a IrMedPoOnRdoT,ANlTaEs :esquSini asse uitnilfizearioruens del regulador de tiro se deberan cortar para conseguir el ajuste, usando la cortadora, con et fin de permitir el libre movimiento del regulador de tiro. Las longitudes - Maytag MMV4205BAQ | Installation Instructions - Page 55
opcional) Bloques de relleno 0 trozos de madera, si fuera necesario para el espacio del armario superior (solamente para instalaciones empotradas de ia parte inferior) Gafas de seguridad NiveI Cinta adhesiva y cinta aisiante ESPACIO DE MONTAJE El borde inferior del armario debe estar a 83,8 cm - Maytag MMV4205BAQ | Installation Instructions - Page 56
Instrucciones de instalacibn I.COLOCACION DE LA PLACA DE MONTAJE A. EXTRACClON DEL MICROONDAS DE LA CAJA/ EXTRACCION DE LA PLACA DE MONTAJE 1. Saque las instrucciones de instalaci6n, el adaptador det escape, los filtros, la bandeja de cristal y la pequefia bolsa con piezas. No retire la protecci6n - Maytag MMV4205BAQ | Installation Instructions - Page 57
placa: bajo el armario de superficie inferior lisa Posicibn de la placa: bajo la parte inferior del armario empotrado t I _L ii AI menos a 76,2 cm Trace una s61o tienen un saliente frontal, sin estructura posterior o lateral, instale la placa de montaje a ta misma distancia que la profundidad - Maytag MMV4205BAQ | Installation Instructions - Page 58
DE LA PLACA MURAL Orificio A i i REAR WAL t TEMPLATE i Ranuras de I& linea central i Trace una linea vertical en Orificio C Orificio B Linea horizontal Trace una linea horizontal en la pared desde la parte inferior de la "Plantitla posterior para la pared". 1. Dibuje una linea vertical en - Maytag MMV4205BAQ | Installation Instructions - Page 59
Instrucciones de instalacibn 2. TIPOS DE INSTALACION (Seleccione A, B o C) El microondas esta disefiado para adaptarlo a los tres tipos de ventitaci6n siguientes: A. Recirculacibn (sin conducciones de ventilacibn) B. Escape superior al exterior (conduccibn vertical) C. Escape posterior al exterior - Maytag MMV4205BAQ | Installation Instructions - Page 60
la "Plantilla posterior para la pared" y que la placa de montaje este correctamente centrada bajo el armario. PRECAUClON: Evite pillarse los dedos entre la parte posterior de la ptaca de montaje y la pared. Acople la placa a la pared mediante los pemos acodados. Se debe usar al menos un tirafondos - Maytag MMV4205BAQ | Installation Instructions - Page 61
AI montar el microondas, pase el cable de alimentaci6n por et orificio en la parte inferior det armario superior. Mantengalo tensado en los pasos 1-3. No lo pince si se nivela con la parte inferior 8. Instale los filtros de grasa. Consutte el manual det usuario que se suministra con et microondas - Maytag MMV4205BAQ | Installation Instructions - Page 62
de la ptantilla posterior para la pared y que la placa de montaje este correctamente centrada bajo el armario. PRECAUClON: Evite pillarse los dedos entre la parte posterior de la placa de montaje y la pared. 4. Apriete todos los pernos. Separe la placa de la pared para apretar mejor los pernos. 14 - Maytag MMV4205BAQ | Installation Instructions - Page 63
de la plantilla para el armario superior. PRECAUClON: Lleve gafas de seguridad cuando taladre orificios en la parte inferior det armario. Placa del ventilador Tornillo _'_ Parte posterior del microondas 3, Saque con cuidado el ventilador. Los cables se alargaran Io suficiente para permitir que - Maytag MMV4205BAQ | Installation Instructions - Page 64
alg_n daSo en la estructura al forzar los tornillos. NOTA:AI montar el microondas, pase el cable de alimentaci6n por el orificio en la parte inferior det armario superior. Mantengalo tensado en los pasos 1-3. No Io pince ni Io use para levantar el microondas. 1. Levante el microondas, inclineto - Maytag MMV4205BAQ | Installation Instructions - Page 65
para conectarlo a la conducci6n de la casa. Placa del ventilador Regulador de tiro Parte posterior del microondas adaptader de escape segun se necesite B7m CONEXION DE LAS CONDUCCIONES . 8, Instate los filtros de grasa. Consulte el manual del usuario que se suministra con el microondas. 17 - Maytag MMV4205BAQ | Installation Instructions - Page 66
Instrucciones de instalacibn C. ESCAPE POSTERIOR AL EXTERIOR (Conduccibn horizontal) VISION GENERAL DE LA INSTALAClON Cl.Prepare la pared posterior C2. Acople la ptaca de montaje a la pared C3. Prepare el armario superior C4.Ajuste et ventilador i C5.Monte el microondas Clm PREPARACION DE - Maytag MMV4205BAQ | Installation Instructions - Page 67
de la ptantilla posterior para ta pared y que la placa de montaje este correctamente centrada bajo el armario. PRECAUClON: Evite pillarse los dedos entre la parte posterior de la placa de montaje y la pared. 4, Apriete todos los pemos. Separe la placa de la pared para apretar mejor los pemos. C3 - Maytag MMV4205BAQ | Installation Instructions - Page 68
daSo en la estructura al forzar los tornillos. NOTA: AI montar el microondas, pase el cable de alimentaci6n por et orificio en la parte inferior del armario superior. Mantengalo tensado en los pasos 1-3. No Io pince ni Io use para levantar el microondas. 1. Levante et microondas, \ inclinelo - Maytag MMV4205BAQ | Installation Instructions - Page 69
(continuacibn) Instate los filtros de grasa. Consulte el manual del usuario que se suministra con el microondas. Frontal del completamente et tornilto central. 7, Apriete los dos tornillos exteriores a la parte superior del microondas. (Cuando apriete los tornillos, sujete el microondas contra - Maytag MMV4205BAQ | Installation Instructions - Page 70
haya instalado de acuerdo con las instrucciones. 6, Lea el manual del usuario. 2. mRiectrioreontdoadso. el material de embalaje I det del 7, GUARDE LAS INSTRUCCIONES DE INSTALACION PARA REFERENCIA DEL INSPECTOR LOCAL. 3. Instale et plato giratorio y el aro en la cavidad. I 4. Conecte la caja - Maytag MMV4205BAQ | Installation Instructions - Page 71
NOTA Instrucciones de instalacibn 23 - Maytag MMV4205BAQ | Installation Instructions - Page 72
N._ pieza : 8101 P710-60 Formulario : A/08/05 N.-°de c6digo : DE68-03141B
-
 1
1 -
 2
2 -
 3
3 -
 4
4 -
 5
5 -
 6
6 -
 7
7 -
8
-
9
-
10
-
11
-
12
-
13
-
14
-
15
-
16
-
17
-
18
-
19
-
20
-
21
-
22
-
23
-
24
-
25
-
26
-
27
-
28
-
29
-
30
-
31
-
32
-
33
-
34
-
35
-
36
-
37
-
38
-
39
-
40
-
41
-
42
-
43
-
44
-
45
-
46
-
47
-
48
-
49
-
50
-
51
-
52
-
53
-
54
-
55
-
56
-
57
-
58
-
59
-
60
-
61
-
62
-
63
-
64
-
65
-
66
-
67
-
68
-
69
-
70
-
71
-
72
 |
 |

Installation
Instructions
Over the Range Microwave
Oven
BEFORE YOU BEGIN
Read
these
instructions
completely
and carefully.
•
IMPORTANT
--
Save
these
instructions
for
local
inspector's
use.
•
IMPORTANT
-- Observe
all governing
codes
and ordinances.
•
Note
to
Installer-
Be sure
to leave
these
instructions
with
the Consumer.
•
Note
to Consumer-
Keep
these
instructions
for
future
reference.
•
Skill
level
-
Installation
of this appliance
requires
basic
mechanical
and electrical
skills.
•
Proper
installation
is the responsibility
of the
installer.
•
Product
failure
due
to improper
installation
is not
covered
under
the Warranty.
READ CAREFULLY.
KEEP
THESE
INSTRUCTIONS.