Maytag MZF34X16DW Owners Manual - Page 6
Style 1-Without Grille, Style 2-With Grille
 |
View all Maytag MZF34X16DW manuals
Add to My Manuals
Save this manual to your list of manuals |
Page 6 highlights
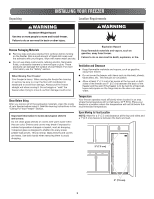
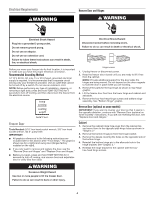
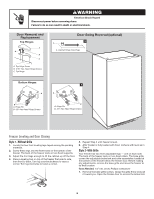
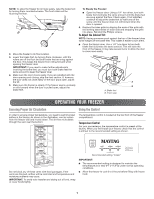
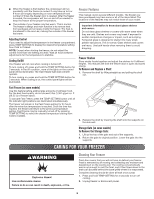
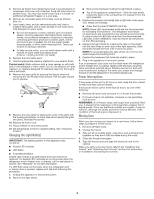
WARNING Electrical Shock Hazard Disconnect power before removing doors. Failure to do so can result in death or electrical shock. Door Removal and Replacement Top Hinges A B B C A. Top Hinge Cover B. 5/16" Hex-Head Hinge Screws C. Top Hinge Door Swing Reversal (optional) 2 A A. Cabinet Hinge Hole Plugs Bottom Hinges 3 A A B A. Hinge Pin B. 3/8" Hex-Head Hinge Screws B A. Hinge Pin B. 3/8" Hex-Head Hinge Screws Freezer Leveling and Door Closing Style 1-Without Grille 1. Locate the two front leveling legs taped among the packing materials. 2. Screw these legs into the front holes on the bottom of the freezer. The back of the freezer rests on two fixed supports. 3. Adjust the front legs enough to lift the cabinet up off the floor. 4. Place a leveling tool on top of the freezer first side to side, then front to back. Turn leg counterclockwise to raise a corner. Turn leg clockwise to lower a corner. 5. Repeat Step 4 until freezer is level. 6. After freezer is fully loaded with food, recheck with level as in Step 4. Style 2-With Grille Your freezer has two front adjustable legs - one on each side. The back of the freezer rests on two fixed rollers. The base grille covers the adjustable brake feet and roller assemblies located at the bottom of the freezer below the freezer door. Before making any adjustments, remove the base grille and move the freezer to its final location. Tools Needed: 1/4" hex driver, Phillips screwdriver 1. Remove the base grille screws. Grasp the grille firmly and pull it toward you. Open the freezer door to access the brake feet. 6
-
 1
1 -
 2
2 -
 3
3 -
 4
4 -
 5
5 -
 6
6 -
 7
7 -
 8
8 -
 9
9 -
 10
10 -
 11
11 -
 12
12 -
13
-
14
-
15
-
16
-
17
-
18
-
19
-
20
-
21
-
22
-
23
-
24
-
25
-
26
-
27
-
28
 |
 |
