Motorola MD7261 User Guide - Page 38
Setting Up Your Answering Machine, Sunday
 |
View all Motorola MD7261 manuals
Add to My Manuals
Save this manual to your list of manuals |
Page 38 highlights
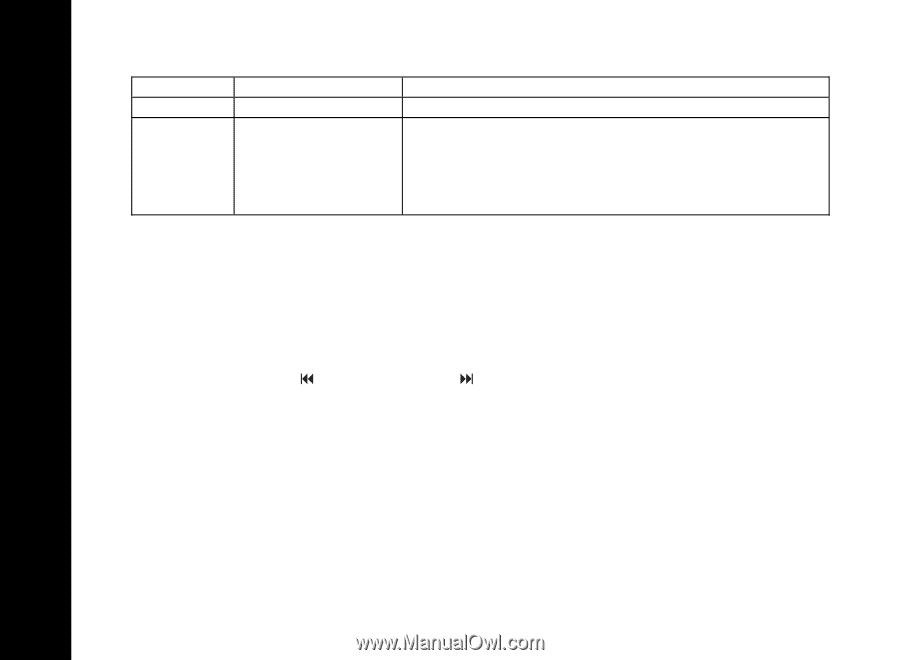
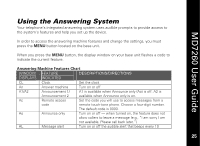
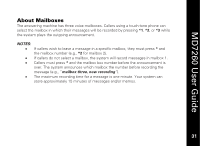
MD7260 User Guide seconds when there is a new message. br Base ringer Turn the base ringer on or off. Nr Number of rings Select 4, 6, or toll saver - When toll saver is selected, the system answers before your set number of rings (e.g., 2 instead of the set 4) when you have new messages, and answers according to the set number of rings when there are no new messages. Setting Up Your Answering Machine To turn your answering machine on/off, to set the clock, or to choose the number of rings allowed before the system picks up a call, you will use the same basic steps. 1. Press the MENU button on the base unit until you see the code (e.g., CL = clock) representing the feature you wish to set (see the Answering Machine Features Chart). 2. Use the rewind ( ) and fast forward ( ) buttons to turn a feature on or off and to increase or decrease setting increments (e.g., to set the clock to Sunday, continue pressing either the rewind or fast forward button until d1 appears on the display and the system announces Sunday). 3. Press MENU to save a setting and move to another setting (e.g., after setting the day, press MENU to save and move to the time) or feature. NOTE: You can press STOP at any time to cancel or exit a feature. 26
-
 1
1 -
2
-
3
-
4
-
5
-
6
-
7
-
8
-
9
-
10
-
11
-
12
-
13
-
14
-
15
-
16
-
17
-
18
-
19
-
20
-
21
-
22
-
23
-
24
-
25
-
26
-
27
-
28
-
29
-
30
-
31
-
32
-
 33
33 -
 34
34 -
 35
35 -
 36
36 -
 37
37 -
 38
38 -
 39
39 -
 40
40 -
 41
41 -
 42
42 -
 43
43 -
44
-
45
-
46
-
47
-
48
-
49
-
50
-
51
-
52
-
53
-
54
-
55
-
56
-
57
-
58
 |
 |