NEC NP-UM330X NP04WK1 Installation Manual - Page 11
Attach the projector to the mount plate., Attach the wall adapter to the wall's structural material
 |
View all NEC NP-UM330X manuals
Add to My Manuals
Save this manual to your list of manuals |
Page 11 highlights
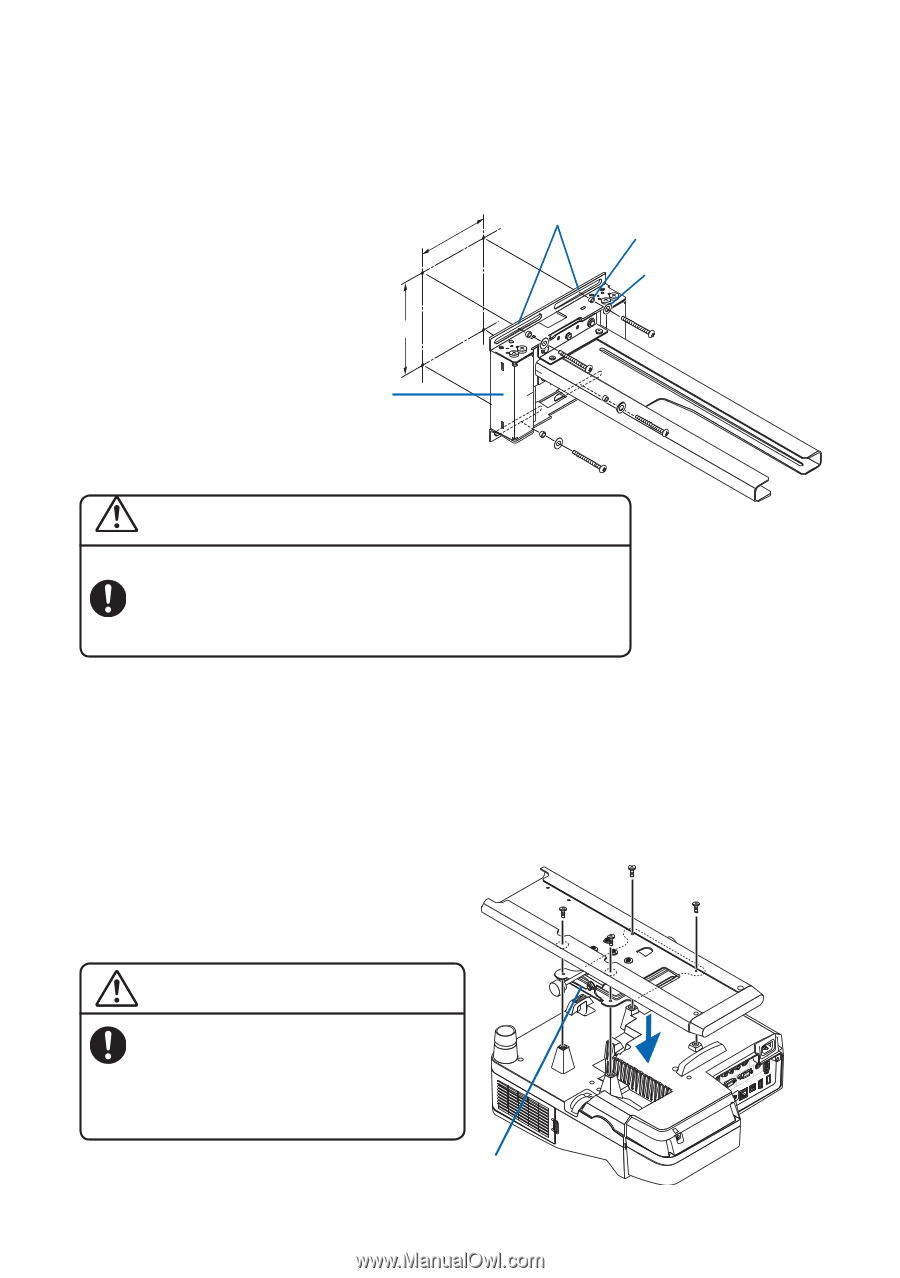
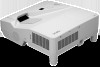
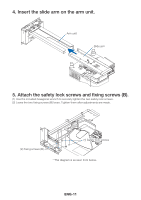
2. Attach the wall adapter to the wall's structural material. Use the included washers and spacers to attach the wall adapter with the M6 screws (or bolts). - For the position for mounting the wall adapter onto the wall and the dimensions, see "Dimensions of Parts" on page ENG-6 and "Projection Distance and Screen Size" on page ENG-7. - Be sure to fasten the screws at the center of the mount holes, as they will serve as the refer- ence points for the horizontal position. - The wall adapter must be installed in the proper up/ down direction. Mount it in the direction shown on 142mm Mount holes Spacer Washer the diagram. - The horizontal position adjustment range is ±50 mm. 189mm CAUTION Wall adapter - Mounting should be per- formed by two people. WARNING - Be sure to use M6 (1/4 inch) screws or bolts (4 locations) to fasten the bottom of the wall adapter. Using anything other than M6 screws (or bolts) could result in the projector falling and causing injury. 3. Attach the projector to the mount plate. Line up the screw holes in the mount plate with the screw holes on the bottom of the projector and securely tighten the four included M4×8 screws. - Place a thick, soft cloth, etc., on the floor to protect the projector from scratches. Note: "MAX.M4 x 8" is indicated on the four screw holes on the bottom of the projector. Note that this indication is not for this product's projector adapter. CAUTION - Be careful not to touch the projector's pro- jection window when mounting the projector. M4×8 screws WARNING - Mounting the projector using screws other than the included ones could damage the projector or result in it falling and causing injury. Be sure to use the included screws. Mount plate ENG-10
-
 1
1 -
2
-
3
-
4
-
5
-
 6
6 -
 7
7 -
 8
8 -
 9
9 -
 10
10 -
 11
11 -
 12
12 -
 13
13 -
 14
14 -
 15
15 -
 16
16 -
17
-
18
-
19
-
20
-
21
 |
 |