NEC NP-UM330X NP04WK1 Installation Manual - Page 12
Insert the slide arm on the arm unit., Attach the safety lock screws and fixing screws B.
 |
View all NEC NP-UM330X manuals
Add to My Manuals
Save this manual to your list of manuals |
Page 12 highlights
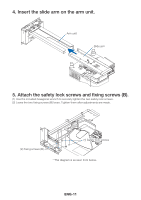
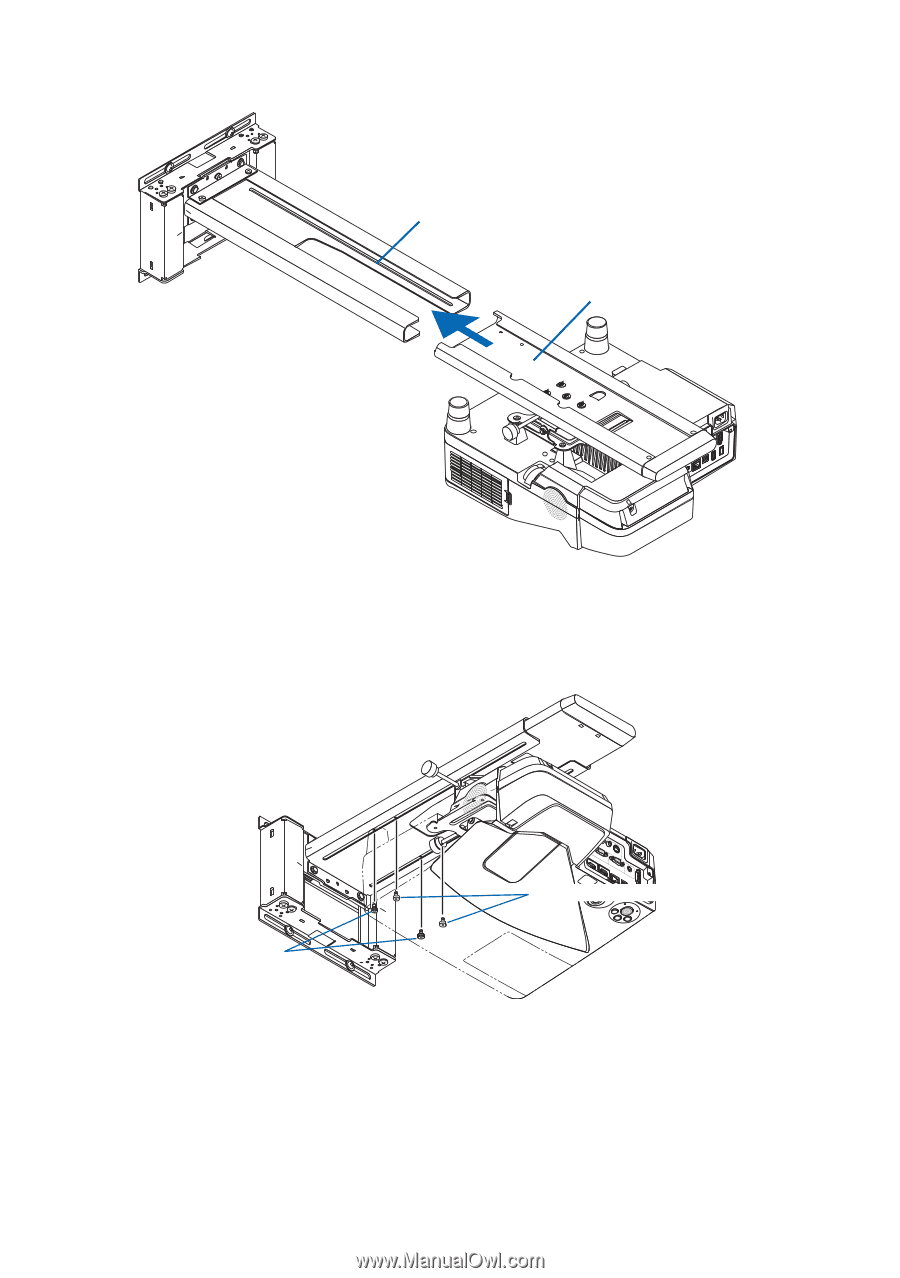
4. Insert the slide arm on the arm unit. Arm unit Slide arm 5. Attach the safety lock screws and fixing screws (B). (1) Use the included hexagonal wrench to securely tighten the two safety lock screws. (2) Leave the two fixing screws (B) loose. Tighten them after adjustments are made. (2) Fixing screws (B) (1) Safety lock screws * This diagram is as seen from below. ENG-11
-
 1
1 -
2
-
3
-
4
-
5
-
6
-
 7
7 -
 8
8 -
 9
9 -
 10
10 -
 11
11 -
 12
12 -
 13
13 -
 14
14 -
 15
15 -
 16
16 -
 17
17 -
18
-
19
-
20
-
21
 |
 |
ENG-11
Arm unit
Slide arm
(1) Safety lock screws
(2) Fixing screws (B)
* This diagram is as seen from below.
4. Insert the slide arm on the arm unit.
5. Attach the safety lock screws and fixing screws (B).
(1) Use the included hexagonal wrench to securely tighten the two safety lock screws.
(2) Leave the two fixing screws (B) loose. Tighten them after adjustments are made.