NEC NP-UM330X NP04WK1 Installation Manual - Page 13
Make the initial setting of the arm unit's vertical, position., WARNING
 |
View all NEC NP-UM330X manuals
Add to My Manuals
Save this manual to your list of manuals |
Page 13 highlights
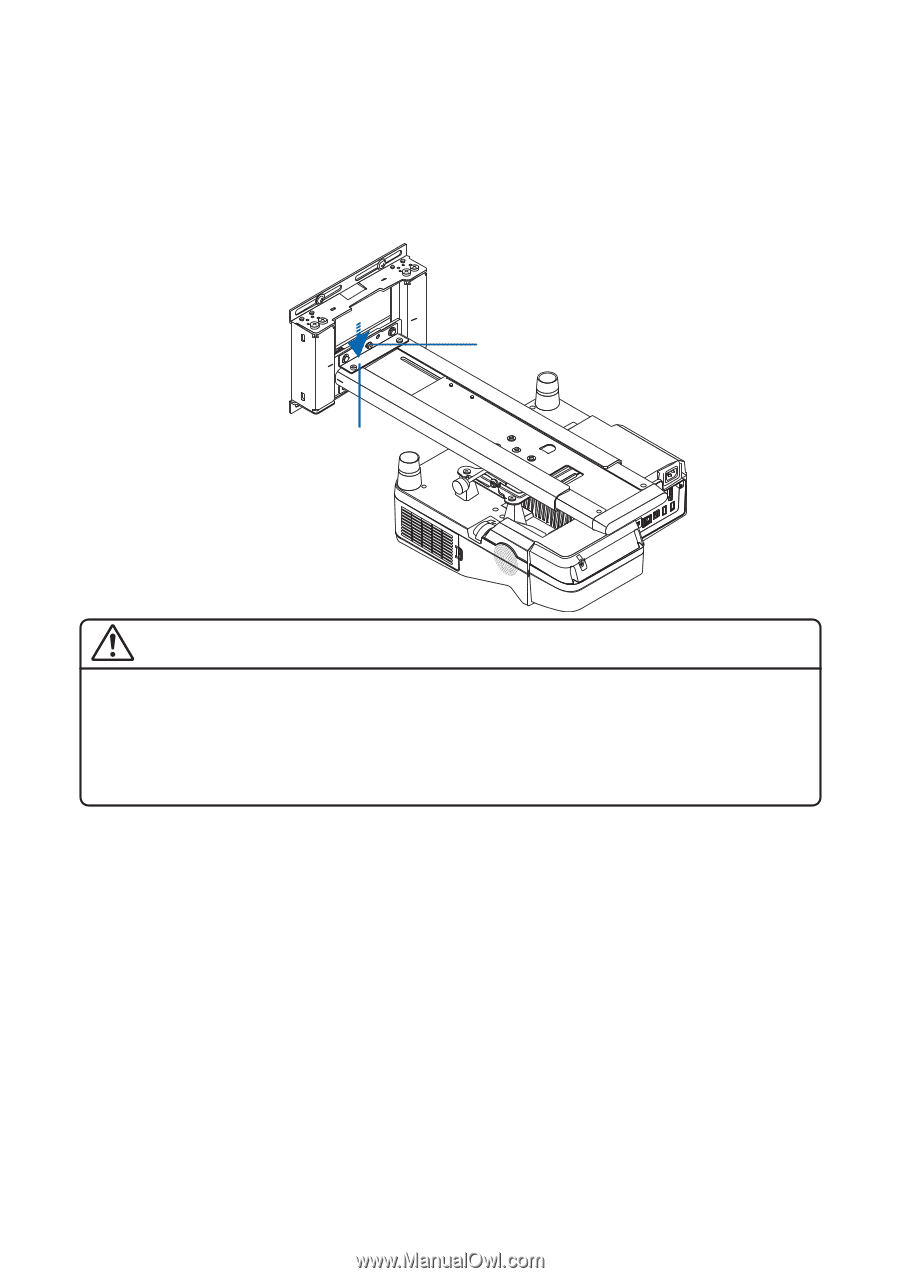
6. Make the initial setting of the arm unit's vertical position. Upon shipment from the factory, the arm unit is set to the uppermost position. (1) Loosen the arm unit's fixing screw (A), then holding the arm unit's base, lower the arm unit to the lowermost position. (2) Temporarily fasten the fixing screw (A). This completes the initial setting of the arm unit's vertical position. Arm unit (1) (2) Fixing screw (A) WARNING - Do not remove the safety lock screws other than for assembly. Doing so could cause the slide arm to come off and fall, resulting in injury. - When lowering the arm for adjustment, be sure to hold it at its base. If held at any other position while performing the adjustment, the arm could be damaged or fall, resulting in injury. ENG-12
-
 1
1 -
2
-
3
-
4
-
5
-
6
-
7
-
 8
8 -
 9
9 -
 10
10 -
 11
11 -
 12
12 -
 13
13 -
 14
14 -
 15
15 -
 16
16 -
 17
17 -
 18
18 -
19
-
20
-
21
 |
 |