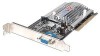
NVIDIA GeForce2 User Manual - Page 12
Add New Hardware Wizard, Cancel], Upgrade system installation - go driver
 |
UPC - 683728130718
View all NVIDIA GeForce2 manuals
Add to My Manuals
Save this manual to your list of manuals |
Page 12 highlights
ÿ Windows®Me Display Driver: As with previous versions of Windows® 9x, the Windows®Me it also performs PnP when you added a new hardware, the will pop-up for driver installation process. Click [Cancel] allow the system start with SVGA (Default from Microsoft Windows®) display driver. After the desktop loaded completely, placed the software CD into the CD ROM driver and proceed the display driver installation. 1. Autorun brings "Welcome Screen", and select display driver to starting driver install. 2. On "Display property", tab on "Settings" then click on button. 3. Tab on " Adapter" screen, click on . 4. Check on "Specify the location of the driver (Advanced)", and click button. 5. You have to specify a location such as "D:\MX\Win9x\" , or browser on the CD directories, then unfold on MX, unfold on Win9x. Click button to continue. 6. Wizard prompt a confirmation for device and a location of the driver file. Click button that will start copy file & updating hardware database in your operating system. 7. Then, press on to complete. Upgrade system installation: Add or change your video adapter to an existing system, you may proceed a few steps before you install the new hardware and software(video display driver). The followings are some of the considers: 1. To change a new adapter, please remove the existing video driver, or replace it to SVGA driver 12
-
 1
1 -
2
-
3
-
4
-
5
-
6
-
 7
7 -
 8
8 -
 9
9 -
 10
10 -
 11
11 -
 12
12 -
 13
13 -
 14
14 -
 15
15 -
 16
16 -
 17
17 -
18
-
19
-
20
-
21
-
22
-
23
-
24
-
25
-
26
-
27
 |
 |
