Netgear WNR1000-2VCNAS WNR1000v2 Setup Manual - Page 25
Wireless Settings, NETGEAR, Region, Apply, For a Windows PC
 |
View all Netgear WNR1000-2VCNAS manuals
Add to My Manuals
Save this manual to your list of manuals |
Page 25 highlights
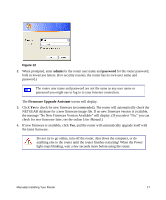
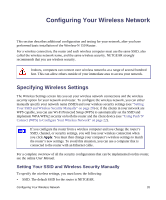
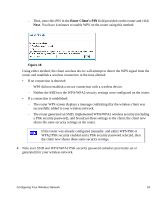
• The wireless mode (802.11g/b, or 802.11n) that each wireless adapter supports. • Wireless security option. NETGEAR strongly recommends that you use wireless security. To successfully implement wireless security, check each wireless adapter to determine which wireless security option it supports. To set up basic wireless connectivity: 1. Log in to the wireless router as described in "To access the router:" on page 16. 2. On the main menu, select Wireless Settings to display the Wireless Settings screen. Note that the default SSID is NETGEAR. The SSID of any wireless adapters must match the SSID you configure in the wireless router. If they do not match, you will not get a wireless connection. 3. Set the Region. Select the region where the router is located. 4. Leave the wireless mode at its default setting. 5. Click Apply to save your changes. To set up your computers for wireless connectivity: 1. Program the wireless settings of each computer or wireless adapter to have the same SSID (wireless network name) as the router. 2. Check that the wireless adapter on each computer can support the mode and security option that you selected. (If you have a question, see the online User Manual or review the settings you selected previously). 3. Check that the security settings on each wireless device match the security settings of the router. For example, if you selected a security option requiring a passphrase, then the same passphrase must be used for each wireless computer. 4. Check that each wireless computer has a wireless link and is able to obtain an IP address by DHCP from the router. For a Windows PC, go to the Control Panel and select Network Connections. Check the Wireless Connections Properties and ensure that TCP/IP Properties are set to Obtain an IP address automatically. Configuring Your Wireless Network 21
-
 1
1 -
2
-
3
-
4
-
5
-
6
-
7
-
8
-
9
-
10
-
11
-
12
-
13
-
14
-
15
-
16
-
17
-
18
-
19
-
 20
20 -
 21
21 -
 22
22 -
 23
23 -
 24
24 -
 25
25 -
 26
26 -
 27
27 -
 28
28 -
 29
29 -
 30
30 -
31
-
32
-
33
-
34
-
35
-
36
-
37
-
38
-
39
-
40
-
41
-
42
-
43
-
44
 |
 |
