Netgear WNR1000-2VCNAS WNR1000v2 Setup Manual - Page 26
Using Push 'N' Connect (WPS) to Con Your Wireless Network
 |
View all Netgear WNR1000-2VCNAS manuals
Add to My Manuals
Save this manual to your list of manuals |
Page 26 highlights
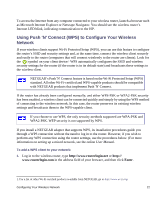
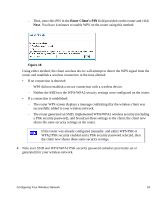
To access the Internet from any computer connected to your wireless router, launch a browser such as Microsoft Internet Explorer or Netscape Navigator. You should see the wireless router's Internet LED blink, indicating communication to the ISP. Using Push 'N' Connect (WPS) to Configure Your Wireless Network If your wireless clients support Wi-Fi Protected Setup (WPS), you can use this feature to configure the router's SSID and security settings and, at the same time, connect the wireless client securely and easily to the router (computers that will connect wirelessly to the router are clients). Look for the symbol on your client device.1 WPS automatically configures the SSID and wireless security settings for the router (if the router is in its default state) and broadcasts these settings to the wireless client. NETGEAR's Push 'N' Connect feature is based on the Wi-Fi Protected Setup (WPS) standard. All other Wi-Fi-certified and WPS-capable products should be compatible with NETGEAR products that implement Push 'N' Connect. If the router has already been configured manually, and either WPS-PSK or WPA2-PSK security has been enabled, a wireless client can be connected quickly and simply by using the WPS method of connecting to the wireless network. In this case, the router preserves its existing wireless settings and broadcasts them to the WPS-capable client. If you choose to use WPS, the only security methods supported are WPA-PSK and WPA2-PSK. WEP security is not supported by WPS. If you install a NETGEAR adapter that supports WPS, its installation procedures guide you through a WPS connection without the need to log in to the router. However, if you wish to perform any WPS connection using the router settings, use the procedures below. (For more information on setting up a mixed network, see the online User Manual. To add a WPS client to your network: 1. Log in to the wireless router, type http://www.routerlogin.net or http:// www.routerlogin.com in the address field of your browser, and then click Enter. 1. For a list of other Wi-Fi-certified products available from NETGEAR, go to http://www.wi-fi.org. Configuring Your Wireless Network 22
-
 1
1 -
2
-
3
-
4
-
5
-
6
-
7
-
8
-
9
-
10
-
11
-
12
-
13
-
14
-
15
-
16
-
17
-
18
-
19
-
20
-
 21
21 -
 22
22 -
 23
23 -
 24
24 -
 25
25 -
 26
26 -
 27
27 -
 28
28 -
 29
29 -
 30
30 -
 31
31 -
32
-
33
-
34
-
35
-
36
-
37
-
38
-
39
-
40
-
41
-
42
-
43
-
44
 |
 |