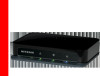
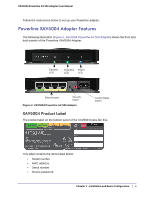
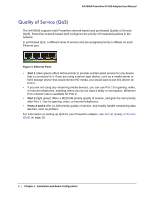
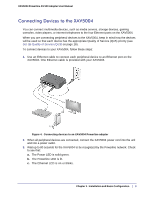
Netgear XAV5004 XAV5004 User Manual - Page 6
LED and Feature Descriptions, Table 1., XAV5004 Features - 4 port powerline av 500 adapter
 |
View all Netgear XAV5004 manuals
Add to My Manuals
Save this manual to your list of manuals |
Page 6 highlights
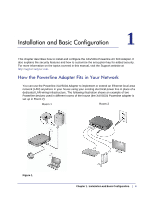
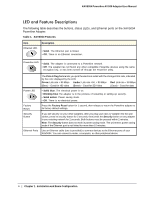
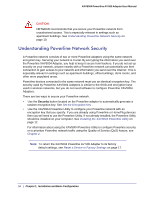
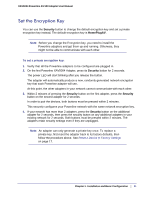
XAV5004 Powerline AV 500 Adapter User Manual LED and Feature Descriptions The following table describes the buttons, status LEDs, and Ethernet ports on the XAV5004 Powerline Adapter. Table 1. XAV5004 Features Item Ethernet LED Description • Solid. The Ethernet port is linked. • Off. There is no Ethernet connection. Powerline LED • Solid. The adapter is connected to a Powerline network. • Off. The adapter has not found any other compatible Powerline devices using the same encryption key, or has been turned off through the Powerline utility. The Pick A Plug feature lets you pick the electrical outlet with the strongest link rate, indicated by the color displayed by the LED: Green: Link rate > 80 Mbps Amber: Link rate >50, < 80 Mbps Red: Link rate < 50 Mbps (Best) - Good for HD video (Better) - Good for SD Video (Good) - Good for data Power LED • Solid blue. The electrical power is on. • Blinking blue.The adapter is in the process of restarting or setting up security. • Solid amber. Power saving mode. • Off. There is no electrical power. Factory Reset Press the Factory Reset button for 1 second, then release to return the Powerline adapter to its factory default settings. Security Button If you set security on your other adapters, after you plug your new AV adapter into the wall socket, press its security button for 2 seconds; then press the Security button on any adapter in your existing network for 2 seconds. Both buttons must be pressed within 2 minutes. Note: The Security button does not work in power saving mode. The unit enters power saving mode if the Ethernet port is not linked for more than 10 minutes. Ethernet Ports Use an Ethernet cable (one is provided) to connect devices to the Ethernet ports of your XAV5004. You can connect a router, a computer, or other peripheral device. 6 | Chapter 1. Installation and Basic Configuration
-
 1
1 -
 2
2 -
 3
3 -
 4
4 -
 5
5 -
 6
6 -
 7
7 -
 8
8 -
 9
9 -
 10
10 -
 11
11 -
 12
12 -
13
-
14
-
15
-
16
-
17
-
18
-
19
-
20
-
21
-
22
-
23
-
24
-
25
-
26
-
27
-
28
 |
 |
