Nikon S710  S710 User's Manual
Nikon S710 - Coolpix Digital Camera Manual
 |
UPC - 018208261277
View all Nikon S710 manuals
Add to My Manuals
Save this manual to your list of manuals |
Nikon S710 manual content summary:
- Nikon S710 |  S710 User's Manual - Page 1
DIGITAL CAMERA User's Manual En - Nikon S710 |  S710 User's Manual - Page 2
trademarks of Adobe Systems Inc. • The SD logo is a trademark of the SD Card Association. • PictBridge is a trademark. • All other trade names mentioned in this manual or the other documentation provided with your Nikon product are trademarks or registered trademarks of their respective holders. - Nikon S710 |  S710 User's Manual - Page 3
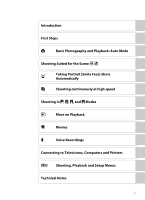
Introduction First Steps A Basic Photography and Playback: Auto Mode Shooting Suited for the Scene C x a Taking Portrait (Smile Face) Shots Automatically k Shooting continuously at high speed Shooting in W, X, V, and U Modes c More on Playback D Movies E Voice Recordings Connecting - Nikon S710 |  S710 User's Manual - Page 4
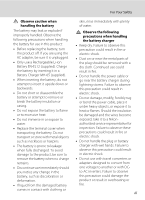
Nikon-authorized service representative for inspection. Do not disassemble Touching the internal parts of the camera or AC adapter could result in injury. Repairs Nikon-authorized service representative for inspection, after unplugging the product and/or removing the battery. Do not use the camera - Nikon S710 |  S710 User's Manual - Page 5
be damaged and the wires become exposed, take it to a Nikonauthorized service representative for inspection. Failure to observe these precautions could result in fire or electric shock. • Do not handle the plug or battery charger with wet hands. Failure to observe this precaution could result in - Nikon S710 |  S710 User's Manual - Page 6
jacks, use only the cables provided or sold by Nikon for the purpose, to maintain compliance with product regulations. Handle moving parts with care Be careful that your fingers or other objects are not pinched by the lens cover or other moving parts. CD-ROMs The CD-ROMs supplied with this device - Nikon S710 |  S710 User's Manual - Page 7
Statement This equipment has been tested and found to comply with the limits for a Class B digital device, pursuant to Part 15 of the FCC rules. the user to be notified that any changes or modifications made to this device that are not expressly approved by Nikon Corporation may void the user's - Nikon S710 |  S710 User's Manual - Page 8
Notice for customers in Canada CAUTION This Class B digital apparatus complies with Canadian ICES-003. ATTENTION Cet appareil symbol on the battery indicates that the battery is to be collected separately. The following apply only to users in European countries: • This battery is designated for - Nikon S710 |  S710 User's Manual - Page 9
About This Manual ...1 Information and Precautions...2 Parts of the Camera...4 The Camera Body ...4 Battery ...12 Inserting the Battery ...14 Removing the Battery ...15 Turning On and Off the Camera...15 Setting Display Language, Date and Time 16 Inserting Memory Cards ...18 Removing Memory Cards - Nikon S710 |  S710 User's Manual - Page 10
Contents Macro Mode... (Shutter-Priority Auto) Mode...54 V (Aperture-Priority Auto) Mode 56 U (Manual) Mode...58 c More on Playback...61 Viewing Multiple Pictures: Thumbnail Playback 61 Date ...68 Selecting a Date in List by Date Mode 68 Using List by Date Mode...69 List by Date Menus ...70 viii - Nikon S710 |  S710 User's Manual - Page 11
to a TV...80 Connecting to a Computer...81 Before Connecting the Camera...81 Transferring Pictures from a Camera to a Computer 82 Connecting to a Printer...85 Connecting the Camera and Printer...86 Printing Pictures One at a Time ...87 Printing Multiple Pictures ...88 Creating a DPOF Print Order - Nikon S710 |  S710 User's Manual - Page 12
p Reset All ...130 r Firmware Version ...132 Technical Notes...133 Optional Accessories ...133 Approved Memory Cards ...133 Image/Sound File and Folder Names 134 Caring for the Camera ...135 Cleaning ...137 Storage ...138 Error Messages...139 Troubleshooting...143 Specifications ...149 Supported - Nikon S710 |  S710 User's Manual - Page 13
should be read before using the camera. This icon indicates that more A information is available elsewhere in this manual or in the Quick Start Guide. Notations • A Secure Digital (SD) memory card is referred to as a "memory card". • The setting at the time of purchase is referred to as the - Nikon S710 |  S710 User's Manual - Page 14
Electronic Accessories Nikon COOLPIX cameras are designed to the highest standards and include complex electronic circuitry. Only Nikon brand electronic accessories (including battery chargers, batteries and AC adapters) certified by Nikon specifically for use with this Nikon digital camera are - Nikon S710 |  S710 User's Manual - Page 15
was digitally copied or reproduced by means of a scanner, digital camera or other such as memory cards or builtin camera memory does not user's responsibility. Before discarding a data storage device or transferring ownership to another person, erase all data using commercial deletion software - Nikon S710 |  S710 User's Manual - Page 16
Parts of the Camera The Camera Body 1 23 4 Lens cover closed 5 67 8 9 1 Shutter-release button 24 2 Power switch 20 3 Power-on lamp 20, 127 4 Self-timer lamp 30 AF-assist illuminator 25, 124 5 Eyelet for camera strap 11 6 Built-in flash 28 7 Built-in microphone 67, 71, 75 8 Lens - Nikon S710 |  S710 User's Manual - Page 17
1 2 3456 7 Parts of the Camera Introduction 14 15 8 9 10 11 12 13 16 17 18 19 1 Monitor 6 2 Indicator 74, 77 10 d button 10, 33, 48, 72, 94, 108 11 Tripod socket 12 Battery-chamber/ memory card slot cover 14, 18 13 Lock lever 14, 18 14 Pin cover 80, 82, 86 15 Cable connector 80, 82, - Nikon S710 |  S710 User's Manual - Page 18
28 16 Focus area (Face Priority 24, 103 7 Battery level indicator 20 17 Metering area 99 8 Vibration reduction/ motion detection icon.........21, 123, 124 18 Shutter speed 24 19 Exposure display 58 9 "Date not set" indicator 139 Time zone indicator 117 20 ISO sensitivity 29, 101 21 - Nikon S710 |  S710 User's Manual - Page 19
9h59m59s 1 Date of recording 16 2 Time of recording 16 3 Volume indicator 67, 74, 77 4 Battery level indicator 20 5 Image mode 95 Movie options 72 a Current frame number/ 6 total number of frames 26 b Movie length 74 7 Internal memory indicator 26 8 Voice memo recording guide 67 - Nikon S710 |  S710 User's Manual - Page 20
26) will also activate shooting mode. If the camera is turned off, hold down c to turn the camera on in playback mode (A 26). The e ( priority auto mode (A 56) Scene auto selector mode (A 44) Scene mode (A 33) Manual mode (A 58) Smile mode (A 46) High-speed continuous mode (A 48) Playback-mode - Nikon S710 |  S710 User's Manual - Page 21
Display o (exposure compensation) menu (A 32). Flash mode Apply selection. Display p (macro mode) menu (A 31). 1 Items can also be selected by pressing the rotary In this manual, H, I, J and K are used in some cases for indicating the up, down, left and right operating parts of the rotary multi - Nikon S710 |  S710 User's Manual - Page 22
area mode Autofocus mode Exit Press the rotary multi selector K or k to proceed to the next set of options. AF area mode Face priority Auto Manual Center Exit Press the rotary multi selector K or k to apply selection. 10 - Nikon S710 |  S710 User's Manual - Page 23
screen to view a description of the currently selected menu option. To return to the original menu, press g (j) again. Continuous Choose single frame, continuous mode, BSS (camera chooses sharpest shot in series), or multi-shot 16. Exit Back Attaching the - Nikon S710 |  S710 User's Manual - Page 24
First Steps First Steps Charging the Battery The camera uses a Rechargeable Li-ion Battery EN-EL12 (supplied). Charge the battery with the Battery Charger MH-65 (supplied). 1 Connect the power cable. Connect the power cable to the battery charger 1 and insert the wall plug into a power outlet 2. - Nikon S710 |  S710 User's Manual - Page 25
: Stop charging immediately, unplug the charger, and take both the battery and charger to your retailer or Nikon service representative. 3 Unplug the charger. Remove the battery and unplug the charger. B Note on the Battery Charger The supplied battery charger is for use only with a Rechargeable - Nikon S710 |  S710 User's Manual - Page 26
EN-EL12 (supplied) that has been fully charged, using the Battery Charger MH-65 (supplied), into your camera (A 12). 1 Open the battery-chamber/memory card slot cover. 1 2 Insert the battery. Confirm that the positive (+) and negative (-) terminals are oriented correctly as described on the label - Nikon S710 |  S710 User's Manual - Page 27
Battery Turn the camera off and make sure that the power-on lamp and the monitor have gone out before opening the battery-chamber/memory card slot cover. To eject the battery, slide the orange battery latch in the direction shown 1. The battery The time allowed to elapse before the camera enters the - Nikon S710 |  S710 User's Manual - Page 28
k. If No is selected, the date and time will not be set. 4 Press J or K to select your home time zone (city name) (A 119) and press the k button. Date Set time and date? No Yes London Casablanca D Daylight Saving Time To use the camera in an area where daylight saving time is in effect, press H on - Nikon S710 |  S710 User's Manual - Page 29
First Steps D Changing the date and time • To change the date and time, select Date from Date (A 117) in the setup menu (A 114) and follow the instructions starting from the above step 5. • To change the time zone and the daylight saving settings, select Time zone from Date in the setup menu - Nikon S710 |  S710 User's Manual - Page 30
on removable Secure Digital (SD) memory cards (available separately) (A 133). If a memory card is inserted in the camera, pictures are automatically stored on the memory card and pictures recorded to the memory card can be played back, deleted or transferred. Remove the memory card to store pictures - Nikon S710 |  S710 User's Manual - Page 31
turn the camera off or open the battery-chamber/memory card slot cover until formatting is complete. • The first time you insert the memory cards used in other devices into the COOLPIX S710, be sure to format them using this camera (A 128). B The Write Protect Switch SD memory cards are equipped - Nikon S710 |  S710 User's Manual - Page 32
mode, an automatic, "point-and-shoot" mode recommended for first-time users of digital cameras. 1 Press the power switch to turn on the camera. The power-on lamp (green) will light for a moment and the monitor will turn on. In this step, the lens will also open. Proceed to step 4 when A is displayed - Nikon S710 |  S710 User's Manual - Page 33
camera shaking and blurred subjects are reduced. Basic Photography and Playback: Auto Mode 11 Internal memory indicator Pictures will be recorded to internal memory (approximately 42 MB). When memory card in A (Auto) Mode In A (auto) mode, macro mode (A 31) and exposure compensation (A 32) can be - Nikon S710 |  S710 User's Manual - Page 34
and other objects away from the lens, flash, selftimer lamp and microphone. When taking pictures in "tall" orientation, turn the camera so that the built-in flash is above the lens. Basic Photography and Playback: Auto the zoom buttons are pressed. 11 Zoom out Zoom in Optical Digital zoom zoom 22 - Nikon S710 |  S710 User's Manual - Page 35
in the center of the screen. Maximum magnification of optical zoom. Digital zoom is in effect. Basic Photography and Playback: Auto Mode C Digital Zoom and Interpolation Unlike optical zoom, digital zoom uses a digital imaging process known as interpolation to magnify images, resulting in slight - Nikon S710 |  S710 User's Manual - Page 36
pressed halfway. • When the camera is unable to focus, the focus area, or focus indicator, blinks red. Change the composition and try again. 2 Press the shutter-release button the rest of the way down. The picture will be recorded to the memory card or internal memory. 1/250 F2.8 Shutter Aperture - Nikon S710 |  S710 User's Manual - Page 37
battery-chamber/memory card slot cover. Removing the memory card or battery while pictures are being recorded could result in loss of data or in damage to the recorded data, camera or card. C Autofocus Autofocus may not perform as expected in the following situations. In some rare cases times, - Nikon S710 |  S710 User's Manual - Page 38
multi selector or press H, I, J or K to display the pictures (A 9). Pictures may be displayed briefly at low resolution while being read from the memory card or internal memory. Press c or the shutter-release button to switch to shooting mode. When C is displayed, pictures stored in the internal - Nikon S710 |  S710 User's Manual - Page 39
mode will be started up. The lens does not extend. C Viewing Pictures • Pictures stored in the internal memory can only be viewed if no memory card is inserted. • Pictures taken in" selected from the playback menu (A 108) or the list by date menus (A 70), multiple pictures can be deleted. 27 - Nikon S710 |  S710 User's Manual - Page 40
a range of approx. 0.5-8.5 m (1 ft. 8 in.-27 ft.) when the camera is zoomed out all the way. With maximum optical zoom applied, the range is approx Y Auto Flash fires automatically when lighting is poor. Auto with red-eye reduction Reduces "red-eye" in portraits (A 29). Off Flash will not fire even - Nikon S710 |  S710 User's Manual - Page 41
remaining battery level Red-eye Reduction The COOLPIX S710 is equipped with an advanced red-eye reduction system. Pre-flashes are fired several times at low intensity before the main flash, to reduce "red-eye." If the camera detects "redeye" after a picture is taken, Nikon's own In-Camera Red Eye Fix - Nikon S710 |  S710 User's Manual - Page 42
to choose 10s or 2s and press k. 10s (ten seconds): Suited for important occasions (such as weddings) 2s (two seconds): Suited for preventing camera shake The mode selected for self-timer is displayed. Self-timer If a setting is not applied by pressing k within a few seconds, the selection - Nikon S710 |  S710 User's Manual - Page 43
position is set to the wide-angle side where the F mark turns green, the camera can focus at distances as close as 30 cm (1 ft.) from the lens. Macro mode C Macro Mode In the macro mode, the camera focuses continuously, even when the shutter-release button is not pressed halfway to lock the - Nikon S710 |  S710 User's Manual - Page 44
to alter exposure from the value suggested by the camera to make pictures brighter or darker. 1 Press o (exposure compensation). • The exposure compensation guide is displayed. • Exposure compensation is not available in mode M (manual). 2 Use the rotary multi selector to adjust exposure. • When - Nikon S710 |  S710 User's Manual - Page 45
Shooting Suited for the Scene Using the Scene Mode Camera settings are automatically optimized for the selected subject type. The following scene modes are available. b Portrait c Landscape d Sports e Night portrait f Party/indoor g Beach/snow h Sunset i - Nikon S710 |  S710 User's Manual - Page 46
screen. • Digital zoom is not available. m V* n Off* p Off o 0.0* * Other settings can be selected. c Landscape Use this mode for vivid landscapes and cityscapes. • Camera focuses at infinity flash mode (A 28); n, self-timer 34 (A 30); p, macro mode (A 31); o, exposure compensation (A 32). - Nikon S710 |  S710 User's Manual - Page 47
image mode setting and the memory card used. • The AF- camera. • If no faces are recognized, focus will be on the center of the screen. • Digital red-eye reduction. 2 Other settings can be selected. f Party/indoor Captures the effects of candlelight and other indoor background lighting. • Camera - Nikon S710 |  S710 User's Manual - Page 48
is pressed halfway, the focus area or focus indicator (A 6) always glows green; however, focus may not be set for near subjects, while the camera focuses at infinity. • The AF-assist illumination turns off automatically regardless of the setting of the AF-assist illumination (A 124). m W n Off - Nikon S710 |  S710 User's Manual - Page 49
and other small objects at close range. • The macro mode (A 31) will turn ON and the zoom lens when the zooming position is set to the wide-angle side where the F mark turns green. • AF area mode is set to Manual (A 103). When k is pressed, the camera can select the active focus area. • The camera - Nikon S710 |  S710 User's Manual - Page 50
Mode" (A 40) for details. • AF area mode is set to Manual (A 103). When k is pressed, the camera can select the active focus area. m W n Off* p On do not want to use the flash. • Camera focuses on subject in center of frame. • BSS (best shot selector) can be used to shoot (A 100). - Nikon S710 |  S710 User's Manual - Page 51
Scene Using the Scene Mode n Copy Provides clear pictures of text or drawings on a white board or in print. • Camera focuses on subject in center of frame. • Use macro mode (A 31) to focus at short ranges. • Colored text and drawings may not show up well. m W* n Off* p Off* o 0.0* * Other - Nikon S710 |  S710 User's Manual - Page 52
33). • The macro mode (A 31 amount of red, or lens when the zooming position is set to the 11 wide-angle side where the F mark turns green. • As pictures are easily affected by camera shake, check the Vibration reduction (A 123) setting and hold the camera steadily. • AF area mode is set to Manual - Nikon S710 |  S710 User's Manual - Page 53
of the way down takes the picture. 1/250 F2.8 • When the camera is unable to focus, the focus area will blink. Change the composition and flash is disabled. The macro mode (A 31) will be locked to ON. C White balance in Food Mode • Increasing the amount of red or blue will decrease illumination - Nikon S710 |  S710 User's Manual - Page 54
Taking Pictures for a Panorama The camera focuses on the subject in the center of the frame. Use a tripod for best results. Turn Vibration reduction (A the direction is fixed when k is pressed. The white fixed direction I is displayed. Apply flash mode (A 28), self-timer (A 30), macro mode (A 31 - Nikon S710 |  S710 User's Manual - Page 55
camera returns to step 2. Using the Scene Mode End 8 Shooting Suited for the Scene B Panorama Assist Flash mode (A 28), self-timer (A 30), macro camera enters standby mode with the auto off function (A 127) during shooting. Setting the time from the supplied Software Suite CD. Transfer End 10 - Nikon S710 |  S710 User's Manual - Page 56
to one of the following scene modes by selecting the Scene auto selector mode and pointing the camera at the subject. • Auto (A 20) • Portrait (A 34) • Night portrait (A 35 scene mode you want is not chosen. In such a case, select the auto 44 mode (A 20) or select the scene mode (A 33) - Nikon S710 |  S710 User's Manual - Page 57
flash mode (A 28). • When U (Auto) is selected, the camera automatically sets the flash mode according to the determined scene mode. • When modes (except high-speed continuous mode and movie mode). • Digital zooming is not available. • The macro mode button (A 9, 31) on the rotary multi selector is - Nikon S710 |  S710 User's Manual - Page 58
Each time the shutter is released, the camera automatically memory or removal Secure Digital (SD) memory card has no capacity. C Shooting in the Smile Mode When either of the following conditions persists in the Smile mode, the Auto off (A 127) will trigger and the camera will turn off. • The camera - Nikon S710 |  S710 User's Manual - Page 59
release button is automatically released. • When the Face priority doesn't take effect, the camera focuses on subject in center of frame. C Available Functions in Smile Mode • continuous mode and movie mode). • Digital zoom is not available. D More Information See, "Autofocus" (A 25) for more information. - Nikon S710 |  S710 User's Manual - Page 60
ISO sensitivity is set automatically within the range of ISO 900 to 3200. • The image mode setting (A 95) is fixed at M Normal (2048). • The focus, exposure, and white balance settings are fixed at the values for the first picture in each series. 1 Enter high-speed continuous mode by pressing e in - Nikon S710 |  S710 User's Manual - Page 61
green and focus will be locked. • When the camera is unable to focus, the focus area will blink on shutter speed settings and the data transfer speed of the memory card. • As the ISO sensitivity is • Digital zooming is not available. • The flash setting is fixed at W (off). • The macro mode - Nikon S710 |  S710 User's Manual - Page 62
Use to freeze or blur motion. V Aperture-priority auto (A 56) User chooses aperture; camera selects shutter speed for best results. Use to blur background or bring both foreground and background into focus. U Manual (A 58) User controls shutter speed, aperture and ISO sensitivity. Shooting in - Nikon S710 |  S710 User's Manual - Page 63
W, X, V and U modes B Note on W, X, V and U Shooting Modes The Motion detection turns off automatically regardless of the setting of the Motion detection. D Shutter Speed and Aperture The same exposure can be achieved with different combinations of shutter speed and aperture, allowing you to - Nikon S710 |  S710 User's Manual - Page 64
in shooting mode, selecting W (use the rotary multi selector), and then pressing k. Programmed auto 2 Frame the subject, focus, and shoot. When the camera recognizes a face (front view), that face will be framed by a yellow double border (by default) (A 103). When shooting non-human subjects or - Nikon S710 |  S710 User's Manual - Page 65
W (Programmed Auto) Mode B Note on Shutter Speed When Continuous, BSS or Multi-shot 16 is selected for Continuous (A 100), the slowest shutter speed available is 1 s. B Note on ISO Sensitivity • When the ISO sensitivity is changed by following Step 7 (A 59) in the shooting mode U and a picture is - Nikon S710 |  S710 User's Manual - Page 66
selector counterclockwise makes the shutter speed slower, and rotating it clockwise makes the speed faster. 1/250 F2.8 11 3 Focus and shoot. When the camera recognizes a face (front view), that face will be framed by a yellow double border (by default) (A 103). When shooting non-human subjects or - Nikon S710 |  S710 User's Manual - Page 67
shutter speed and try again. • When the shutter speed is made slower and the shutter speed indicator turns red, noise will be reduced in the recorded image. In such case, image recording time becomes longer. B Note on Shutter Speed • When Continuous, BSS or Multi-shot 16 is selected for Continuous - Nikon S710 |  S710 User's Manual - Page 68
can be set to values between f/2.8 and f/6.7; at maximum zoom, aperture can be set to values between f/5.6 and f/7.3. 3 Focus and shoot. When the camera recognizes a face (front view), that face will be framed by a yellow double border (by default) (A 103). When shooting non-human subjects or when - Nikon S710 |  S710 User's Manual - Page 69
) let more light into the camera, small apertures (large f-numbers) less. When the camera is zoomed out, the focal length of the lens diminishes and the f-number decreases. When the camera is zoomed in, the focal length and f-number increase. The COOLPIX S710 has a lens with a focal length of 6-21 - Nikon S710 |  S710 User's Manual - Page 70
rotary multi selector), and then pressing k. Manual 2 Press the rotary multi selector K to shutter speed, aperture and ISO sensitivity each time the rotary multi selector K is pressed. of deviation from the exposure value measured by the camera is displayed for a few seconds in the exposure - Nikon S710 |  S710 User's Manual - Page 71
multi selector K to activate the aperture setting. U (Manual) Mode 5 Rotate the rotary multi selector to choose an value and ISO sensitivity as necessary. 4800 1/125 F2.8 11 8 Focus and shoot. When the camera recognizes a face (front view), that face will be framed by a yellow double border (by - Nikon S710 |  S710 User's Manual - Page 72
the shutter speed indicator turns red, noise will be reduced in the recorded image. In such case, image recording time becomes longer. B Shutter default setting) or High ISO sensitivity auto, ISO sensitivity will change to manual setting by selecting the U shooting mode. • When the ISO sensitivity - Nikon S710 |  S710 User's Manual - Page 73
More on Playback Viewing Multiple Pictures: Thumbnail Playback Press f (h) in full-frame playback mode (A 26) to display pictures in "contact sheets" of thumbnail images. The following operations can be performed while thumbnails are displayed. 19 To Use Description A Choose pictures Use the - Nikon S710 |  S710 User's Manual - Page 74
displayed in the monitor. • The guide displayed in the right bottom in the monitor will show which part of the image is currently displayed. The 104) will be enlarged using the face which was focused on during shooting time as the centralized point. • If several faces are recognized, the picture - Nikon S710 |  S710 User's Manual - Page 75
S710 digital cameras. • If a copy created using the COOLPIX S710 is viewed on a different digital camera, the picture may not be displayed or may not be transferred to a computer. • Editing functions are not available when there is not enough free space in the internal memory or on the memory card - Nikon S710 |  S710 User's Manual - Page 76
Editing Pictures Enhancing Brightness and Contrast: D-Lighting D-Lighting can be used to create copies with enhanced brightness and contrast, brightening dark portions of a picture. Enhanced copies are stored as separate files. 1 Select the desired picture from full-frame (A 26) or thumbnail (A 61) - Nikon S710 |  S710 User's Manual - Page 77
Editing Pictures Creating a Cropped Copy: Crop This function is only available when u is displayed in the monitor with playback zoom (A 62) enabled. Cropped copies are stored as separate files. 1 Press g (i) in full-frame playback mode to zoom in on the image. Cropping can be done by enlarging the - Nikon S710 |  S710 User's Manual - Page 78
More on Playback Editing Pictures g Resizing Pictures: Small Picture Create a small copy of the current picture. Small copies are stored as JPEG files with a compression ratio of 1:16. The following sizes are available. Option l 640×480 m 320×240 n 160×120 Description Suited to television - Nikon S710 |  S710 User's Manual - Page 79
for the current picture, it must be deleted before a new voice memo can be recorded. • The COOLPIX S710 cannot be used to attach voice memos to pictures shot with cameras other than the COOLPIX S710. D More Information See "Image/Sound File and Folder Names" (A 134) for more information. 67 - Nikon S710 |  S710 User's Manual - Page 80
pictures exist will be listed. List by date 2 Choose the desired date and press k. Camera lists up to 29 dates. If pictures exist for more than 29 dates, all pictures recorded earlier than most recent 29 dates will be listed together as Others. List by date 15/11/2008 3 10/11/2008 2 Others - Nikon S710 |  S710 User's Manual - Page 81
playbackmode menu Switch to shooting mode k l d e c Press k to display the first picture taken on the selected date. Press f (h) in full-frame playback to return to the calendar or list by date mode 26 selected before viewing in full-frame playback. Press l to delete all pictures taken on - Nikon S710 |  S710 User's Manual - Page 82
full-frame and press d. More on Playback B Print Set When print marking already exists for pictures taken on dates other than that specified, a confirmation dialog Save print marking for other dates? will be displayed. Select Yes to add the new print to the existing marking. Select No to remove - Nikon S710 |  S710 User's Manual - Page 83
when the shooting screen appears. Do not open the battery-chamber / memory card slot cover. Removing the memory card or the battery during the movie recording may result in loss of the movie data or damage to the camera or the memory card. D Changing Movie Settings Movie options, or Autofocus mode - Nikon S710 |  S710 User's Manual - Page 84
. 16 min * All figures are approximate. Maximum movie length or frames varies with make of memory card. The maximum file size for movies is 2 GB. Even if the memory card has a capacity greater than 4 GB, the camera displays the maximum movie length for the file size of 2 GB. D More Information 72 - Nikon S710 |  S710 User's Manual - Page 85
Movie Menu Autofocus mode Choose how the camera focuses in movie mode. Option A Single AF (default setting) B Full-time AF Description Camera focuses when shutter-release button is pressed halfway and locks at this position during shooting. Camera focuses continuously until focus is acquired and - Nikon S710 |  S710 User's Manual - Page 86
Movie Playback In full-frame playback mode (A 26), movies are recognized by the Movie options icon (A 72). To play a movie, display it in full-frame playback mode and press k. 15/11/2008 15:30 0010.AVI Movies Use the zoom buttons g/f to adjust playback volume. Rotating the rotary multi selector - Nikon S710 |  S710 User's Manual - Page 87
The indicator lamp lights during recording. After about 30 seconds, the camera's auto off function is enabled and the monitor turns off. See, time to end recording. Recording will end automatically if the internal memory or memory card becomes full, or after five hours of recording on the memory card - Nikon S710 |  S710 User's Manual - Page 88
2008 17:30 00:01:00/ 00:46:47 Index 0 1 Date of recording Time remaining Index number To Reactivate the monitor Pause/resume recording Create index blink. During recording, press the rotary multi selector to create index. Camera can skip to any index during playback. Start of recording is index - Nikon S710 |  S710 User's Manual - Page 89
rotary multi selector), and then pressing k. 2 Choose the desired file and press k. The selected file will be played back. Voice recording Voice recording Max. rec. time 00:44:47 001 15/11/2008 17:30 002 26/11/2008 13:00 003 29/11/2008 16:40 Copy Play Voice Recordings - Nikon S710 |  S710 User's Manual - Page 90
Progress indicator Sound file playback 001 15/11/2008 17:30 00:00:15/00:01:00 Index 0 1 Date and time of recording Length of recording Index number Index Volume Use the zoom buttons g/f to adjust playback volume. Rotating the rotary multi selector enables fast-forwarding/ - Nikon S710 |  S710 User's Manual - Page 91
press k. q: Copy recordings from internal memory to memory card r: Copy recordings from memory card to internal memory 3 Choose the copy option and press k. Selected files: Proceed to step 4 Copy all files: Proceed to step 5 Copy sound files Exit Camera to card Selected files Copy all files Exit - Nikon S710 |  S710 User's Manual - Page 92
jack. Yellow White 3 Tune the television to the video channel. See the documentation provided with your television for details. 4 Hold down c to turn on the camera. The camera enters playback mode, and the pictures taken will be displayed on the television. While connected to the TV, the - Nikon S710 |  S710 User's Manual - Page 93
. C If You Are Using Windows 2000 Professional • Do not connect the camera to the computer. • Use a card reader or similar device to transfer pictures stored on the memory card to the computer (A 84). • If the camera has been connected to the computer, the Found New Hardware Wizard dialog is - Nikon S710 |  S710 User's Manual - Page 94
to the computer using the supplied USB cable. 4 Turn on the camera. The power-on lamp will light. Windows Vista When the AutoPlay dialog is displayed, click Copy pictures to a folder on my computer using Nikon Transfer. Nikon Transfer will start. To bypass this dialog in the future, check Always do - Nikon S710 |  S710 User's Manual - Page 95
. When ViewNX is installed, ViewNX automatically starts to check the transferred pictures. For more information on using Nikon Transfer, refer to help information contained in Nikon Transfer. 6 Disconnect the camera when transfer is complete. Turn the camera off and disconnect the USB cable. 83 - Nikon S710 |  S710 User's Manual - Page 96
support these features of the memory card. • At the Nikon Transfer default settings, Nikon Transfer will start automatically when a memory card is inserted into the card reader or similar device. See step 5 of "Transferring Pictures from a Camera the on-screen instructions and help information - Nikon S710 |  S710 User's Manual - Page 97
printing pictures transferred to a computer from your personal printer and printing over a direct camera-to-printer connection, the following options are also available for printing pictures: • Insert a memory card into a DPOF-compatible printer's card slot • Take a memory card to a digital photo - Nikon S710 |  S710 User's Manual - Page 98
printer using the supplied USB cable. Connecting to Televisions, Computers and Printers 4 Turn on the camera. When connected correctly, the PictBridge startup screen 1 will be displayed in the camera monitor. Then the print selection screen will be displayed 2. 1 2 Print selection 15/11 2008 - Nikon S710 |  S710 User's Manual - Page 99
Connecting to a Printer Printing Pictures One at a Time After connecting the camera to the printer correctly (A 86), print pictures by following the procedure below. 1 Use the rotary multi selector to choose the desired picture and press k. Press f (h) - Nikon S710 |  S710 User's Manual - Page 100
Start print Copies Paper size Exit Printing 002/004 Cancel Current print/ total number of prints Printing Multiple Pictures After connecting the camera to the printer correctly (A 86), print pictures by following the procedure below. 1 When the print selection screen is displayed, press d. The - Nikon S710 |  S710 User's Manual - Page 101
and press k. Choose Cancel and press k to return to the print menu. Print all images All pictures stored in the internal memory, or on the memory card, are printed one at a time. The menu shown at right will be displayed. To print, choose Start print and press k. Choose Cancel and press k to return - Nikon S710 |  S710 User's Manual - Page 102
k. Back Printing 002/010 Cancel Current print/ total number of prints Connecting to Televisions, Computers and Printers B Paper Size The camera supports the following paper sizes: Default (the default paper size for the current printer), 3.5 × 5 in., 5 × 7 in., 100 × 150 mm, 4 × 6 in., 8 × 10 - Nikon S710 |  S710 User's Manual - Page 103
create digital "print orders" for printing on DPOF-compatible devices (A 152). When the camera is connected to a PictBridge-compatible printer, pictures can be printed from the printer according to the DPOF print order you have created for pictures on the memory card. If the memory card is removed - Nikon S710 |  S710 User's Manual - Page 104
compatible (A 152) printer which supports printing of shooting date and photo information is used. • Photo information cannot be printed when the camera is connected directly to a printer, via the supplied USB cable, for DPOF printing (A 88). • Date and Info are reset each time the print set menu is - Nikon S710 |  S710 User's Manual - Page 105
Choose how the camera meters exposure. C Continuous Change settings for Continuous or BSS (best shot selector). E ISO sensitivity Control camera's sensitivity to light Playback and Setup Menus B Camera settings that cannot be applied at the same time Some functions may not be set at the same - Nikon S710 |  S710 User's Manual - Page 106
Shooting Options: The Shooting Menu Displaying the Shooting Menu Enter W (Programmed Auto), X (Shutter-Priority Auto), V (Aperture-Priority Auto), or U (Manual) by pressing e in shooting mode, and then pressing k. Press d to display the shooting menu. Programmed auto Shooting menu Image mode - Nikon S710 |  S710 User's Manual - Page 107
Shooting Menu A Image Mode Pictures taken with a digital camera are recorded as image files. The size of the Normal (4352) (default setting) R Normal (3264) 4,352 × 3,264 3,264 × 2,448 Best choice in most situations. The compression ratio is approximately 1:8. L Normal (2592) 2,592 × 1,944 - Nikon S710 |  S710 User's Manual - Page 108
of the picture (due to JPEG compression). In addition, this number may differ depending on the make of memory card, even if the capacity for the memory card is the same. Setting Internal memory Memory card1 Print size (printed at (approx. 42 MB) (256 MB) 300 dpi; cm/in.)2 Q High (4352P) 6 30 - Nikon S710 |  S710 User's Manual - Page 109
seen in the shade, direct sunlight, or under incandescent lighting. Digital cameras can mimic this adjustment by processing images according to the color of automatically adjusted to suit lighting conditions. Best choice in most situations. b Preset manual Neutral-colored object used as reference - Nikon S710 |  S710 User's Manual - Page 110
lamp with a red shade look as though they had been taken under white light). 1 Place a white or gray reference object under the lighting that will be used during shooting. 2 Use the rotary multi selector to choose b Preset manual in the White balance menu, and press k. The camera zooms in. White - Nikon S710 |  S710 User's Manual - Page 111
camera meters exposure. G Matrix (default setting) Camera sets exposure for entire frame. Recommended in most situations. q Center-weighted Camera -center subjects. Shooting, Playback and Setup Menus B Note on Metering While digital zooming is in effect, metering is set to center-weighted or spot. - Nikon S710 |  S710 User's Manual - Page 112
best shot selector). Flash will be switched off for Continuous, BSS or Multi-shot 16, and focus, exposure and white balance are fixed at the values for the first picture in each series. U Single (default setting) One shot is taken each time image mode setting and the memory card used. B Note on BSS - Nikon S710 |  S710 User's Manual - Page 113
colored pixels concentrated in dark parts of the image. Auto and the flash is off, the camera compensates by raising sensitivity to a that, the ISO sensitivity can be changed manually. 100, 200, 400, 800, mode mark on the screen will be displayed in red during shooting. • When ISO sensitivity is set - Nikon S710 |  S710 User's Manual - Page 114
Shooting Options: The Shooting Menu F Color Options Make colors more vivid or record pictures in monochrome. n Standard color (default setting) Use for pictures exhibiting natural color. o Vivid color Use to achieve a vivid, "photoprint" effect. p Black-and-white Record pictures in black-and-white. - Nikon S710 |  S710 User's Manual - Page 115
the focus area selected by the camera will be displayed in the monitor. 1/125 F3.2 11 1/125 F3.2 11 Focus area x Manual This option is suited to screen is displayed. To end focus-area selection and adjust the flash, macro, self-timer and exposure compensation settings, press k. To return to - Nikon S710 |  S710 User's Manual - Page 116
Focus area D More Information See, "Autofocus" (A 25) for more information. Face Priority When the camera is pointed at a person's face, the camera automatically recognizes the face and focuses on it. In the following cases, the face priority feature will take effect. • When AF area mode is set to - Nikon S710 |  S710 User's Manual - Page 117
including whether or not the subject is facing the camera. • In some rare cases shooting subjects with which autofocus may not perform as mode setting to Manual or Center in W, X, V, and U modes, refocus on another subject positioned at the same distance from the camera as the actual portrait - Nikon S710 |  S710 User's Manual - Page 118
Shooting Options: The Shooting Menu I Autofocus mode Choose how the camera focuses. A Single AF (default setting) Camera focuses when shutter-release button is pressed halfway. B Full-time AF Camera adjusts focus continuously until shutter-release button is pressed halfway. Use with moving subjects. - Nikon S710 |  S710 User's Manual - Page 119
Shooting Options: The Shooting Menu Camera Settings that Cannot Be Set at the Same Time Restrictions apply to the following settings in W, X, V and U modes. Flash mode Flash turns off at Continuous settings of Continuous, BSS or Multi-shot 16. Applied - Nikon S710 |  S710 User's Manual - Page 120
Print set Select pictures to print and the number of copies for each. b Slide show View pictures stored in the internal memory or on a memory card in an automatic slide show. c Delete Delete all or selected pictures. d Protect Protect selected pictures from accidental deletion. f Rotate image Change - Nikon S710 |  S710 User's Manual - Page 121
, a check mark (y) is displayed in the top left corner of the current picture. Repeat steps 1 and 2 to select additional pictures. Erase selected images Back 3 To fix the selection of pictures, press k. Shooting, Playback and Setup Menus 109 - Nikon S710 |  S710 User's Manual - Page 122
back pictures, stored in the internal memory or on a memory card, one by one in an automated "slide show". 1 Use the rotary multi selector to choose Start and press k. To change the interval between pictures, choose Frame intvl, select the desired interval time, and press k before choosing Start - Nikon S710 |  S710 User's Manual - Page 123
B Notes on Deletion • Once deleted, pictures cannot be recovered. Transfer important images to a computer before deletion. • Pictures marked with this function. Note, however, that formatting the camera's internal memory or the memory card will permanently erase protected files (A 128). Protected - Nikon S710 |  S710 User's Manual - Page 124
Playback Options: The Playback Menu f Rotate Image Set the picture orientation (vertical or horizontal frame) displayed on the camera monitor after the pictures are taken. Pictures can be rotated 90° clockwise or counterclockwise. Pictures that were recorded in the portrait (vertical) orientation - Nikon S710 |  S710 User's Manual - Page 125
are no pictures stored on the memory card when playback mode is applied, the message Memory contains no images. will be displayed. Press d to display the copy option screen, and copy the pictures stored in the camera's internal memory to the memory card. D More Information See, "Image/Sound File - Nikon S710 |  S710 User's Manual - Page 126
off Set time before camera enters standby mode. l/m Format memory/Format card Format internal memory or memory card. n Language Choose the language used for camera monitor display. o Video mode Adjust settings necessary for connection to television. p Reset all Restore camera settings to - Nikon S710 |  S710 User's Manual - Page 127
Basic Camera Setup: The Setup Menu Displaying the Setup Menu First, display the playback-mode or shooting-mode selection menu by pressing e. Then select F (use the rotary multi selector), and press k. Set up Set up Menus Welcome screen Date Monitor settings Date imprint • Use the rotary multi - Nikon S710 |  S710 User's Manual - Page 128
select the welcome screen to be displayed when the camera is turned on. None (default setting) No welcome screen will be displayed. COOLPIX Displays a welcome screen. Select an image Select a picture in the internal memory or on the memory card for the welcome screen. Choose a picture in the picture - Nikon S710 |  S710 User's Manual - Page 129
clock and choose home and travel destination time zones. Date Set camera clock to current date and time. The operation of each option displayed is as follows. • JK: Move through the items (day, month, year, hour, minute and the order of the date). • HI: Adjusts the content of the selected item - Nikon S710 |  S710 User's Manual - Page 130
the travel destination. While the travel destination time zone is selected, the Z icon will be displayed in the monitor when the camera is in shooting mode. Shooting, Playback and Setup Menus B The Clock Battery The clock battery charges when the main battery is installed or an AC adapter is - Nikon S710 |  S710 User's Manual - Page 131
Setup: The Setup Menu C Time Zones (A 16) The camera supports the time zones listed below.For time differences not listed below, set the camera clock to local time. UTC +/- -11 -10 Location Midway, Samoa Hawaii, Tahiti -9 Alaska, Anchorage -8 PST (PDT): Los Angeles, Seattle, Vancouver -7 MST - Nikon S710 |  S710 User's Manual - Page 132
Basic Camera Setup: The Setup Menu e Monitor Settings Choose whether or not to X, V and U, a framing grid is displayed to help frame pictures; other current settings or operation guide is displayed for a few seconds, as in Auto info above. In other shooting modes, the current settings or operation - Nikon S710 |  S710 User's Manual - Page 133
Basic Camera Setup: The Setup Menu f Date Imprint Date and time are imprinted on pictures. Date can be printed from printers that do not support the date imprinting (A 92). Off (default setting) Date and time are not imprinted on pictures. Date Date is imprinted on the bottom right corner of - Nikon S710 |  S710 User's Manual - Page 134
Choose Number of days, Years and days, or Yrs, mnths, days and press k. Display options Number of days Years and days Yrs, mnths, days Sample date counter time stamps are shown below. 02/ 18.11.2008 Two days remaining 02/ 22.11.2008 Two days elapsed Shooting, Playback and Setup Menus 122 - Nikon S710 |  S710 User's Manual - Page 135
Setup Menus B Notes on Vibration reduction • Vibration reduction may take a few seconds to activate after the power is turned on, or the camera enters shooting mode from playback mode. Wait until the display stabilizes before shooting. • Due to characteristics of the vibration reduction function - Nikon S710 |  S710 User's Manual - Page 136
(See "The vibration reduction / motion detection icon" (A 21)). B Notes on Motion detection • Motion detection may not be able to completely reduce the camera and subject blurs in some situations. • If the subject is extremely blurred, too dark, the Motion detection won't start. • The pictures taken - Nikon S710 |  S710 User's Manual - Page 137
Digital Zoom will not be activated (Except when shooting a movie). B Notes on Digital Zoom • When digital zoom is in effect, AF area mode is set to Center (A 103). • Digital times when the focus has been locked, and three times when an error is detected, and welcome sound is played when the camera - Nikon S710 |  S710 User's Manual - Page 138
camera orientation is recorded with shooting. Auto (default setting) Camera orientation orientation Camera rotated 90º clockwise Camera rotated 90º counterclockwise Off Camera with the shutter-release button held down, camera orientation information is fixed at that of the first picture in each - Nikon S710 |  S710 User's Manual - Page 139
1 min (default setting), 5 min, or 30 min. Shooting, Playback and Setup Menus C Notes on Auto Off The time allowed to elapse before the camera enters standby mode is fixed in the following cases: • While menus are displayed: 3 minutes • While slide show is in progress: Up to 30 minutes • While - Nikon S710 |  S710 User's Manual - Page 140
pictures to a computer before formatting. • Do not turn the camera off, disconnect the AC adapter, or open the battery-chamber/memory card slot cover during formatting. • The first time you insert the memory cards used in other devices into the COOLPIX S710, be sure to 128 format them using this - Nikon S710 |  S710 User's Manual - Page 141
Setup: The Setup Menu n Language Choose one of 24 languages for display of camera menus and messages. Czech Danish German (default setting) Spanish Greek French Indonesian Italian Hungarian Dutch Norwegian Polish Portuguese Russian Finnish Swedish Turkish Arabic Simplified Chinese - Nikon S710 |  S710 User's Manual - Page 142
: The Setup Menu p Reset All When Reset is selected, the camera's settings will be restored to their default values. Pop-up Menu Option Flash mode (A 28) Self-timer (A 30) Macro mode (A 31) Exposure compensation (A 32) Default value Auto Off Off 0.0 Scene Mode Option Scene menu (A 33) Default - Nikon S710 |  S710 User's Manual - Page 143
settings in the menus will remain unaffected even if Reset all is performed. Shooting menu: Preset manual in the White balance menu (A 98) Setup menu: settings for picture registered for Welcome screen (A 116), Date (A 117), Date counter (A 122), Language (A 129), and Video mode (A 129) Shooting - Nikon S710 |  S710 User's Manual - Page 144
Basic Camera Setup: The Setup Menu r Firmware Version View the current camera firmware version. COOLPIX S710 Ver. X.X Back Firmware version Shooting, Playback and Setup Menus 132 - Nikon S710 |  S710 User's Manual - Page 145
closing the battery chamber/memory card slot cover. If part of the cord runs out of the groove, the cover or cord may be damaged when the cover is closed. USB Cable UC-E6 Audio/Video Cable EG-CP14 Approved Memory Cards The following Secure Digital (SD) memory cards have been tested and approved - Nikon S710 |  S710 User's Manual - Page 146
Identifier (not shown on camera monitor) Extension (signifies fivecharacter identifier: "P_" plus a three-digit sequence number for pictures taken using panorama recordings (e.g. "101SOUND"; A 75), and "NIKON" for all other pictures (e.g. "100NIKON"). When memory card inserted. Technical Notes 134 - Nikon S710 |  S710 User's Manual - Page 147
or vibration. B Handle the lens and all moving parts with care Do not apply force to the lens, lens cover, monitor, memory card slot or battery chamber. These parts are easily damaged. Applying force to the lens cover could result in camera malfunction or damage to the lens. Should the monitor break - Nikon S710 |  S710 User's Manual - Page 148
may recover some of its charge. • Should the battery terminals become dirty, the camera may not turn on due to poor contact. Wipe the terminals off with a clean, dry cloth before use. • If the battery will not be used for some time, insert it in the camera and run it flat before removing it for - Nikon S710 |  S710 User's Manual - Page 149
Caring for the Camera Cleaning Avoid touching glass parts with your fingers. Remove dust or lint with a blower (typically a small device with a rubber bulb attached to one end that is pumped to produce a stream of air out the other end). To remove fingerprints Lens or other stains that cannot - Nikon S710 |  S710 User's Manual - Page 150
camera away. Remove the battery if the camera will not be used for an extended period. Do not store the camera camera out of storage at least once a month. Turn the camera on and release the shutter a few times before putting the camera flicker, contact your Nikon-authorized service representative. C - Nikon S710 |  S710 User's Manual - Page 151
cannot be read. Error accessing memory card. • Use approved card. 133 • Check that connectors 18 are clean. • Confirm that memory 18 card is correctly inserted. P Card is not formatted. Format card? No Yes Memory card has not been formatted for use in COOLPIX S710. Choose Yes and press - Nikon S710 |  S710 User's Manual - Page 152
Display N Out of memory. Problem Memory card is full. P Image cannot be saved. Error occurred while recording picture. Camera has run out of file numbers. Picture cannot be used for welcome screen. Cannot copy picture. P Camera has run out of file Sound file cannot be numbers. saved - Nikon S710 |  S710 User's Manual - Page 153
off, remove and reinsert battery, and turn camera on. If error persists, contact retailer or Nikon-authorized service representative. PR Printer error: check printer status. Running out of ink or printer error. Check printer. After checking the ink or solving the problem, select Resume and press - Nikon S710 |  S710 User's Manual - Page 154
Error Messages Display Problem PR Printer error: out of paper No paper is loaded in printer. PR Ink error. Printer error: check ink PR Ink cartridge is empty. Printer error: out of ink PR Printer error: file corrupt An error caused by the image file has occurred. Solution A Load the - Nikon S710 |  S710 User's Manual - Page 155
120 • Monitor is dirty. Clean monitor. 137 • Monitor has dimmed to save power. Monitor 15 brightens when controls are used. Camera turns off without warning • Battery is low. 20 • Camera has turned off automatically to save 127 power. • Battery is cold. 136 Date and time of recording are - Nikon S710 |  S710 User's Manual - Page 156
turn the camera on again. In the event of continued malfunction, contact your retailer or Nikon-authorized service representative. Note that disconnecting the power source as described above may result in the loss of any data not recorded to internal memory or the memory card at the time the problem - Nikon S710 |  S710 User's Manual - Page 157
Troubleshooting Shooting Problem Cause/Solution A No picture taken when shutter- • When camera is in playback mode, press c 26 release button is pressed. or the shutter-release button. • When menus are displayed, press d. 10 • Battery is exhausted. 20 • When flash lamp blinks, flash is - Nikon S710 |  S710 User's Manual - Page 158
Troubleshooting Problem does not light. • Off is selected for AF assist option in camera setup menu. • AF-assist illuminator turns off automatically in some modes. high-speed continuous mode. Pictures appear smeared. Lens is dirty. Clean lens. Colors are unnatural. White balance does not - Nikon S710 |  S710 User's Manual - Page 159
Troubleshooting Problem Cause/Solution Unexpected results when flash set to V (auto with red-eye reduction). If taking pictures with V (auto with red-eye reduction) or fill flash with slow sync and redeye reduction when scene mode is set to Night portrait or scene auto selector, In-Camera Red - Nikon S710 |  S710 User's Manual - Page 160
Troubleshooting Problem Nikon Transfer does not start when camera is connected. Pictures to be printed are not displayed. Cannot select paper size with camera. Cause/Solution • Camera is off. • Battery is exhausted. • USB cable is not correctly connected. • If the computer OS used is Windows 2000 - Nikon S710 |  S710 User's Manual - Page 161
Nikon COOLPIX S710 Digital Camera Type Effective pixels Image sensor Lens Focal length f/-number Construction Digital zoom Vibration reduction Autofocus (AF) Focus range (from lens to actual picture) • Internal memory (approx. 42 MB) • SD (Secure Digital) memory cards DCF, Exif 2.2, and DPOF - Nikon S710 |  S710 User's Manual - Page 162
transfer protocol Video output I/O terminal Supported languages Power sources Battery digital zoom 2× or more) Programmed auto exposure with flexible program, shutterpriority auto, aperture-priority auto, manual ) Approx. 155 g (5.5 oz) (without battery and SD memory card) 0 to 40 °C (32 to 104 °F) - Nikon S710 |  S710 User's Manual - Page 163
Charger MH-65 Rated input Rated capacity Rated output Applicable batteries Charging time Operating temperature Dimensions (W × H × D) Length of power cable Weight AC 100 to 240 V, 50/60 Hz, 0.08 to 0.05 A 8 ~ 12 VA DC 4.2 V, 0.7 A Nikon Rechargeable Li-ion Battery EN-EL12 Approx. 150 minutes - Nikon S710 |  S710 User's Manual - Page 164
-wide standard that allows pictures to be printed from print orders stored on the memory card. • Exif version 2.2: This camera supports Exif (Exchangeable Image File Format for Digital Still Cameras) version 2.2, a standard that allows information stored with photographs to be used for optimal color - Nikon S710 |  S710 User's Manual - Page 165
, 56 U Manual 50, 58 mode 28 k High-speed continuous mode 48 C List by date mode 68 p Macro mode 31 d button 5, 10 e Mode button 5, 8 Battery 12, 14, 118 Battery charger 12, 133 Battery latch 5, 14 Battery level 20 Battery-chamber 5 Battery-chamber/memory card slot cover 5, 14, 18 Beach/snow g 36 Best - Nikon S710 |  S710 User's Manual - Page 166
J JPG 134 L Landscape c 34 Language 129 Lens 4, 149 Li-ion rechargeable battery 12, 14 List by date menus 70 List by date mode 68 Lock lever 5 M Macro mode 31 Making voice recordings 75 Manual 50, 58 Matrix 99 Memory capacity 20, 96 Memory card 18, 133 Memory card slot 5, 18 Menus 115 Metering 99 - Nikon S710 |  S710 User's Manual - Page 167
lamp 4, 20 Preset manual 98 Print 87, 88, 91 Print Set 91 Print Set (Date) 92 Printer 85 Programmed auto 50, 52 Protect 111 Index R Rechargeable battery 133 Rechargeable Li-ion battery 12, 14 Record orientation 126 Recording movies 71 Red-eye reduction 28, 29 Replay mode 26, 27 Reset all 130 Rotary - Nikon S710 |  S710 User's Manual - Page 168
Index T Thumbnail Playback 61 Time zone 16, 117, 119 Tripod socket 5 TV 80 TV movie 72 U USB cable 81, 82 V Vibration reduction 123 Video Mode 80, 129 Vivid color 102 - Nikon S710 |  S710 User's Manual - Page 169
157 - Nikon S710 |  S710 User's Manual - Page 170
158 - Nikon S710 |  S710 User's Manual - Page 171
- Nikon S710 |  S710 User's Manual - Page 172
No reproduction in any form of this manual, in whole or in part (except for brief quotation in critical articles or reviews), may be made without written authorization from NIKON CORPORATION. © 2008 Nikon Corporation Printed in Europe CT8H01(11) 6MMA9611-01
-
 1
1 -
 2
2 -
 3
3 -
 4
4 -
 5
5 -
 6
6 -
 7
7 -
8
-
9
-
10
-
11
-
12
-
13
-
14
-
15
-
16
-
17
-
18
-
19
-
20
-
21
-
22
-
23
-
24
-
25
-
26
-
27
-
28
-
29
-
30
-
31
-
32
-
33
-
34
-
35
-
36
-
37
-
38
-
39
-
40
-
41
-
42
-
43
-
44
-
45
-
46
-
47
-
48
-
49
-
50
-
51
-
52
-
53
-
54
-
55
-
56
-
57
-
58
-
59
-
60
-
61
-
62
-
63
-
64
-
65
-
66
-
67
-
68
-
69
-
70
-
71
-
72
-
73
-
74
-
75
-
76
-
77
-
78
-
79
-
80
-
81
-
82
-
83
-
84
-
85
-
86
-
87
-
88
-
89
-
90
-
91
-
92
-
93
-
94
-
95
-
96
-
97
-
98
-
99
-
100
-
101
-
102
-
103
-
104
-
105
-
106
-
107
-
108
-
109
-
110
-
111
-
112
-
113
-
114
-
115
-
116
-
117
-
118
-
119
-
120
-
121
-
122
-
123
-
124
-
125
-
126
-
127
-
128
-
129
-
130
-
131
-
132
-
133
-
134
-
135
-
136
-
137
-
138
-
139
-
140
-
141
-
142
-
143
-
144
-
145
-
146
-
147
-
148
-
149
-
150
-
151
-
152
-
153
-
154
-
155
-
156
-
157
-
158
-
159
-
160
-
161
-
162
-
163
-
164
-
165
-
166
-
167
-
168
-
169
-
170
-
171
-
172
 |
 |
En
DIGITAL CAMERA
User’s Manual