Panasonic AE3000U Operating Instructions
Panasonic AE3000U - LCD Projector - HD 1080p Manual
 |
UPC - 791871111741
View all Panasonic AE3000U manuals
Add to My Manuals
Save this manual to your list of manuals |
Panasonic AE3000U manual content summary:
- Panasonic AE3000U | Operating Instructions - Page 1
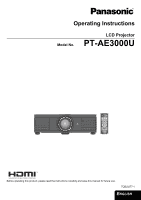
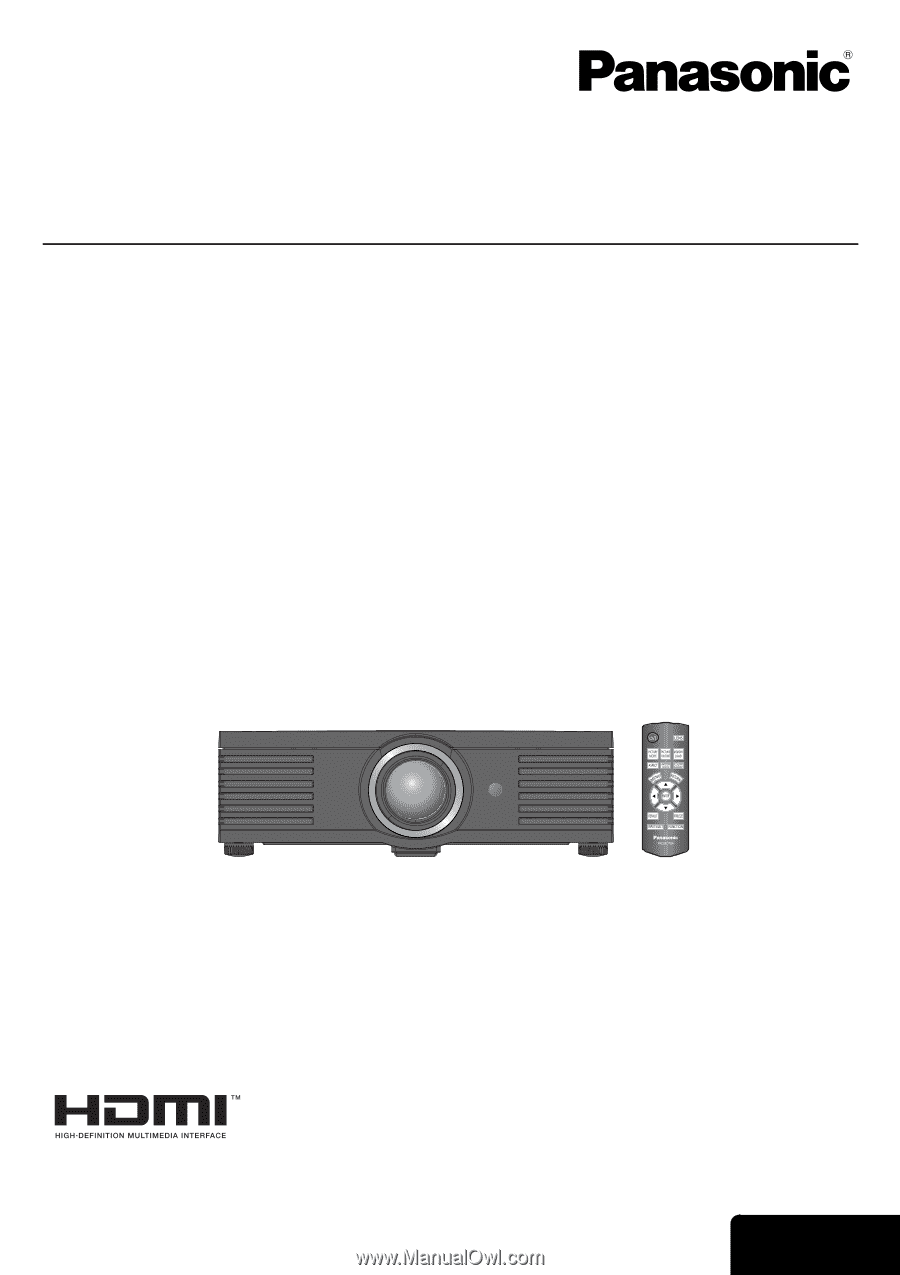
Operating Instructions Model No. LCD Projector PT-AE3000U Before operating this product, please read the instructions carefully and save this manual for future use. TQBJ0277-1 ENGLISH - Panasonic AE3000U | Operating Instructions - Page 2
Panasonic LCD projector. The serial number of your product may be found on its bottom. You should note it in the space provided below and retain this booklet in case service is required. Model number: PT-AE3000U maintenance (servicing) instructions in the Discharge (HID) lamp that contains mercury - Panasonic AE3000U | Operating Instructions - Page 3
and used in accordance with the instructions, may cause harmful interference to PT-AE3000U Trade Name: Panasonic Responsible party: Panasonic Corporation of North America Address: One Panasonic Way, Secaucus, New Jersey 07094 Telephone number: (888) 411 - 1996 This device complies with Part - Panasonic AE3000U | Operating Instructions - Page 4
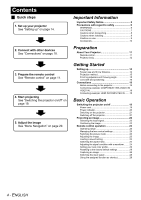
9 Cautions on use 9 Accessories 10 Preparation About Your Projector 11 Remote control 11 Projector body 12 Getting Started Setting up 14 Screen size and throw distance 14 Projection method 15 Front leg adjusters and throwing angle 15 Lens shift and positioning 16 Connections 18 Before - Panasonic AE3000U | Operating Instructions - Page 5
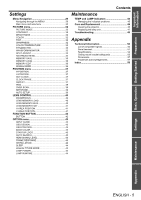
BUTTON 42 OPTION menu 43 INPUT GUIDE 43 OSD DESIGN 43 OSD problems 45 Care and Replacement 46 Cleaning the projector 46 Replacing the lamp unit 47 Troubleshooting 49 Appendix Technical Information 50 List of compatible signals 50 Serial terminal 51 Specifications 54 Ceiling mount - Panasonic AE3000U | Operating Instructions - Page 6
, there is the danger that injury or electric shocks may occur. Do not use other than an authorized ceiling mount bracket. If foreign objects or water get inside the projector, or if the projector is dropped or the cabinet is broken, disconnect the power plug from the wall outlet. Continued use of - Panasonic AE3000U | Operating Instructions - Page 7
which is mounted on the ceiling. Do not set up the projector in a high temperature environment, such as near a heater or in direct sunlight. Failure to observe this may result in fire, malfunction or plastic deterioration. Do not set up the projector outdoors. The projector is designed for - Panasonic AE3000U | Operating Instructions - Page 8
dealer about the replacement of the lamp unit and check the inside of the projector. Ask an Authorized Service Center to clean inside the projector at least once a year. If dust is left to build up inside the projector without being cleaned out, it can result in fire or problems with operation. It - Panasonic AE3000U | Operating Instructions - Page 9
the duration of use. The lamp may explode or shorten the lamp life by shocks or chipping damage. The lamp may explode only occasionally after using the projector. The lamp may explode if using the projector after the instructed lamp replacement timing. When the lamp exploded, it emits the internal - Panasonic AE3000U | Operating Instructions - Page 10
Important Information Precautions with regard to safety Accessories Make sure the following accessories are provided with your projector. Remote control for PT-AE3000U (x1) N2QAYB000316 Safety cable TTRA0141 Attachment screw (x1) Safety cable (x1) Lens cover (x1) TXFKK01VKF5 (Attached to the - Panasonic AE3000U | Operating Instructions - Page 11
Your Projector Remote activate the menu item with the ENTER button. (page 29) Reset some of the settings to the factory default. (page 28) Switch to cycle through the input method. disassemble the remote control. Contact an Authorized Service Center for repairs. • Do not keep pressing the remote - Panasonic AE3000U | Operating Instructions - Page 12
of this opening. Lens shift dial • Vertical Lens shift dial • Horizontal (page 16) (page 16) Power/LAMP/TEMP indicators (page 20/page 45) Air filter (page 46) Projection lens MAIN POWER Switch the projector on/off. (page 21) Lens cover Protects the projection lens from dust or dirt. Remote - Panasonic AE3000U | Operating Instructions - Page 13
to the projector. (page 19) Safety cable attachment point Attach the safety cable when mounted on the ceiling. (page projector should only be used with the attached power cord to ensure optimum performance and avoid damage to the projector. • Do not open the top cover other than replacing the lamp - Panasonic AE3000U | Operating Instructions - Page 14
Setting up Screen size and throw distance You can adjust the projection size with 2.0x zoom lens. Calculate and define the throw distance as tilt the projector -30° body less than approximately ± 30° vertically. Overtilting may result in shortening the component's life. • For the best quality of - Panasonic AE3000U | Operating Instructions - Page 15
translucent screen is required for rear projection. • When mounting the projector on the ceiling, the optional ceiling mount bracket (ET-PKE2000, ET-PKE1000S) is required. • See "Ceiling mount bracket safeguards" on page 56. Front leg adjusters and throwing angle You can screw up/down the front leg - Panasonic AE3000U | Operating Instructions - Page 16
Setting up Lens shift and positioning If the projector is not positioned right in front of the of the lens. J Adjusting the lens shift dials Q Horizontal shift You can place the projector where the projector lens is up to 40% horizontally off-center from the screen and then adjust the image - Panasonic AE3000U | Operating Instructions - Page 17
position is fixed 100% SH Shift range 100% 40% SW 40% Projector NOTE: • When the projector is located right in front of the center of the screen and the lens shift dials is centered, you will get the best quality of the projection image. • When the Lens shift dial • Vertical is at the - Panasonic AE3000U | Operating Instructions - Page 18
Connections Before connecting to the projector Read and follow the operating and connecting instructions of each peripheral device. The peripheral devices must be some equipment may not project the image properly or other problems could be encountered. See "Serial terminal" on page 51. 18 - ENGLISH - Panasonic AE3000U | Operating Instructions - Page 19
the side of the power cord secure lock with the side guide rail of the AC IN terminal of the projector and slide it in. Rail guide Latch 3. Slide the power cord secure lock up along the side guide rail and remove. Rail guide 3. Place the latch to the latch catcher and press until it - Panasonic AE3000U | Operating Instructions - Page 20
and recovering to projection mode. Recovery may take a while. NOTE: • See "TEMP indicator" on page 45. • While the projector is cooling the lamp, do not switch the MAIN POWER button off or unplug the power cord. • The electric consumption in standby mode is 0.08 W. Basic Operation 20 - ENGLISH - Panasonic AE3000U | Operating Instructions - Page 21
can reduce the operational sound by setting the LAMP POWER in OPTION menu to the ECO-MODE. See "LAMP POWER" on page 44. • When starting up the projector, some small rattling or tinkling sound may be heard, or the display may flicker for the characteristics of the lamp. Those are normal and will not - Panasonic AE3000U | Operating Instructions - Page 22
and zoom by the remote control. See "LENS CONTROL" on page 40. 3. Adjust the angle of the projector. Screw down the front leg adjusters and adjust the angle vertically. See "Front leg adjusters and throwing angle" on page 15. NOTE: • Do not touch the air exhaust port as this may cause burns - Panasonic AE3000U | Operating Instructions - Page 23
is facing to the screen and press the required buttons to operate the projector. The signal will be reflected off the screen. The operating range may the remote control may not operate correctly. Managing the lens control settings You can adjust the focus and zoom of the the LENS button to - Panasonic AE3000U | Operating Instructions - Page 24
. 2. Press the ENTER button to activate the selected setting. NOTE: • If you have not saved any settings, MEMORY1 - 16 will not be displayed. Switching the aspect ratio The aspect ratio will be selected automatically, or you can switch it manually by pressing the ASPECT button. Press the button - Panasonic AE3000U | Operating Instructions - Page 25
range: -32 to +32 4. Press F G to display the CONTRAST. 5. Adjust by pressing I H. Adjust the up line of the waveform to 100 % (100 IRE). Setting range: -64 to +64 FULL SCAN(Y)/SINGLE LINE SCAN(Y) BRIGHTNESS Adjust the bottom line of the waveform to 0 % (0 or 7.5 IRE) CONTRAST Adjust the top - Panasonic AE3000U | Operating Instructions - Page 26
the left of the cursor. The menu items are displayed on the upper part of the screen. You may fail to adjust when the very edge point stored in LOG. You can store up to 8 logs under LOG for each PICTURE MODE setting. 5. Press MENU or RETURN to return to the previous menu. Repeat the steps above - Panasonic AE3000U | Operating Instructions - Page 27
press G then perform step 3. 5. Select OK and press the ENTER button to set the entered text as a name. Press the ENTER button without entering any text the COLOR MANAGEMENT button and select the PROFILE menu. The profile settings of the selected PICTURE MODE will be displayed. 3. Select the - Panasonic AE3000U | Operating Instructions - Page 28
settings to the factory defaults by pressing DEFAULT button of the remote control. Display the required sub-menu or the menu items and press the button again. NOTE: • Some menu items are not available to reset by pressing the DEFAULT button. Adjust each menu item manually See "INPUT GUIDE" on page - Panasonic AE3000U | Operating Instructions - Page 29
the main menu Press the MENU button to display the main menu and the operating guidance. Main menu Sub-menu Current settings PICTURE POSITION LANGUAGE LENS CONTROL FUNCTION BUTTON OPTION SELECT RETURN ENTER PICTURE MODE CONTRAST BRIGHTNESS COLOR TINT SHARPNESS COLOR TEMPERATURE DYNAMIC IRIS - Panasonic AE3000U | Operating Instructions - Page 30
vary by the selected input signal. • Sub-menu items vary according to the selected input signal. • Some settings are adjustable without any signals. Settings PICTURE PICTURE MODE NORMAL COLOR1 CINEMA1 CINEMA3 DYNAMIC COLOR2 CINEMA2 page 32 CONTRAST (Default: 0) page 32 BRIGHTNESS (Default - Panasonic AE3000U | Operating Instructions - Page 31
Menu Navigation OPTION INPUT GUIDE page 43 DETAILED OFF CEILING REAR/CEILING SLEEP page 44 OFF 15 MIN. 20 MIN. 25 MIN. 30 MIN. 35 MIN. 55 MIN. 40 MIN. 45 MIN. 50 MIN. 60 MIN. HIGH ALTITUDE MODE page 44 OFF ON LAMP POWER page 44 NORMAL ECO-MODE LAMP RUNTIME page 44 Settings - Panasonic AE3000U | Operating Instructions - Page 32
(1 080)/50i 1 125 (1 080)/60p 1 125 (1 080)/50p TINT You can adjust the skin tone in the projected image. More reddish More greenish Setting range: -32 to +32 When COMPUTER signal is connected, only available with the following signals. 1 125 (1 080)/60i 1 125 (1 080)/50i 1 125 (1 080 - Panasonic AE3000U | Operating Instructions - Page 33
. Less bluish More bluish Setting range: -6 to +6 DYNAMIC IRIS You can switch automatic adjustment of the lamp and the lens iris on waveform monitor. If the waveform is not in the range, adjust it for the best quality. See "Adjusting the signal condition with a waveform" on page 24. OFF FULL - Panasonic AE3000U | Operating Instructions - Page 34
ADVANCED MENU You can perform more detailed image adjustment manually. J GAMMA You can adjust linear intensity at 3 levels. Press I H to increase/decrease 1 point. Levels Default setting GAMMA HIGH 0 GAMMA MID 0 GAMMA LOW 0 Setting range: -8 to +8 J CONTRAST You can adjust the amount of - Panasonic AE3000U | Operating Instructions - Page 35
Deactive NOTE: • CINEMA REALITY is effective only with interlace signals. J TV-SYSTEM When the video signal is changed, the setting switches automatically. You can switch the setting manually to match the video data. Press I H to cycle through the options. AUTO NTSC SECAM PAL-N NTSC 4.43 PAL - Panasonic AE3000U | Operating Instructions - Page 36
button. Indicated with ★ is in use, and ✩ is empty. 4. Name the memory setting. Use F G I H to specify the location of the required character to enter and press G then perform step 4. 6. Select OK and press the ENTER button to set the entered text as a name. NOTE: • If you leave the text box empty - Panasonic AE3000U | Operating Instructions - Page 37
needs to be adjusted before adjusting the CLOCK PHASE. ASPECT You can switch the aspect ratio manually when needed. J Aspect ratio depend on signals Press I H to cycle through the , 1 125 (1 080)/50p, 1 125 (1 080)/60p, 1 125 (1 080)/24p, 750 (720)/50p, 750 (720)/60p signals Settings ENGLISH - 37 - Panasonic AE3000U | Operating Instructions - Page 38
the image to adjust the edge vertically. Adjusts to 16:9 size with preserving original ratio. Escape the menu mode and press FG to adjust vertically. Settings 38 - ENGLISH - Panasonic AE3000U | Operating Instructions - Page 39
ratio to required setting automatically. You can switch the system off manually. KEYSTONE If the projector is aligned non partly dropped, you can use this function to adjust and project it properly. Setting range: 0 to +10 OVER SCAN is not available with COMPUTER signals. Shrink Enlarge Setting - Panasonic AE3000U | Operating Instructions - Page 40
adjust the ZOOM/FOCUS menu again. • If the power supply is stopped while loading or saving the lens memory, saved adjusted settings may differ from the original after restart the projector. Adjust the ZOOM/FOCUS menu again. ZOOM/FOCUS You can use the 2 different test patterns to adjust the focus and - Panasonic AE3000U | Operating Instructions - Page 41
, move the cursor to the text box to select the required place and press G then perform step 2. 5. Select OK and press the ENTER button to set the entered text as a name. H-AREA POSITION You can move the frame area horizontally, such as aligning the right or left frame edge to the - Panasonic AE3000U | Operating Instructions - Page 42
G BRIGHTNESS B page 28 page 39 page 32 page 34 page 32 page 33 page 40 page 32 page 34 *1.The underlined item is factory default setting. Settings 42 - ENGLISH - Panasonic AE3000U | Operating Instructions - Page 43
29. See "Main menu and sub-menu" on page 30. INPUT GUIDE When you change the input method, the guidance appears in the upper right for 15 seconds. ON Active OFF Deactive AUTO SEARCH When the projector is turned on, the input terminals are detected and an input Settings ENGLISH - 43 - Panasonic AE3000U | Operating Instructions - Page 44
method according to the projector position. Press I H to cycle through the options. See "Projection method" on page 15. FRONT/DESK FRONT/CEILING REAR/DESK REAR/CEILING Setting on a desk/floor and projecting from front Mounting on the ceiling and projecting from front Setting on a desk/floor and - Panasonic AE3000U | Operating Instructions - Page 45
See page 54. Replace the air filter in the proper method. See page 46. Turn on the projector and set the HIGH ALTITUDE MODE to ON. See page 44. NOTE: • If no problem is found or the problem remains, do not turn on the projector. Instead contact an Authorized Service Center. Maintenance ENGLISH - Panasonic AE3000U | Operating Instructions - Page 46
projector without attaching the air filter. J Replacing the air filter The air filter should be replaced when cleaning is ineffective and when replacing the lamp unit. A replacement air filter (TXFKN01VKF5) is provided with a replacement lamp unit, ET-LAE1000. Contact an Authorized Service Center - Panasonic AE3000U | Operating Instructions - Page 47
-head screwdriver. Contact an Authorized Service Center to purchase a replacement lamp unit (ET-LAE1000). When the projector is mounted on the ceiling, do not work directly under the projector or put your face closer to the projector. NOTE: • Prior to replacing the lamp unit, allow it to cool - Panasonic AE3000U | Operating Instructions - Page 48
the top cover is opened. • When the projector is mounted on the ceiling, keep the lamp unit paralleled up and remove. J Resetting the LAMP RUNTIME If the lamp usage time has passed 2 000 hours (when LAMP POWER has been set to NORMAL), the projector will switch to standby mode after approximately - Panasonic AE3000U | Operating Instructions - Page 49
Troubleshooting Should any problem persist, contact your dealer. Problem indicator is lit or flashes. LAMP indicator is lit or flashes. The lamp unit cover has not been securely set correctly. The projector may not be at the correct distance from the screen. The lens may be dirty. The projector - Panasonic AE3000U | Operating Instructions - Page 50
Technical Information List of compatible signals Mode Display Display resolution (dots)*1 Scanning frequency H (kHz) V (Hz) Dot clock frequency (MHz) Picture quality*2 NTSC/NTSC 4.43/ PAL-M/PAL60 - 720 x 480i 15.7 59.9 - A PAL/PAL-N/SECAM - 720 x 576i 15.6 50.0 - A 525i (480i - Panasonic AE3000U | Operating Instructions - Page 51
start with STX, and proceed to Command, Parameter and end with ETX. You can add the required parameter. The projector can not receive any command for 10 seconds after the lamp is switched on. Wait 10 seconds before sending the command. If sending multiple commands, check that a response has been - Panasonic AE3000U | Operating Instructions - Page 52
cooling fan is operating after the lamp has switched off, the lamp is not turned back on again straight away in order to protect the lamp. Parameter: CP1 = COMPONENT1 PICTURE WAVEFORM ASPECT PICTURE MODE Resetting to the factory default setting. (page 28) Freezing the projected screen. Parameter: - Panasonic AE3000U | Operating Instructions - Page 53
Technical Information J Inquiry commands Command QPW QFZ QIN QOT QPM QSH QWM Control contents Parameter Power status 000 = OFF 001 = ON FREEZE status INPUT signal status OFF TIMER status PICTURE MODE status BLANK status WAVEFORM status 0 = OFF 1 = ON CP1 = COMPONENT1 IN SVD = S-VIDEO IN - Panasonic AE3000U | Operating Instructions - Page 54
78 mm) Aspect ratio 16 : 9 LCD panel Display method 3 transparent LCD panels (RGB) Drive method Active matrix method Lens Lamp Pixels 2 073 600 (1 920 x Throw distance 1.2 m - 12 m (3'11" - 39'4") Screen aspect ratio Installation 16 : 9 FRONT/DESK, FRONT/CEILING, REAR/DESK, REAR/CEILING - Panasonic AE3000U | Operating Instructions - Page 55
in front of signal receptor) Weight Remote control Dimensions Options Cable cover Ceiling bracket 125 g (4.4 ozs.) (including batteries) Width Length Height 48 32") 28.35 mm (1 -3/32") (not including surface projection parts) ET-PCE2000 ET-PKE2000/ET-PKE1000S *1. Average value. Each product - Panasonic AE3000U | Operating Instructions - Page 56
be carried by a qualified technician. • Remove an unused ceiling mount bracket promptly. J Installing the safety cable 1. Install the ceiling mount bracket according to the Installation Instructions. 2. Loop the security cable around the ceiling mount bracket with less slack. Lace the cable of the - Panasonic AE3000U | Operating Instructions - Page 57
Dimensions Technical Information 300 (11-23/32) Unit: mm 116 (4 -9/16) 130 15 (19/6) 230 (9 -1/32) 460 (18 -3/32) 147 (5 -25/32) 60 (2 -5/16) 17 (-21/32) Trademark acknowledgements VGA and XGA are trademarks of International Business Machines Corporation. S-VGA is a registered trademark of - Panasonic AE3000U | Operating Instructions - Page 58
12 Air filter 12 Replacing 46 Air intake port 13 ASPECT 37 Remote control button 11 Remote control function 24 AUTO SEARCH 43 AUTO SETUP 39 B BACK COLOR 43 Batteries Accessory 10 Compartment 11 BLANK 42 BRIGHTNESS ADVANCED MENU 34 PICTURE menu 32 BUTTON 42 C Ceiling mount bracket 56 - Panasonic AE3000U | Operating Instructions - Page 59
13 SERIAL Basic format 51 Cable specifications 51 Communication settings 52 Connection 51 Control commands 52 Inquiry commands 53 50 TEMP Indicator 12 Indicator status 45 Throw distance 14 Throwing angle 15 TINT 32 Top cover 13, 47 Troubleshooting 49 TV-SYSTEM 35 V V-AREA POSITION - Panasonic AE3000U | Operating Instructions - Page 60
Printed in Japan S0908-2108C
-
 1
1 -
 2
2 -
 3
3 -
 4
4 -
 5
5 -
 6
6 -
 7
7 -
8
-
9
-
10
-
11
-
12
-
13
-
14
-
15
-
16
-
17
-
18
-
19
-
20
-
21
-
22
-
23
-
24
-
25
-
26
-
27
-
28
-
29
-
30
-
31
-
32
-
33
-
34
-
35
-
36
-
37
-
38
-
39
-
40
-
41
-
42
-
43
-
44
-
45
-
46
-
47
-
48
-
49
-
50
-
51
-
52
-
53
-
54
-
55
-
56
-
57
-
58
-
59
-
60
 |
 |
E
NGLISH
Operating Instructions
LCD Projector
Model No.
PT-AE3000U
Before operating this product, please read the instructions carefully and save this manual for future use.
TQBJ0277-1