Panasonic AG-HMC80PJ Editing AVCHD with Final Cut Pro 7 - Page 3
The Avchd Workflow On Apple Computers, Editing And Outputting Avchd, With Apple Final Cut Pro 7, - avccam
 |
View all Panasonic AG-HMC80PJ manuals
Add to My Manuals
Save this manual to your list of manuals |
Page 3 highlights
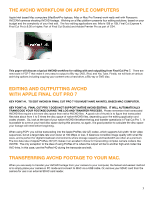
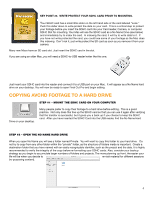
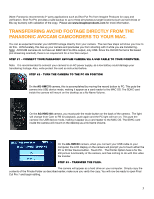
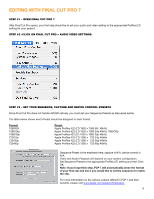
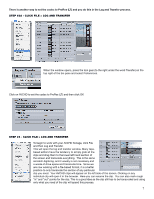
The AVCHD Workflow on apple computers Apple Intel based Mac computers (MacBookPro laptops, iMac or Mac Pro Towers) work really well with Panasonic AVCCAM cameras shooting AVCHD footage. Working on a Mac platform presents four editing solutions, based on your budget and the complexity of your final edit. The four editing applications are: iMovie '(08 or '09), Final Cut Express 4, Final Cut Pro (v.6.05 or higher, Part of Final Cut Studio) and Adobe Premier Pro as part of CS4. This paper will discuss a typical AVCHD workflow for editing with and outputting from Final Cut Pro 7. There are new tools in FCP 7 that make it very easy to output to Blu-ray, DVD, iPod, and You Tube. Finally, we will look at various archiving options including copying your content onto a hard drive, a Blu-ray or DVD disc. Editing and outputting avchd with apple final cut pro 7 KEY POINT #1. To edit AVCHD in Final Cut pro 7 you must have an Intel based MAC computer. KEY POINT #2. Final Cut pro 7 does not support native AVCHD editing. It will automatically transcode your footage during the Log and transfer process. Please remember that transcoded AVCHD files require a lot more disc space than native AVCHD files. A good rule of thumb is to figure that transcoded files take about from 4 to 5 times the disc space of native AVCHD files, depending upon the editing application and codec chosen. So, look at the size of your native AVCHD file before the log and transfer operations in Final Cut Pro 7. It is possible to overrun your hard disc space during this process, so again, it is good practice to calculate the disc space your footage will need before beginning. When using FCP7 you will be transcoding into the Apple ProRes 422 (LT) codec, which supports full-width 10-bit video sequences, but at a target data rate even lower at 100 Mbps or less. It balances incredible image quality with small file sizes, and is perfect for digital broadcast environments where storage capacity and bandwidth are often at a premium. The low data rate of Apple ProRes 422 (LT) makes it an excellent choice for transcoding complex camera codecs like AVCHD. The only exception to the idea of using ProRes LT is where the output will be to another high-end codec like AVC-Intra. In this case, use the ProRes HQ during the transcode and edit. Transferring AVCHD footage to your MAC. When you are ready to transfer your AVCHD footage from your camera to your computer, the fastest and easiest method is to simply place your camera in PC mode and connect to MAC via a USB cable. Or, remove your SDHC card from the camera for use in an external SDHC card reader. 3
-
 1
1 -
 2
2 -
 3
3 -
 4
4 -
 5
5 -
 6
6 -
 7
7 -
 8
8 -
 9
9 -
10
-
11
-
12
-
13
-
14
 |
 |
