Panasonic AG-HMC80PJ Editing AVCHD with Final Cut Pro 7 - Page 8
Outputing To Ipod
 |
View all Panasonic AG-HMC80PJ manuals
Add to My Manuals
Save this manual to your list of manuals |
Page 8 highlights
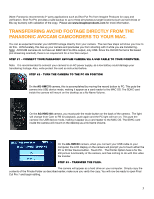
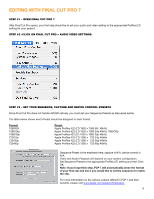
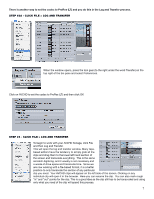
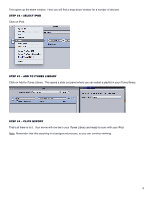
STEP #5 - CLICK ON ADD CLIP TO QUEUE. This will begin the transcoding of your AVCHD clip into the Apple ProRes preference you established earlier for easy editing. You can watch the progress bar to see the speed of the transcoding. The actual speed of the encoding will be dependent on the speed of your Mac and the length and complexity of your footage. When the transcoding is finished, your clips will appear in your bin. Note: Log and Transfer is a background process so you can start editing while you continue to log and transfer. From this point on, you will edit as you normally edit in Final Cut Pro. For more information on editing in Final Cut Pro, please visit: www.apple.com/support/finalcutpro Outputing to iPOD Final Cut Pro 7 makes it very easy to output your movie to display on an iPod STEP #1 - CLICK FILE > SHARE 8
-
 1
1 -
2
-
 3
3 -
 4
4 -
 5
5 -
 6
6 -
 7
7 -
 8
8 -
 9
9 -
 10
10 -
 11
11 -
 12
12 -
 13
13 -
14
 |
 |
