Panasonic FV-10VS1 Installation Instructions - Page 13
Installation
 |
View all Panasonic FV-10VS1 manuals
Add to My Manuals
Save this manual to your list of manuals |
Page 13 highlights
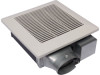
INSTALLATION VII ( WALL INSTALLATION-I ) IMPORTANT: When the product is installed on the wall, the adaptor shall be faced upward. (Fig. 21) UPI 0 Prohibition 0 Prohibition 1. Disconnect plug connector from receptacle and remove adaptor from fan body before starting installation. (Fig. 22) 0 Prohibition Fig. 21 2. Insert the suspension bracket into the adaptor. (refer to step 2 of installation II of page 8). O 3. Secure it to stud by using long screws (ST4.2X20). (Fig. 23) IMPORTANT: Ensure distance C is 3/16 of an inch (5 mm) during the installation process as follows. Wall Stud III C 3/16 (5) Unit: inches (mm) Adaptor Fig. 22 2 Long screws (ST4.2X20) FT)I ) , /I A) cl'K 7 \, 2 Long screws (ST4.2X20) ....j,... ---- A Stud A,- Fig. 23 4. Insert the suspension bracket into fan body (refer to step 2 of installation I, page 6). 5. Secure the fan body to the studs by using long screws (ST4.2X20) (refer to step 5 to step 7 of installation II of page 9). (Fig. 24) 6. Complete the duct work and wiring (refer to step 5 to 7 of the installation I of page 7). 2 Long screws (ST4.2X20) I- I ) e' HEM o . 0 8 o 0 2 Long screws ° 8 (ST4.2X20) 0 Fig. 24 7. Finish the wall work, wall hole should be aligned with the edge of the flange. ( Fig. 25 ) 8. Insert the mounting spring into slots and mount grill to fan body (refer to step 9 of installation I of page 8). 1 111 1141 0 0 ) Unit: inches (mm) 12 1/8 (305) CO 0 01 Fig. 25 13
-
 1
1 -
2
-
3
-
4
-
5
-
6
-
7
-
 8
8 -
 9
9 -
 10
10 -
 11
11 -
 12
12 -
 13
13 -
 14
14 -
 15
15 -
 16
16
 |
 |
