Panasonic KX-TS3282B Multi-line Phone - Page 16
To adjust the time and date, 30PM 12/27, ENTER=Save, Extension, Erase, Caller ID edit, Set clock - digital
 |
UPC - 037988473717
View all Panasonic KX-TS3282B manuals
Add to My Manuals
Save this manual to your list of manuals |
Page 16 highlights
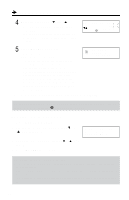
w w w Programmable Settings w w 4 Enter the year using [ ] and [ ]. • You can select the year between 2000 and 2099. • You can also select the year entering the last 2-digits using the dialing buttons ([0] to [9]). 09:30PM 12/27 2002 ENTER=Save 5 Press [ENTER] (Save key). • A beep sounds. • The clock starts working. • If 3 beeps are heard, the setting is not correct. Start again from step 2. • The display will go to the extension number assigning menu as shown on the right if you had started programming within 60 seconds after plugging in the AC adaptor. The menu will remain for 60 seconds. To assign a number, see page 17, from step 4. Extension# 12345678 Erase ENTER=Save • You can exit the programming mode any time by pressing [EXIT]. If a power failure occurs, the adjusted time/date will be retained by installing the batteries (p. 9). Readjust if " " flashing on the display. w w w To adjust the time and date 1. Press [FUNCTION/EDIT]. 2. Scroll to "Set clock" by pressing [ ] or [ ], and press [ ]. 3. Adjust the time and date, using or [ ]. 4. Press [ENTER] (Save key). Caller ID edit Set clock Assign EXT# For Caller ID service users (p. 29) • The Caller ID information will reset the clock after the first ring if the adjusted time is incorrect. • If the clock has not previously been set, the Caller ID information will not adjust the clock. • The Caller ID information will automatically adjust the clock for daylight saving time. 16
-
 1
1 -
2
-
3
-
4
-
5
-
6
-
7
-
8
-
9
-
10
-
 11
11 -
 12
12 -
 13
13 -
 14
14 -
 15
15 -
 16
16 -
 17
17 -
 18
18 -
 19
19 -
 20
20 -
 21
21 -
22
-
23
-
24
-
25
-
26
-
27
-
28
-
29
-
30
-
31
-
32
-
33
-
34
-
35
-
36
-
37
-
38
-
39
-
40
-
41
-
42
-
43
-
44
-
45
-
46
-
47
-
48
-
49
-
50
-
51
-
52
-
53
-
54
-
55
-
56
-
57
-
58
-
59
-
60
-
61
-
62
-
63
-
64
-
65
-
66
-
67
-
68
-
69
-
70
-
71
-
72
-
73
-
74
-
75
-
76
 |
 |
