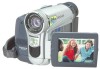
Panasonic PV GS15 Digital Video Camera - Page 14
THE ONE-TOUCH FREE-STYLE GRIP BELT, To use as a hand strap
 |
UPC - 037988977734
View all Panasonic PV GS15 manuals
Add to My Manuals
Save this manual to your list of manuals |
Page 14 highlights
Before using 1 1 2 2 (40) (40) Tripod receptacle This is a hole for attaching the Camcorder to optional tripod. (Please carefully read the operating instructions for how to attach the tripod to the Camcorder.) ≥When the tripod is used, operate the Camcorder from the Magic Wire Remote Control with Narration Mic for convenience. (When not using the remote control, attach the clip to the grip belt for convenience. When you move with remote control attached to a pocket, etc., take care to avoid tipping over the tripod.) ≥You cannot open the card slot cover when the tripod is used. Insert the card first and then attach the tripod. (42) (42) Lens hood In order to remove the lens hood, rotate it counter-clockwise 1. In order to fit it, put into slot 2, and then rotate it clockwise. ≥The lens hood has a built-in lens cover. The one-touch free-style grip belt ª To use as a hand strap If you use the grip belt as a hand strap, then you can carry or handle this Camcorder more easily. 1 Open the lock cover 1 by pinching the projections 2 on both sides. Press the lock button 3 to remove the grip belt. 2 (41) Shoulder strap fixture 1 3 ≥When removing the grip belt, tightly hold the Camcorder with both hands. (41) ≥After removing the grip belt, restore the lock cover to the original position. 2 Adjust the belt length. 1 3 12 2 ≥Put the strap through the fixture 1 and through the stopper 2 so it will not come off. Extend part 3 by at least 1 inch (2 cm). ≥Fit the other end of the belt similarly. 13 1 Flip the belt. 2 Slide 1 in the direction indicated by the arrow. 3 Fix the belt. 3 Put your hand through the strap. 14 LSQT0861 ≥Use the Magic Wire Remote Control with Narration Mic for more convenience.
-
 1
1 -
2
-
3
-
4
-
5
-
6
-
7
-
8
-
 9
9 -
 10
10 -
 11
11 -
 12
12 -
 13
13 -
 14
14 -
 15
15 -
 16
16 -
 17
17 -
 18
18 -
 19
19 -
20
-
21
-
22
-
23
-
24
-
25
-
26
-
27
-
28
-
29
-
30
-
31
-
32
-
33
-
34
-
35
-
36
-
37
-
38
-
39
-
40
-
41
-
42
-
43
-
44
-
45
-
46
-
47
-
48
-
49
-
50
-
51
-
52
-
53
-
54
-
55
-
56
-
57
-
58
-
59
-
60
-
61
-
62
-
63
-
64
-
65
-
66
-
67
-
68
-
69
-
70
-
71
-
72
-
73
-
74
-
75
-
76
-
77
-
78
-
79
-
80
-
81
-
82
-
83
-
84
-
85
-
86
-
87
-
88
 |
 |
