Pentax 17191 V20 Operating Manual
Pentax 17191 - Optio V20 Digital Camera Manual
 |
UPC - 027075139701
View all Pentax 17191 manuals
Add to My Manuals
Save this manual to your list of manuals |
Pentax 17191 manual content summary:
- Pentax 17191 | V20 Operating Manual - Page 1
Digital Camera Operating Manual To ensure the best performance from your camera, please read the Operating Manual before using the camera. - Pentax 17191 | V20 Operating Manual - Page 2
to as SD Memory Cards hereafter. Regarding trademarks • PENTAX and Optio are trademarks of HOYA CORPORATION. • SDHC logo ( ) is trademark. • This product supports PRINT Image Matching III. PRINT Image Matching enabled digital still cameras, printers and software help photographers to produce images - Pentax 17191 | V20 Operating Manual - Page 3
may cause fire or electric shocks. • If the camera emits smoke or a strange smell, or in the event of any other irregularity, stop using the camera immediately, remove the battery and contact your nearest PENTAX Service Center. Continued use of the camera may result in fire or electric shock. 1 - Pentax 17191 | V20 Operating Manual - Page 4
EXPOSE TO HIGH TEMP. (140°F / 60°C) • Remove the battery from the camera immediately if it becomes hot or begins to smoke. Be careful not to burn yourself during removal. • Some portions of the camera heat up during use, so please take care, as there is a - Pentax 17191 | V20 Operating Manual - Page 5
• If water should happen to get inside the product, consult a PENTAX Service Center. Continuing to use the product can cause a fire or electrical to excessive bending. If the AC plug cord becomes damaged, consult a PENTAX Service Center. • Do not short or touch the output terminals of the product - Pentax 17191 | V20 Operating Manual - Page 6
to the vibrations of a motorbike, car, ship, etc. If the camera is subjected to substantial vibrations, shocks or pressure, take your camera to your nearest PENTAX Service Center and have it checked. • The temperature range in which the camera can be used is 0°C to 40°C (32°F to 104°F). • The - Pentax 17191 | V20 Operating Manual - Page 7
battery performance. Avoid storing it especially in high temperatures. If the battery is left inserted and the camera is not used for a long time, the battery will over-discharge and shorten the battery's service life. • Charging the battery a day before use or on the day of use is recommended. 5 - Pentax 17191 | V20 Operating Manual - Page 8
4 Contents 6 Composition of the Operating Manual 11 Camera Features 12 Checking the Contents of the Package 15 Names of Parts 16 Names of Operating Parts 17 Monitor Indications 18 Getting Started 21 Attaching the Strap 21 Powering the Camera 22 Charging the Battery 22 Installing the - Pentax 17191 | V20 Operating Manual - Page 9
Continuous Shooting Mode 77 Using the Zoom 78 Using the Digital Wide Function (Digital Wide Mode 81 Setting the Exposure (EV Compensation 84 Displaying 98 Setting the Autofocus Conditions 100 Setting the Instant Review Time (Instant Review 101 Setting the Image Sharpness (Sharpness 102 Setting - Pentax 17191 | V20 Operating Manual - Page 10
121 Correcting Camera Shake with Digital SR 122 Slideshow 123 Playing Back Movies 125 Playing Back a Movie 125 Connecting the Camera to AV the Printing Service (DPOF 149 Printing Single Images 149 Printing All Images 151 Printing Using PictBridge 152 Connecting the Camera to the - Pentax 17191 | V20 Operating Manual - Page 11
Memo 160 Playing Back a Voice Memo 161 Settings 162 Camera Settings 162 Formatting an SD Memory Card or the Built Setting the Quick Zoom Function 176 Setting the Guide Display 177 Resetting to Default Settings (Reset 178 Troubleshooting 192 Main Specifications 194 WARRANTY POLICY 198 Index - Pentax 17191 | V20 Operating Manual - Page 12
2or 5or 3or The meanings of the symbols used in this Operating Manual are explained below. 1 indicates the reference page number for an taken when operating the camera. This is the mode for capturing still pictures and recording movies and sound files. In this manual, the mode for taking - Pentax 17191 | V20 Operating Manual - Page 13
Composition of the Operating Manual This Operating Manual contains the following chapters. 1 Getting Started 1 This chapter explains what you need to do after purchasing the camera before you start taking pictures. Be sure to read it and follow the instructions. 2 2 Quick Start This - Pentax 17191 | V20 Operating Manual - Page 14
of the key features of your camera. Together with the explanations of camera operations, it will enable you to enjoy your camera to the full. Advanced Movie Recording and Picture Taking Functions The Optio V20 has a shake reduction function to reduce camera shake during movie recording. (p.114) For - Pentax 17191 | V20 Operating Manual - Page 15
Palette and a playback mode guide in the Playback Mode Palette for a few seconds after each mode is selected. (p.53, p.59) Use the Green Mode to take pictures easily using standard settings. (p.63) Display Images and Sound Files in Calendar Format! With the Optio V20, you can display recorded images - Pentax 17191 | V20 Operating Manual - Page 16
camera for enjoying images without a PC! The Optio V20 has a variety of functions to let you enjoy playing back and editing images without having to connect the camera to your computer and transfer the images first. The camera the camera to create Panorama (p.74) and Digital Wide (p.81) pictures. 14 - Pentax 17191 | V20 Operating Manual - Page 17
the Contents of the Package Camera Optio V20 Strap O-ST20 (*) Software (CD-ROM) S-SW77 USB cable I-USB7 (*) Battery charger D-BC78 (*) Digital Camera Operating Manual AV cable I-AVC7 (*) Rechargeable lithium-ion battery D-LI78(*) AC plug cord (*) PC Connection Manual You can transfer images - Pentax 17191 | V20 Operating Manual - Page 18
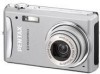
Names of Parts Front Back Self timer lamp Flash Lens Microphone Tripod socket Speaker Battery/Card cover Display Power switch Shutter release button Terminal cover PC/AV terminal 16 - Pentax 17191 | V20 Operating Manual - Page 19
Names of Operating Parts Power switch Shutter release button Zoom/w/x/f/y lever I button Q button Four-way controller 4/W button Green/i button 3 button Refer to "Understanding the Button Functions" (p.44 - p.47) for an explanation of the function of each button. 17 - Pentax 17191 | V20 Operating Manual - Page 20
14:25 13 14 15 1 Shooting mode (p.53) 2 Face Priority icon (p.56) 3 Flash mode (p.89) 4 Drive mode (p.76, p.77) 5 Camera shake warning (p.85) 6 Focus mode (p.87) 7 Digital zoom icon (p.78) Intelligent zoom icon (p.78) 8 Memory status (p.34) + : Built-in memory (without card) a : SD Memory Card - Pentax 17191 | V20 Operating Manual - Page 21
Picture Capture Mode 1 2 3 4 1/250 5 F3.5 + 1 . 0+ 1 . 0 38 8M 6 7 8 9 200 10 11 1 Bright portion (blinks red) 2 Dark portion (blinks yellow) 3 Camera shake warning (p.85) 4 Shutter speed 5 Aperture 6 Recorded pixels (p.91) 7 Quality (p.93) 8 White balance (p.94) 9 AE Metering (p.96) 10 - Pentax 17191 | V20 Operating Manual - Page 22
14:25 A9 A10 A1 Playback mode A9 Captured date and time (p.38) w : Still Picture Playback A10 Four-way controller guide Mode (p.59) A11 Key lock icon (p.64) P : Digital SR (p.122) A12 Face Priority icon (p.56) A2 Folder number (p.170) B1 Bright portion (blinks red) (p.19) A3 File number - Pentax 17191 | V20 Operating Manual - Page 23
Getting Started Getting Started Attaching the Strap Attach the strap (O-ST20) supplied with the camera. 1 1 2 1 Pass the narrow end of the strap through the strap lug. 2 Pass the other end of the strap through the loop and pull tight. 21 - Pentax 17191 | V20 Operating Manual - Page 24
to charge the battery before using it in the camera for the first time or after a long period of Place the battery in the charger so that the PENTAX logo is facing up. The charging indicator lights while • The battery has reached the end of its service life when it starts to run down soon after - Pentax 17191 | V20 Operating Manual - Page 25
camera for the first time. 1 Open the battery/card cover. Move the battery/card cover lock lever to the OPEN position 1 and open the battery/card cover 2. 2 Using the side of the battery to press the battery/card cover lock lever in the direction of 3, insert the battery with the PENTAX the PENTAX - Pentax 17191 | V20 Operating Manual - Page 26
and cause malfunction. • Insert the battery correctly. If the battery is incorrectly oriented, malfunction may result. • Do not remove the battery while the camera is turned on. • When storing the battery for more than 6 months, charge the battery for 30 minutes using the battery charger and store - Pentax 17191 | V20 Operating Manual - Page 27
Display (green) (green) (yellow) (red) [Battery depleted] Battery Status Adequate power remains. Battery is running low. Battery is running very low. Battery is exhausted. The camera will turn off after this message appears. 25 - Pentax 17191 | V20 Operating Manual - Page 28
the DC coupler. Confirm the DC coupler is locked in place. 4 Extract the DC coupler cord. Pull out the tab at the joint of the camera and the battery/card cover so that the DC coupler cord extracts from there. 5 Close the battery/card cover. 6 Connect the DC terminal of the - Pentax 17191 | V20 Operating Manual - Page 29
the AC Adapter" (p.2) before using the AC adapter. • Be sure to read the operation manual accompanying the AC adapter kit K-AC78 before using the adapter. • When connecting the AC adapter, you cannot set the camera upright on the table because the cord from the DC coupler is extracted from the - Pentax 17191 | V20 Operating Manual - Page 30
cameras or digital devices. Refer to "Formatting an SD Memory Card or the Built-in Memory" (p.162) for instructions on formatting. • Make sure that the camera is being accessed (data is being recorded or read). Backing Up Data The camera may not be able to access data in the built-in memory in the - Pentax 17191 | V20 Operating Manual - Page 31
battery/card cover 2. 2 Insert the SD Memory Card into the SD Memory Card 1 socket so that the label is facing toward the front of the camera (the side with the lens). Push the card in all the way. Images and sound may not be recorded correctly if the card is not - Pentax 17191 | V20 Operating Manual - Page 32
shooting and playback may take a long time. • For information on compatible SD Memory Cards, visit the PENTAX website. • Be sure to format an SD Memory Card that is unused or has been used on another camera. Refer to "Formatting an SD Memory Card or the Built-in Memory". (p.162) • Please note - Pentax 17191 | V20 Operating Manual - Page 33
reduces the total number of pictures that can be taken (stored in the camera's built-in memory or on the SD Memory Card). The quality of the not need to select more than the required number of pixels. As a rough guide, i (1600×1200) is adequate for making postcard-size prints. Refer to the - Pentax 17191 | V20 Operating Manual - Page 34
Getting Started Choose the appropriate number of recorded pixels and quality level for still pictures on the [A Rec.Mode] menu. Selecting the Recorded Pixels 1p.91 1 Selecting the Quality Level 1p.93 Recorded Pixels, Quality Level and Image Storage Capacity (Approximate numbers of pictures) E - Pentax 17191 | V20 Operating Manual - Page 35
Appropriate Number of Recorded Pixels According to Use m (640×480) Suitable for viewing on a TV or computer screen. D (320×240) Suitable for posting on a website or attaching to e-mail. 1 The default setting is m (640×480). Getting Started Appropriate Quality Level According to Use C D E - Pentax 17191 | V20 Operating Manual - Page 36
, the lens cover opens and the lens extends. If the Language Selection screen or Date Adjust screen appears when you turn the camera on, follow the procedure on p.36 to set the display language and/or current date and time. 2 Press the power switch again. The display turns - Pentax 17191 | V20 Operating Manual - Page 37
without taking any more pictures. 1 Press the power switch while holding down the Q button. The display turns on with the lens retracted and the camera turns on in Playback Mode. To switch from Playback Mode to A mode, press the Q button or press the shutter release button halfway. Playing Back - Pentax 17191 | V20 Operating Manual - Page 38
button 3 button The [Language/ ] screen appears when the camera is turned on for the first time. Perform the operations in time. Language, Date, and Time can be changed later. Refer to the pages below for instructions. • To change the language, follow the steps in "Changing the Display Language" (1p - Pentax 17191 | V20 Operating Manual - Page 39
selected language. The language is now switched to your desired language. To reset Hometown and the Date and Time, refer to the pages below for instructions. • To change Hometown, follow the steps in "Setting the World Time" (p.167). • To change the Date and Time, follow the steps in "Changing the - Pentax 17191 | V20 Operating Manual - Page 40
Getting Started Setting Hometown and DST 3 14 5 6 7 8 9 Press the four-way controller (3). The frame moves to [Hometown]. Press the four-way controller (5). The Hometown screen appears. Initial Setting English Hometown New York DOSFTF Use the four-way controller (45) MENU Cancel OK OK to - Pentax 17191 | V20 Operating Manual - Page 41
pm corresponding to the time. 9 Press the 4 button. The setting is set and the camera returns to capture status. Language, Date, Time, Hometown, and DST can be changed. Refer to the pages below for instructions. • To change the language, follow the steps in "Changing the Display Language" (1p.169 - Pentax 17191 | V20 Operating Manual - Page 42
Press the power switch. 38 The camera turns on and is ready to take still pictures. In this manual, this is called Still Picture Capture . The picture is taken. The image appears on the display for one second (Instant Review) and is saved to the SD Memory Card or built-in memory. (p.41) Press - Pentax 17191 | V20 Operating Manual - Page 43
image appears on the display for one second (Instant Review) immediately after it is captured. You can change the Instant Review time. (p.101) You can delete the image during Instant Review by pressing the i button. • When the camera detects that the subject's eyes are closed, the message "Closed - Pentax 17191 | V20 Operating Manual - Page 44
button 2 Q button Four-way controller Playing Back Images 1 Press the Q button after taking a picture. The image appears on the display. In this manual, this is called Q mode (Playback mode). Displaying one image in full in Q mode (Q mode default setting) is called single-image display. Press - Pentax 17191 | V20 Operating Manual - Page 45
Q button Four-way controller 2 4 button i button Quick Start Rotating the Displayed Image 1 Press the Q button after taking a picture. The image appears on the display. 2 Press the four-way controller (3). The Playback Mode Palette appears. 3 Use the four-way controller (234 5) to select s ( - Pentax 17191 | V20 Operating Manual - Page 46
on and off. (p.34) 2 Zoom/w/xlever Changes the captured area. (p.78) 3 Shutter release button Focuses the camera on the subject when pressed halfway in Still Picture Capture mode. (Except in 3, s and \ modes) (p.40) Takes the still picture when pressed down fully. (p.40) - Pentax 17191 | V20 Operating Manual - Page 47
6 Four-way controller (2) : Changes the drive mode. (p.76, p.77) (3) : Displays the Capture Mode Palette. (p.53) (4) : Changes the flash mode. (p.89) (5) : Changes the focus mode. (p.87) (23) : Adjusts \ in \ mode. (p.88) 7 4/W button Changes the information on the display. (p.85) 8 Green - Pentax 17191 | V20 Operating Manual - Page 48
1 2 3 4 5 6 3 7 8 9 Common Operations Q Mode 1 Power switch Turns the camera on and off. (p.34) 2 Zoom/f/y lever Turn towards f during single-image display to change to nine-Image display. Return to the previous display by turning - Pentax 17191 | V20 Operating Manual - Page 49
Common Operations 5 Q button Switches to A mode. (p.115) 6 Four-way controller (2) : Plays back and pauses a movie or sound file. (p.125, p.159) (3) : Displays the Playback Mode Palette. (p.60) (45) Stops a movie or sound file during playback. (p.125, p.159) : Displays the previous or next - Pentax 17191 | V20 Operating Manual - Page 50
Functions To change the camera settings, press the 3 button to display the [A Rec.Mode] menu or [W Setting] menu. Menus for World Time 03/03/2008 Folder Name Date MENU Exit The setting is complete and the camera returns to A mode 48 38 03/03/2008 14:25 100-0038 The setting is complete and the - Pentax 17191 | V20 Operating Manual - Page 51
Common Operations A guide to available button operations appears on the display during menu operation. Ex Level White Balance Focusing Area items that can be selected with the current AE Metering Sensitivity camera settings. MENU Cancel 5 Use the four-way controller (23) Auto OK OK to change - Pentax 17191 | V20 Operating Manual - Page 52
Rec.Mode] menu is displayed from A mode, the setting is saved and the camera returns to playback status. To Save the Setting and Continue with Menu Operations 6 The 3 button function differs depending on the screen. Refer to the guide indications. MENU Exit MENU : Exits the menu and returns to the - Pentax 17191 | V20 Operating Manual - Page 53
Zoom For choosing whether to use the digital zoom function p.80 Instant Review For setting the Instant Review time p.101 Memory For choosing whether to save the set values of the shooting function or return to the defaults when the camera is turned off p.106 Green Button For assigning - Pentax 17191 | V20 Operating Manual - Page 54
enters powersaving mode p.174 For setting the time until the camera turns off automatically p.175 For choosing whether to use the Quick Zoom function (p.118) when playing back images p.176 For displaying a guide for the function selectable in the Capture Mode Palette and the Playback Mode - Pentax 17191 | V20 Operating Manual - Page 55
button Setting the Shooting Mode 3 The Optio V20 has a variety of shooting modes that guide MENU Cancel OK OK using the [W Setting] menu. Refer to "Setting the Guide Display" (p.177) for details of how to operate the menu. 3 Press the 4 button. 38 The shooting mode is selected and the camera - Pentax 17191 | V20 Operating Manual - Page 56
Shooting Mode" (p.186). • You can turn off the shooting mode guide on the Capture Mode Palette. (p.177) There are 17 available shooting Keeps the camera in focus until the shutter is released. 4 Digital SR (Blur Reduction) Higher sensitivity reduces blur from both subject and camera movement. p. - Pentax 17191 | V20 Operating Manual - Page 57
Item Description D Food For capturing images of food. Saturation will be rather high to make it look appetizing. F Digital Panorama Stitches images taken with the camera to create a panoramic photograph. S Digital Wide Composites two images resulting in wider field of view. Page p.74 p.81 - Pentax 17191 | V20 Operating Manual - Page 58
I button Common Operations Setting the Face Recognition function 3 With the Optio V20, the Face Recognition function is available with all shooting modes except O mode. In the Face Recognition function, you can choose the Face Priority function that - Pentax 17191 | V20 Operating Manual - Page 59
Common Operations • The Face Recognition function cannot be set to off in b (Auto Picture), z (Natural Skin Tone), e (Portrait) or H (Kids) mode. You can select either Face Priority On or Smile Capture. • Face Priority On is automatically selected in b (Auto Picture), z (Natural Skin Tone), e ( - Pentax 17191 | V20 Operating Manual - Page 60
Level to choose a function and press the 4 button. White Balance Focusing Area AE Metering 4 Press the 3 button. MENU Cancel OK OK 3 The camera returns to capture status with the current setting. Using the Green Button 1 Press the Green button in A mode. EV Compensation 0.0 The function - Pentax 17191 | V20 Operating Manual - Page 61
icon and pressing the 4 button. 100-0038 3 03/03/2008 14:25 MENU Common Operations Digital SR Resize MENU Cancel OK OK SHUTTER Press halfway 38 MENU Cancel OK OK OK 03/03 each icon of the Playback Mode Palette, a guide for each function appears after about 2 seconds. • You can turn off the - Pentax 17191 | V20 Operating Manual - Page 62
Playback Mode Palette Item Description Page P Digital SR For reducing the camera shake in recorded images p.122 u Card and vice p.139 versa s Image Rotation For rotating still pictures p.43 D Digital Filter For processing still pictures as you desire p.141 Movie Edit [ Save as Still - Pentax 17191 | V20 Operating Manual - Page 63
Taking Pictures Taking Pictures Automatically (Auto Picture 4 Mode) In b (Auto Picture) mode, when you press the shutter release button, the camera selects the most appropriate mode from six shooting modes: (Standard), A (Night Scene), q (Landscape), e (Portrait), \ (Sport) and < (Flower) modes - Pentax 17191 | V20 Operating Manual - Page 64
Taking Pictures Shutter release button Four-way controller 4 button Setting The Functions (Program Mode) In R (Program) mode, the camera automatically sets the shutter speed 4 and aperture for taking still pictures. However, you can select other functions such as the flash mode and recorded - Pentax 17191 | V20 Operating Manual - Page 65
picture-taking using standard settings*, regardless of the settings in the [A Rec.Mode] 4 menu. 1 Press the Green button in A mode. 38 The camera switches to 9 mode. Press the Green button again to return to the status before 9 mode was selected. 2 Press the shutter release button halfway - Pentax 17191 | V20 Operating Manual - Page 66
try to display the [W Setting] menu, - (key lock icon) appears. • When the camera is turned off in 9 mode, it turns on in 9 mode next time the power Focusing Area AE Metering Sensitivity EV Compensation Digital Wide Digital Zoom Instant Review Sharpness Saturation Contrast Date Imprint , (Auto - Pentax 17191 | V20 Operating Manual - Page 67
Capture Mode Palette appears. 2 Use the four-way controller (2345) to select A (Night Scene) or 4 (Digital SR (Blur Reduction)). 3 Press the 4 button. The shooting mode is selected and the camera returns to capture status. 4 Press the shutter release button halfway. The focus frame on the display - Pentax 17191 | V20 Operating Manual - Page 68
3 button Taking Pictures Framing Your Pictures (Frame Composite) In Y (Frame Composite) mode, you can take pictures using the frames 4 stored in the camera. 1 Press the four-way controller (2) in A mode. 2 Use the four-way controller (45) to select Y (Frame Composite) and press the 4 button - Pentax 17191 | V20 Operating Manual - Page 69
. 7 Press the shutter release button fully. The picture is taken. • In Y mode, recorded pixels is fixed at h (2048 × 1536). • In b (Auto Picture), C (Movie), O (Voice Recording), F (Digital Panorama) or S (Digital Wide) mode, Y mode is not available. 4 67 - Pentax 17191 | V20 Operating Manual - Page 70
Use the four-way controller (23) to choose e or z. 4 Press the 4 button. Natural Skin Tone Portrait The shooting mode is selected and the camera returns to capture status. When the subject's face is recognized, a MENU Cancel OK OK yellow focus frame appears on the display at the location of - Pentax 17191 | V20 Operating Manual - Page 71
green if the subject is in focus. 6 Press the shutter release button fully. The picture is taken. • If the camera cannot recognize the subject's face, the camera focuses using the Focusing Area currently selected. • When Smile Capture is activated, the shutter will be released automatically when the - Pentax 17191 | V20 Operating Manual - Page 72
icon (white, gray, or black) whose tone best matches your pet's coat or fur. 5 Press the 4 button. 38 The Pet mode is selected and the camera returns to capture status. 6 Press the shutter release button halfway. The focus frame on the display turns green if the subject is in focus. 03 - Pentax 17191 | V20 Operating Manual - Page 73
Taking Pictures 7 Press the shutter release button fully. The picture is taken. 4 71 - Pentax 17191 | V20 Operating Manual - Page 74
Taking Pictures Shutter release button Four-way controller 4 button Taking Pictures of Children (Kids Mode) H (Kids) mode is suitable for taking pictures of moving children. It also 4 reproduces healthy and bright skin tone. Face Recognition (p.56) operates automatically for this mode, making it - Pentax 17191 | V20 Operating Manual - Page 75
is wearing sunglasses or has part of the face covered or if the subject is not looking toward the camera. • If the camera cannot recognize the subject's face, the camera focuses using the Focusing Area currently selected. • When Smile Capture is activated, the shutter will be released automatically - Pentax 17191 | V20 Operating Manual - Page 76
4 button Taking Pictures Taking Panoramic Pictures (Digital Panorama Mode) 4 In F (Digital Panorama) mode, take three frames overlapping their edges by moving the camera horizontally. When the third frame is taken, the images taken with the camera are automatically stitched and the panoramic - Pentax 17191 | V20 Operating Manual - Page 77
display. 7 Move the camera horizontally to the selected direction and take the second frame. Move the camera so that the semi-transparent and the stitched image appears. The stitched image does not appear when the Instant Review (p.41, p.101) is off. • When the Face Recognition is activated - Pentax 17191 | V20 Operating Manual - Page 78
the Self-timer In Self-timer mode, the picture is taken ten seconds or two seconds after 4 the shutter release button is pressed. Stabilize the camera with a tripod when taking a picture with the self-timer. Use this mode when you want to be included in a group picture. g The picture is taken - Pentax 17191 | V20 Operating Manual - Page 79
45) to select 1 (Continuous Shooting) and press the 4 button. The camera is ready to take a series of pictures. 3 Press the shutter release Picture), A (Night), C (Movie), O (Voice Recording), F (Digital Panorama) or S (Digital Wide) mode. • You can continue shooting until the memory capacity - Pentax 17191 | V20 Operating Manual - Page 80
Once the lever is released and turned Zoom bar again, the camera switches to Digital Zoom. 38 25.5 x Zoom ratio The zoom bar is displayed . Zoom in with some degree of image deterioration. Optical zoom range*1 Intelligent Digital Zoom Zoom range*2 range *1 You can zoom in to a maximum of - Pentax 17191 | V20 Operating Manual - Page 81
available) Approx. 6.3× Approx. 7.1× Approx. 8.0× Approx. 10.2× Approx. 15.9× Approx. 25.5× (Same as 25.5× Digital Zoom) Digital Zoom Equivalent to approx. 25.5× • You are recommended to use a tripod to prevent camera shake when taking pictures at a high magnification rate. • Pictures taken in the - Pentax 17191 | V20 Operating Manual - Page 82
P (Off). The selected setting is saved. Press the 3 button. The setting is complete and the camera returns to capture status. Rec.Mode EV Compensation Movie Digital Wide Digital Zoom Instant Review Memory MENU Exit 2/3 0.0 1sec Saving the Digital Zoom Function Setting 1p.106 Taking Pictures 80 - Pentax 17191 | V20 Operating Manual - Page 83
? Digital Wide Cancel OK OK 3 Press the 4 button. 1 The camera enters the S mode and an explanation is displayed in the center of the screen. After 5 seconds or when you press the Green button, the camera returns to capture status. Composites two images. Overlap the background and the guide - Pentax 17191 | V20 Operating Manual - Page 84
second image appear on the display for one second (Instant Review), and then saved to the built-in memory or SD Memory Card. • For less distortion when taking the second picture, turn the camera to overlap the background and the preview guide on the left of the screen. • Some distortion may result - Pentax 17191 | V20 Operating Manual - Page 85
controller (45) Rec.Mode 2/3 to select O (On) or P (Off). EV Compensation 0.0 The selected setting is saved. Movie Digital Wide 4 Press the 3 button. Digital Zoom Instant Review 1sec The setting is complete and the camera Memory returns to capture status. MENU Exit Taking Pictures 83 - Pentax 17191 | V20 Operating Manual - Page 86
the four-way controller (23) Movie Digital Wide to select [EV Compensation]. Digital Zoom Instant Review 1sec 3 Use the four-way controller EV steps. 4 Press the 3 button. The setting is complete and the camera returns to capture status. • If you use the EV compensation function frequently, - Pentax 17191 | V20 Operating Manual - Page 87
of each display mode, refer to "Monitor Indications" (p.18). • Y appears if you press the shutter release button halfway when camera shake is likely to occur. To prevent camera shake, use a tripod and/or the self-timer function. (p.76) • In 9 (Green) mode, you cannot change the information on - Pentax 17191 | V20 Operating Manual - Page 88
Using the Histogram Number of pixels→ A histogram shows the brightness distribution of an image. The horizontal axis represents brightness (dark at the left and bright at the right) and the vertical axis represents the number of pixels. The shape of the histogram (Dark) ←Brightness→ ( - Pentax 17191 | V20 Operating Manual - Page 89
button Taking Pictures Selecting the Focus Mode 4 Focus Mode = Standard q Macro 3 Pan Focus s Infinity \ Manual Focus Use this mode when the distance to the subject is 40 cm (16 in.) or more. The camera is focused on the subject in the autofocus area when the shutter release button is pressed - Pentax 17191 | V20 Operating Manual - Page 90
cm away, the camera automatically focuses to infinity. Saving the Focus Mode 1p.106 Manual Focus The procedure for setting the focus manually (\) is described guide. 1 2 : for distant focus MENU OK OK 3 : for closer focus 4 Press the 4 button. \ indicator The focus is fixed and the camera - Pentax 17191 | V20 Operating Manual - Page 91
bright even when fired at close range. The flash discharges regardless of the light conditions. • The flash does not discharge (a Flash Off) in C (Movie) or F (Digital Panorama) mode, or when the drive mode is set to 1, or the focus mode is set to s. • A pre-flash discharges when using the red-eye - Pentax 17191 | V20 Operating Manual - Page 92
mode changes each time the button is pressed. You can also change the setting using the four-way controller (23). 2 Press the 4 button. The camera returns to capture status with the selected flash mode. Flash Mode Auto MENU Cancel OK OK [About the red-eye phenomenon] Taking pictures using the - Pentax 17191 | V20 Operating Manual - Page 93
MENU Four-way controller 4 button 3 button Rec.Mode 1/3 Recorded Pixels 8M Quality Level White Balance AWB Focusing Area AE Metering Sensitivity Auto MENU Exit Taking Pictures Selecting the Recorded Pixels You can choose from seven recorded pixels settings for still pictures. The - Pentax 17191 | V20 Operating Manual - Page 94
640 OK OK The Recorded Pixels setting is saved. Press the 3 button. The camera returns to capture status with the current setting. • When drive mode is set number of recorded pixels for images captured in S (Digital Wide) or 4 (Digital SR) mode is fixed at f. (However, the number of recorded pixels will - Pentax 17191 | V20 Operating Manual - Page 95
Focusing Area 5 Press the 4 button. AE Metering Sensitivity Auto The Quality Level setting is saved. 6 Press the 3 button. MENU Cancel OK OK The camera returns to capture status with the current setting. If you use the [Quality Level] function frequently, you can save time by assigning it - Pentax 17191 | V20 Operating Manual - Page 96
of shooting. White Balance F G H I J K Auto The camera adjusts the white balance automatically. Daylight Use this mode when taking pictures outside when taking pictures under fluorescent light. Manual Use this mode when adjusting the white balance manually. • Set another white balance if - Pentax 17191 | V20 Operating Manual - Page 97
Balance setting is saved. 6 Press the 3 button. MENU Cancel OK OK The camera returns to capture status with the current setting. Refer to "Manual Setting" below for instructions on adjusting the white balance manually. If you use the [White Balance] function frequently, you can save time by - Pentax 17191 | V20 Operating Manual - Page 98
a reading of the overall brightness of the picture with the center of the image having more influence on the exposure. N Spot AE metering The camera determines the exposure by metering the brightness only at the center of the image. 1 Press the 3 button in A mode. The [A Rec.Mode] menu appears - Pentax 17191 | V20 Operating Manual - Page 99
is metered and the exposure is determined. • When the subject is outside the focusing area and you want to use spot AE metering, aim the camera at the subject and press the shutter release button halfway to lock the exposure, then compose your picture again and press the shutter release button - Pentax 17191 | V20 Operating Manual - Page 100
image. The shutter speed will be slower in low light conditions. • Higher sensitivity settings use faster shutter speeds in low light conditions to reduce camera shake, but the image may be affected by noise. 6400 1 Press the 3 button in A mode. The [A Rec.Mode] menu appears. 2 Use the four-way - Pentax 17191 | V20 Operating Manual - Page 101
is fixed at f. • When the shooting mode is set to C (Movie), only Auto (sensitivity 80 - 800) is available. • When the shooting mode is set to 4 (Digital SR), only Auto (sensitivity 80 - 6400) is available. • If you use the [Sensitivity] function frequently, you can save time by assigning it to the - Pentax 17191 | V20 Operating Manual - Page 102
AWB Focusing Area 5 Press the 4 button. AE Metering Sensitivity AUTO The AF Setting is saved. MENU Cancel OK OK 6 Press the 3 button. The camera returns to capture status with the current setting. • In Y (Frame Composite) mode, [Focusing Area] can only be set to J (Multiple) or K (Spot - Pentax 17191 | V20 Operating Manual - Page 103
the display time. Press the 4 button. EV Compensation Movie Digital Wide Digital Zoom Instant Review Memory 5sec 4sec 3sec 2sec 1sec 0.5sec Off MENU Cancel OK OK The Instant Review setting is saved. 6 Press the 3 button. The camera returns to capture status with the current setting. Instant - Pentax 17191 | V20 Operating Manual - Page 104
is saved. Sharpness Saturation F (Soft) Contrast G (Normal) Date Imprint H (Hard) 4 Press the 3 button. MENU Exit The Sharpness setting is saved and the camera returns to capture status. If you use the [Sharpness] function frequently, you can save time by assigning it to the Green button - Pentax 17191 | V20 Operating Manual - Page 105
is saved. F (Low) Sharpness Saturation Contrast G (Normal) Date Imprint H (High) 4 Press the 3 button. MENU Exit The Saturation setting is saved and the camera returns to capture status. If you use the [Saturation] function frequently, you can save time by assigning it to the Green button - Pentax 17191 | V20 Operating Manual - Page 106
is saved. Sharpness Saturation F (Low) Contrast G (Normal) Date Imprint H (High) 4 Press the 3 button. MENU Exit The Contrast setting is saved and the camera returns to capture status. If you use the [Contrast] function frequently, you can save time by assigning it to the Green button - Pentax 17191 | V20 Operating Manual - Page 107
Taking Pictures MENU Four-way controller 3 button Rec.Mode 1/3 Recorded Pixels 8M Quality Level White Balance AWB Focusing Area AE Metering Sensitivity Auto MENU Exit Setting the Date Imprint Function For choosing whether to imprint the date when taking still pictures. 1 Press the 3 - Pentax 17191 | V20 Operating Manual - Page 108
camera is turned off. The table below also shows whether the Memory default setting for each item is on or off. Item Face Priority Flash Mode Drive Mode Focus Mode Zoom Position MF Position White Balance Sensitivity EV Compensation AE Metering Digital lever (p.78) The manual focus position set with - Pentax 17191 | V20 Operating Manual - Page 109
O (On) or P (Off). Focus Mode Zoom Position 6 Press the 4 button. MF Position MENU Cancel OK OK The Memory setting is saved. 7 Press the 3 button. The camera returns to capture status with the current setting. Taking Pictures 107 - Pentax 17191 | V20 Operating Manual - Page 110
) to select C (Movie). Taking Pictures 3 108 MENU Cancel OK OK Press the 4 button. 1 23 C (Movie) mode is selected and the camera returns to capture status. The following information appears on the display. 1 Movie mode icon 2 Recording indicator (blinks during recording) 3 Remaining - Pentax 17191 | V20 Operating Manual - Page 111
set to \(Manual Focus), you can adjust the focus before recording starts. • You can use the optical zoom only before recording, while the digital zoom is Smile Capture is activated, movie recording starts automatically when the camera recognizes the subject's smile. However, depending on the - Pentax 17191 | V20 Operating Manual - Page 112
pixels. Color Mode 7 Press the 4 button. Movie SR Full Color The Recorded Pixels setting is saved. MENU Cancel OK OK 8 Press the 3 button twice. The camera returns to capture status with the current setting. Recorded Pixels, Quality Level and Frame Rate of Movies 1p.32 110 - Pentax 17191 | V20 Operating Manual - Page 113
the quality level. Color Mode Movie SR 7 Press the 4 button. MENU Cancel OK OK The Quality Level setting is saved. 8 Press the 3 button twice. The camera returns to capture status with the current setting. Recorded Pixels, Quality Level and Frame Rate of Movies 1p.32 111 - Pentax 17191 | V20 Operating Manual - Page 114
] or [15fps]. Color Mode Movie SR 15fps 7 Press the 4 button. MENU Cancel OK OK The Frame Rate setting is saved. 8 Press the 3 button twice. The camera returns to capture status with the current setting. Recorded Pixels, Quality Level and Frame Rate of Movies 1p.32 112 - Pentax 17191 | V20 Operating Manual - Page 115
. Color Mode Movie SR Full Color B&W 7 Press the 4 button. MENU Cancel Sepia OK OK The Color Mode setting is saved. 8 Press the 3 button twice. The camera returns to capture status with the current setting. The color mode setting for a recorded movie cannot be changed. 113 - Pentax 17191 | V20 Operating Manual - Page 116
Area AE Metering Sensitivity Auto MENU Exit Setting the Movie SR (Movie Shake Reduction) Function 4 In C (Movie) mode, you can compensate for camera shake while you are recording movies with the Movie SR (Movie Shake Reduction) function. 1 Press the 3 button in A mode. The [A Rec.Mode - Pentax 17191 | V20 Operating Manual - Page 117
Images Switching Between A Mode and Q Mode In this manual, the capture mode, such as for taking still pictures Q mode. To Switch from A Mode to Q Mode 1 Press the Q button. The camera switches to Q mode. Playing Back and Deleting Images To Switch from Q Mode to A Mode (p.42) for instructions. 115 - Pentax 17191 | V20 Operating Manual - Page 118
. The icons that appear on the images indicate the following: No icon : Still picture without sound P : Still picture that can have camera shake corrected O (with image) : Still picture with sound C : Movie (the first frame appears) O (without image) : Sound file only Press the 4 button - Pentax 17191 | V20 Operating Manual - Page 119
Playing Back and Deleting Images Switching to Folder Display or Calendar Display In nine-image display, turn the Zoom/f/y lever towards f to switch to folder display or calendar display. Press the Green button to switch between folder display and calendar display. 1 Turn the Zoom/f/y lever - Pentax 17191 | V20 Operating Manual - Page 120
When the Quick Zoom function (p.176) is set to O, you can magnify the image at a maximum of ×8 simply by turning once Guide towards y. You can use the guide at the bottom left of the screen to check which portion of the image is magnified. The following operations can be performed while the - Pentax 17191 | V20 Operating Manual - Page 121
Zoom/f/y lever Shutter release button I button Q button Four-way controller 4 button Zoom Up On the Subject's Face Automatically (Face close-up playback) You can enjoy playing back images with the subject's faces zoomed up simply by pressing the I button (Face close-up playback) if Face - Pentax 17191 | V20 Operating Manual - Page 122
Playing Back and Deleting Images • The magnification ratio for Face close-up playback may differ depending the conditions such as the size of the face recognized when shooting. • Turn the Zoom/f/y lever towards y during Face close-up playback to center on the subject and switch between displaying - Pentax 17191 | V20 Operating Manual - Page 123
Displaying Shooting Information in Playback Mode Shooting information can be displayed on the display in Q mode. Pressing the 4/W button changes the display mode. Refer to p.20 for details of each display mode. Normal Display 100-0026 03/03/2008 14:25 OK Histogram +MoIvniefo 5 100-0026 8M OK - Pentax 17191 | V20 Operating Manual - Page 124
MENU Cancel OK OK Playing Back and Deleting Images Correcting Camera Shake with Digital SR For correcting the camera shake in recorded images. 1 Enter the Q mode and use the four-way controller (45) to choose the image to correct camera shake for. 2 Press the four-way controller (3). 53 The - Pentax 17191 | V20 Operating Manual - Page 125
Q button Four-way controller 4 button Slideshow MENU Cancel OK OK Playing Back and Deleting Images Slideshow You can play back recorded images one after another. 1 Enter the Q mode and use the four-way controller (45) to choose an image to start the slideshow with. 2 Press the four-way - Pentax 17191 | V20 Operating Manual - Page 126
display from left to right in 4 seconds before the next picture is played back, regardless of the settings of [Interval] or [Screen Effect]. Connecting the Camera to AV Equipment 1p.126 124 - Pentax 17191 | V20 Operating Manual - Page 127
Playing Back Movies Zoom/f/y lever Q button Four-way controller Playing Back and Deleting Images Playing Back a Movie You can play back the movies you have taken. Sound is played back at the same time. 1 Enter the Q mode and use the four-way controller (45) to 5 100-0017 00:30 choose the - Pentax 17191 | V20 Operating Manual - Page 128
terminal of the AV cable with pointing toward the 4 on the PC/AV terminal of the camera. 2 Connect the other ends of the AV cable (yellow: video, white: audio) to as a TV), refer to the operation manual of the device and select the video input terminal to which the camera is connected. 4 Turn the - Pentax 17191 | V20 Operating Manual - Page 129
Playing Back and Deleting Images • You are recommended to use the AC adapter kit K-AC78 (optional) if you intend to use the camera for a long time. • Depending on the country or region, images and sound files may fail to be played back if the video output format is - Pentax 17191 | V20 Operating Manual - Page 130
sounds can be recovered with the Optio V20. (p.133) Deleted images and sounds can be recovered even if the camera has been turned off after deletion Images/Sounds OK OK If you press the i button during Instant Review, the screen in Step 2 appears, enabling you to delete the image you have - Pentax 17191 | V20 Operating Manual - Page 131
Deleting a Sound File If sound has been recorded with an image (p.160), you can delete the sound without deleting the image. 1 Enter the Q mode and use the four-way controller (45) to choose an image with sound. 2 Press the i button. A confirmation screen appears. 3 Use the four-way controller ( - Pentax 17191 | V20 Operating Manual - Page 132
Zoom/f/y lever Q button Four-way controller 4 button i button Playing Back and Deleting Images Deleting Selected Images and Sound Files (from Nine-Image Display) You can delete several images/sound files selected from the nine-image display at once. 5 1 2 3 Protected images and sound files - Pentax 17191 | V20 Operating Manual - Page 133
4 Press the i button. A confirmation dialog appears. 5 Use the four-way controller (23) Delete all selected images/sounds to select [Select & Delete]. 6 Press the 4 button. The selected images and sound files are deleted. Select & Delete Cancel MENU OK OK 5 Playing Back and Deleting Images - Pentax 17191 | V20 Operating Manual - Page 134
Q button Four-way controller 4 button i button Deleting All Images and Sound Files You can delete all the images and sound files at once. Protected images and sound files cannot be deleted. (p.134) 51 2 3 4 Press the i button in Q mode. A confirmation dialog appears. Press the i button. A - Pentax 17191 | V20 Operating Manual - Page 135
MENU Cancel OK OK Playing Back and Deleting Images Recovering Deleted Images You can recover images or sound files that were taken with this camera and then deleted. After deleting an image, once operations to write data such as taking pictures, recording movies, protecting images, saving DPOF - Pentax 17191 | V20 Operating Manual - Page 136
Q button Four-way controller 4 button Protect MENU Cancel OK OK Protecting Images and Sound Files from Deletion (Protect) Playing Back and Deleting Images You can protect stored images and sound files from being accidentally deleted. 1 Press the four-way controller (3) in Q mode. 2 53 The - Pentax 17191 | V20 Operating Manual - Page 137
Playing Back and Deleting Images Q button Four-way controller 4 button Protect MENU Cancel OK OK Protecting All Images and Sound Files 1 Press the four-way controller (3) in Q mode. The Playback Mode Palette appears. 2 Use the four-way controller (2345) to select Z (Protect). 3 Press the 4 - Pentax 17191 | V20 Operating Manual - Page 138
Editing and Printing Images Editing Images Q button Four-way controller 4 button Resize MENU Cancel OK OK Changing the Image Size and Quality (Resize) Editing and Printing Images By changing the size and quality of a selected image, you can make the file size smaller than the original. You - Pentax 17191 | V20 Operating Manual - Page 139
6 Press the 4 button. A confirmation dialog for overwriting the image appears. When an image is protected, the image will be saved as a new image without the confirmation dialog displayed on the screen. 7 Use the four-way controller (23) to select [Overwrite] or [Save as]. 8 Press the 4 button. - Pentax 17191 | V20 Operating Manual - Page 140
Zoom/f/y lever Q button Four-way controller 4 button Green button Cropping MENU Cancel OK OK Cropping Images Editing and Printing Images You can delete the unwanted part of a picture and save the cropped image as a separate image. 1 Enter the Q mode and use the four-way controller (45) to - Pentax 17191 | V20 Operating Manual - Page 141
the SD Memory Card and vice versa. This function can only be selected when an SD Memory Card has been inserted in the camera. Make sure that the camera is turned off before inserting or removing the SD Memory Card. 1 Press the four-way controller (3) in Q mode. The Playback Mode Palette appears - Pentax 17191 | V20 Operating Manual - Page 142
To Copy Files from the SD Memory Card to the Built-in Memory Selected images and sound files from the SD Memory Card are copied to the built-in memory one at a time. 4 Use the four-way controller (23) to select [{}2]. 5 Press the 4 button. 100-0017 Copy this image/sound 6 Use the four-way - Pentax 17191 | V20 Operating Manual - Page 143
four-way controller (3). The Playback Mode Palette appears. 3 Use the four-way controller (2345) to select D (Digital 4 321 Filter). 4 Press the 4 button. The digital filter selection screen appears. 1 B&W/sepia filter 2 Color filter MENU Cancel OK OK 3 Color extraction filter 5 4 Soft - Pentax 17191 | V20 Operating Manual - Page 144
image. Editing and Printing Images To Select a Color filter or the Color Extraction Filter 6 5 Use the four-way controller (23) to choose a digital filter. 6 Use the four-way controller (45) to adjust the effect. The color extraction filter changes in the following sequence each time you press - Pentax 17191 | V20 Operating Manual - Page 145
image is saved with the same number of recorded pixels 6 and quality level as the original. Movies or images taken with another camera cannot be edited using [Digital Filter]. An error message appears if you choose this function from the Playback Mode Palette and press the 4 button. Editing and - Pentax 17191 | V20 Operating Manual - Page 146
level as the original. • The red-eye compensation function cannot be used on movies or on images where red eyes cannot be detected on the camera. An error message appears in Step 4. • The red-eye compensation function can only be used with still pictures taken with this - Pentax 17191 | V20 Operating Manual - Page 147
(Frame Composite) Editing and Printing Images This function lets you add a decorative frame to still pictures. There are three frames already stored in the camera. 1 Enter the Q mode and use the four-way controller (45) to choose the image to which you want to add a frame. 2 Press the four - Pentax 17191 | V20 Operating Manual - Page 148
size i or smaller. An error message appears in Step 4. Using a New Frame Frames downloaded from a PENTAX website or other source can be used when adding a frame to pictures. To display the frames available in memory or SD Memory Card is formatted with this camera. Editing and Printing Images 146 - Pentax 17191 | V20 Operating Manual - Page 149
How to display the Movie Edit menu Q button Four-way controller 4 button Movie Edit MENU Cancel OK OK Editing Movies You can select a frame from a recorded movie to save as a still picture or divide a movie into two. 1 Enter the Q mode and use the four-way controller (45) to choose the movie - Pentax 17191 | V20 Operating Manual - Page 150
6 Press the 4 button. 100-0042 The screen appears for selecting a frame to 00:06 be saved as a still picture. Select image to save 7 Use the four-way controller (2345) to choose the frame you 1 want to save. MENU Cancel OK OK 2 : Plays or pauses the movie 3 : Stops the movie and returns - Pentax 17191 | V20 Operating Manual - Page 151
Setting the Printing Service (DPOF) DPOF (Digital Print Order Format) is the format for storing print order data on still pictures captured with a digital camera. Once the print order data has been stored, the pictures can be printed according to the DPOF settings using a DPOF-compatible printer or - Pentax 17191 | V20 Operating Manual - Page 152
5 6 7 68 Press the 4 button. 100-0017 The message [DPOF setting for this image] appears. DPOF setting for this image To make DPOF settings for another image, use the four-way controller (45) to select Copies 00 Date another image. If DPOF settings have already been made Date MENU Cancel - Pentax 17191 | V20 Operating Manual - Page 153
to insert the date, the settings are applied to all the images stored in the camera. 1 Display the screen for DPOF settings in Q mode. Refer to Steps 1 to button. The DPOF settings for all the images are saved and the camera returns to the DPOF setting screen. Editing and Printing Images • The - Pentax 17191 | V20 Operating Manual - Page 154
the images (printing multiple images on a single sheet) cannot be performed directly from the camera. Make the settings on a printer supporting index printing function or use a PC. 6 Connecting the Camera to the Printer 1 Select [PictBridge] for the [USB Connection] mode on the [W Setting] menu - Pentax 17191 | V20 Operating Manual - Page 155
Printing Single Images 1 In the printing mode selection screen, use the four-way controller (23) to select [Single Image]. 2 Press the 4 button. The setting screen appears. Select printing mode All Images Single Image DPOF AUTOPRINT OK OK 3 Use the four-way controller (45) to choose an image to - Pentax 17191 | V20 Operating Manual - Page 156
settings made on the printer. 6 Paper Type with more E supports higher quality paper. Quality with more E indicates higher print Type], [Quality] and [Border Status] settings are reset to the defaults when the camera is turned off. • If the picture already has the date imprinted on it (p.105 - Pentax 17191 | V20 Operating Manual - Page 157
Printing All Images 1 In the printing mode selection screen, use the four-way controller (23) to select [All Images]. Select printing mode All Images Single Image DPOF AUTOPRINT OK OK 2 Press the 4 button. The setting screen appears. 3 Choose the number of copies and 100-0017 Print all images - Pentax 17191 | V20 Operating Manual - Page 158
date or not, and the total number of copies. Refer to p.149 for instructions on how to make the DPOF settings. 100-0017 Print with DPOF setting Copies cable from the camera and printer when you have finished printing. 1 Turn off the camera. 2 Disconnect the USB cable from the camera and printer. - Pentax 17191 | V20 Operating Manual - Page 159
and Playing Back Sound Recording Sound (Voice Recording Mode) You can record sound with the camera. The microphone is located on the front of the camera. When recording sound, aim the camera to obtain the best conditions. Microphone Speaker Shutter release button Four-way controller 4 button - Pentax 17191 | V20 Operating Manual - Page 160
3 4 5 7 Press the 4 button. The remaining recordable time and the recording time of the current file appear on the display. 1 Recording time 2 Remaining recordable time 1 2 01:31:44 00:00:00 SHUTTER REC S t a r t 03/03/2008 14:25 Press the shutter release button fully. 01:30:22 Recording - Pentax 17191 | V20 Operating Manual - Page 161
Playing Back Sound You can play back the sound files you made in O mode. Zoom/f/y lever Q button Four-way controller Recording and Playing Back Sound 1 Press the Q button. 2 Use the four-way controller (45) to choose a sound file to play back. 1 2 100-0025 3 Press the four-way controller (2). - Pentax 17191 | V20 Operating Manual - Page 162
Adding a Voice Memo to Images You can add a voice memo to your still pictures. Voice Memo Four-way controller 4 button MENU Cancel OK OK Recording a Voice Memo 1 Enter Q mode and use the four-way controller (45) to choose the still picture to which you want to add a voice memo. 2 Press the - Pentax 17191 | V20 Operating Manual - Page 163
Zoom/w/x lever Q button Four-way controller Playing Back a Voice Memo 1 Enter Q mode and use the four- way controller (45) to choose the still picture with the voice memo that you want to play back. U appears on images with voice memos in single-image display. 2 Press the four-way controller (2). - Pentax 17191 | V20 Operating Manual - Page 164
on the SD Memory Card. All the data in the built-in memory will be deleted if no SD Memory Card is inserted in the camera. 81 2 3 4 • Do not remove the SD Memory Card during formatting as this may damage the card and render it unusable. • Formatting will delete protected images - Pentax 17191 | V20 Operating Manual - Page 165
How to display the [W Setting] menu MENU Four-way controller 4 button 3 button Setting 1/3 Format Sound Date Adjust World Time 03/03/2008 Folder Name MENU Exit Date Changing the Sound Settings You can adjust the volume of operation sounds and change the type of sound. 1 Use the four-way - Pentax 17191 | V20 Operating Manual - Page 166
Changing the Sound Type 6 Use the four-way controller (23) to select [Start-up Sound]. 7 Press the four-way controller (5). A pull-down menu appears. 8 Use the four-way controller (23) to select [1], [2], [3] or [Off] and press the 4 button. The selected sound type is saved. 9 Set [Shutter Sound], [ - Pentax 17191 | V20 Operating Manual - Page 167
Date and Time You can change the initial date and time settings. You can also set the style in which the date appears on the camera. 1 Use the four-way controller (23) to select [Date Adjust] on the [W Setting] menu. 2 Press the four-way controller (5). Date Adjust The Date Adjust screen - Pentax 17191 | V20 Operating Manual - Page 168
corresponding to the time. 13 Press the 4 button. The date and time settings are saved. When you finish the settings and press the 4 button, the camera clock is reset to 00 seconds. To set the exact time, press the 4 button when the time signal (on the TV, radio, etc.) reaches 00 - Pentax 17191 | V20 Operating Manual - Page 169
How to display the [W Setting] menu MENU Four-way controller 4 button 3 button Setting 1/3 Format Sound Date Adjust World Time 03/03/2008 Folder Name MENU Exit Date Setting the World Time The date and time selected in "Setting the Date and Time" (p.38) and "Changing the Date and Time" (p.165 - Pentax 17191 | V20 Operating Manual - Page 170
the city selected as the Hometown city Press the 4 button. The Select time setting is saved. 7 Press the 3 button twice. The camera returns to A mode or Q mode. X (Destination) appears on the display when the camera returns to A mode and World Time is selected. 38 03/03/2008 20:25 Settings 168 - Pentax 17191 | V20 Operating Manual - Page 171
Date Changing the Display Language You can change the language in which the menus, error messages, etc. are displayed. The camera supports the following 19 languages: English, French, German, Spanish, Portuguese, Italian, Dutch, Danish, Swedish, Finnish, Polish, Czech, Hungarian, Turkish, Russian - Pentax 17191 | V20 Operating Manual - Page 172
are saved in separate folders by the date they were taken. Folder Name Standard xxxPENTX (where xxx is the 3-digit folder number) Date xxx_mmdd (3-digit folder number_month day) * xxx_ddmm (3-digit folder number_day month) when the date style is set to [dd/mm/yy] Picture taken with Folder name - Pentax 17191 | V20 Operating Manual - Page 173
on whether you are going to connect the USB cable to a PC or a PictBridgecompatible printer. Refer to the PC Connection Manual for instructions on connecting the camera to a computer. 1 Use the four-way controller (23) to select [USB Connection] on the [W Setting] menu. 2 Press the four-way - Pentax 17191 | V20 Operating Manual - Page 174
Setting 1/3 Format Sound Date Adjust World Time 03/03/2008 Folder Name MENU Exit Date Changing the Video Output Format When you connect the camera to AV equipment, choose the appropriate video output format (NTSC or PAL) for taking and playing back images. 1 Use the four-way controller (23 - Pentax 17191 | V20 Operating Manual - Page 175
Out NTSC Brightness Level Power Saving 5sec G (Normal) H (Bright) Auto Power Off Quick Zoom MENU CExaintcel 3min OK 3 Press the 3 button. The camera returns to Capture mode or Playback mode. The display is displayed with the set brightness. To change the brightness setting, perform the - Pentax 17191 | V20 Operating Manual - Page 176
is saved. • Power Saving does not function in the following situations: • while taking pictures in Continuous Shooting mode • in Playback mode • while the camera is connected to a PC or printer • when using the AC adapter • while recording a movie • while the menu is being displayed • When no - Pentax 17191 | V20 Operating Manual - Page 177
button 3 button Setting 1/3 Format Sound Date Adjust World Time 03/03/2008 Folder Name MENU Exit Date Setting Auto Power Off You can set the camera to turn off automatically when no operation is performed for a fixed time. 1 Use the four-way controller (23) to select [Auto Power Off] on the - Pentax 17191 | V20 Operating Manual - Page 178
(45) to select O (On) or P (Off). O(On): The Quick Zoom is available. P (Off): The Quick Zoom is not available. Press the 3 button. The camera returns to A mode or Q mode. Repeat the above steps to change the setting. Setting USB Connection Video Out Brightness Level Power Saving Auto Power Off - Pentax 17191 | V20 Operating Manual - Page 179
menu. Reset 2 Use the four-way controller (45) to select O (On) or P (Off). O (ON): The mode guide is displayed. MENU Exit P (OFF): The mode guide is not displayed. 3 Press the 3 button. The camera returns to A mode or Q mode. Repeat the above steps to change the setting. 8 Settings 177 - Pentax 17191 | V20 Operating Manual - Page 180
Exit Date Resetting to Default Settings (Reset) You can reset the camera settings to their defaults. Refer to "Default Settings" (p.181) for -way controller (23) to select [Reset] on the [W Setting] Setting Guide Display 3/3 menu. Reset 2 Press the four-way controller (5). The Reset screen - Pentax 17191 | V20 Operating Manual - Page 181
OK OK Changing the Start-up Screen You can choose an image to be displayed as the start-up screen when the camera is turned on. 1 Press the Q button. The camera enters Q mode. 2 Press the four-way controller (3). The Playback Mode Palette appears. 3 Use the four-way controller (2345) to select - Pentax 17191 | V20 Operating Manual - Page 182
Appendix List of World Time Cities The column "City" indicates cities that can be set as either the Initial Setting (p.36) or the World Time (p.167). The column "Video Output Format" indicates the video output format of the city set as the Initial Setting. Region City Video Output Format Region - Pentax 17191 | V20 Operating Manual - Page 183
setting (last memory) is saved when the camera is turned off. No : The setting returns to the default setting when the camera is turned off. * : The setting Level Movie Frame Rate Color Mode Movie SR Digital wide Digital Zoom Instant Review Default Setting Last Memory Reset Setting Setting Page - Pentax 17191 | V20 Operating Manual - Page 184
Item Face Priority Flash Mode Drive Mode Focus Mode Zoom Position MF Position Memory White Balance Sensitivity EV Compensation AE Metering Digital Zoom DISPLAY File No. Green Button Sharpness Saturation Contrast Date Imprint Default Setting P (Off) O (On) P (Off) P (Off) P (Off) P (Off) P (Off) P ( - Pentax 17191 | V20 Operating Manual - Page 185
Hometown (City) Hometown (DST) Language/ Folder Name USB Connection Video Out Brightness Level Power Saving Auto Power Off Quick Zoom Guide Display Reset Default Setting Cancel 3 3 1 1 1 1 According to initial setting 24h 1/1/2008 According to initial setting Same as W hometown According - Pentax 17191 | V20 Operating Manual - Page 186
the picture taken Cropping Image/Sound Copy Depending on the picture taken Built-in memory J SD Memory Card Image Rotation Normal Digital Filter B&W Save as Still image - Movie Edit Divide Movies - Frame Composite Default1 Red-eye Compensation - Voice Memo - Protect Single Image - Pentax 17191 | V20 Operating Manual - Page 187
Key Operation Item Q button Zoom/w/x lever Function Operation Mode Zoom Position Default Setting Q mode Full wide-angle Last Memory Setting - * 2 Drive Mode 9 (Standard) * Four-way 3 Shooting Mode b (Auto Picture) Yes controller 4 Flash Mode , (Auto) * 5 Focus Mode = (Standard) * - Pentax 17191 | V20 Operating Manual - Page 188
Yes Yes Yes No Yes Yes Yes Yes Yes Yes Yes No Yes Yes \ (Manual Focus) Yes No Yes Yes Yes No Yes Yes Recorded Pixels Yes*18 No Yes EV Compensation No No Yes Yes Yes*6 # Yes Yes Digital Zoom Yes No Yes Yes Yes # Yes Yes 9 Instant Review Memory Yes No Yes Yes # # Yes Yes Yes No - Pentax 17191 | V20 Operating Manual - Page 189
Yes s (Infinity) Yes Yes Yes Yes 3 (Pan Focus) Yes Yes Yes Yes \ (Manual Focus) Yes*18 No*17 No*16 No*13 Recorded Pixels Yes Yes Yes No*19 Quality Yes No*19 EV Compensation Yes No Yes No*19 Digital Zoom Yes Yes Yes No*19 Instant Review 9 Yes Yes Yes No*19 Memory Appendix No - Pentax 17191 | V20 Operating Manual - Page 190
. Products marked with an asterisk (*) are the same as those supplied with the camera. Power supply Rechargeable lithium-ion battery D-LI78 (*) Battery charger kit K-BC78 (*) ( O-ST20 (*) O-ST24 Genuine leather strap O-ST8 Silver chain strap O-ST30 Waterproof strap Camera case O-CC79 9 188 Appendix - Pentax 17191 | V20 Operating Manual - Page 191
again. (p.136) Memory card error Shooting and playback are impossible due to a problem with the SD Memory Card. You may be able to display or copy the image or sound in a format not supported by this camera. You may be able to play it back on another brand of camera or on your computer. 9 Image - Pentax 17191 | V20 Operating Manual - Page 192
be processed Displayed for files that cannot be processed. No card in the camera Displayed when no SD card is inserted. The built-in memory is not to use this function. Displayed when you try to use a function not supported by the Green Mode. Messages such as the following may appear on the - Pentax 17191 | V20 Operating Manual - Page 193
Message Printing is completed. Continue printing? Print Canceled No image to be processed Wrong DPOF setting Description Displayed when printing completes. Displayed when printing is canceled. Displayed when there are no images to print. Displayed when DPOF printing cannot be performed. Appendix - Pentax 17191 | V20 Operating Manual - Page 194
Troubleshooting Problem Cause Remedy The battery is not installed Check if a battery is installed. If not, install a battery. The camera will not turn on The battery is installed incorrectly Check orientation of the battery. Reinsert the battery according to the +- symbols in the battery - Pentax 17191 | V20 Operating Manual - Page 195
Problem Cause Remedy The subject is not in focus The subject is difficult to focus on with autofocus The subject is not in the focusing area The camera window or a net. Try shooting using the focus lock (p.41), or Manual Focus (p.88). Locate the desired subject in the focus frame (focusing area - Pentax 17191 | V20 Operating Manual - Page 196
Main Specifications Type Fully automatic compact digital still camera with built-in zoom lens Number of sensitivity is set to 1600 or 3200. * Fixed at f (2592×1944) in Digital SR mode. * Fixed at f (2592×1944) in Digital Wide mode. Movie m (640×480 pixels), D (320×240 pixels) Sensitivity - Pentax 17191 | V20 Operating Manual - Page 197
Copy, Image Rotation, Digital Filter (Color Filter (11 kinds), Digital Filter, Brightness Filter), Movie Edit, Frame Composite, Red-eye Compensation, Voice Memo, Protect, DPOF, Image Recovery, Start-up Image Setting Focus Modes Autofocus, Macro, Infinity, Pan Focus, Manual Focus Appendix 195 - Pentax 17191 | V20 Operating Manual - Page 198
switch to Pan Focus, Infinity and Manual Focus. * Face Recognition AF is available only while the camera recognizes the subject's face. Focus Lock , Food, Digital Panorama, Digital Wide * Face Recognition AE is available only while the camera recognizes the subject's face. Digital Filters B&W, - Pentax 17191 | V20 Operating Manual - Page 199
. 145 g (including battery and SD Memory Card) Rechargeable lithium-ion battery, battery charger, AC plug cord, USB cable, AV cable, software (CD-ROM), strap, Operating Manual, PC Connection Manual, Quick Guide 9 Appendix 197 - Pentax 17191 | V20 Operating Manual - Page 200
PENTAX cameras purchased through authorized bona fide photographic distribution channels are guaranteed against defects of material or workmanship for a period of twelve months from date of purchase. Service service charge, and only after you accept the quoted service charge, instruct the service station - Pentax 17191 | V20 Operating Manual - Page 201
policy does not affect the customer's statutory rights. • The local warranty policies available from PENTAX distributors in some countries can supersede this warranty policy. Therefore, we recommend that you review the warranty card supplied with your product at the time of purchase, or contact the - Pentax 17191 | V20 Operating Manual - Page 202
and used in accordance with the instructions, may cause harmful interference to technician for help. For customers in Canada This Class B digital apparatus complies with Canadian ICES-003. 9 Pour les . The lithium battery used in this camera contains perchlorate material,which may require special - Pentax 17191 | V20 Operating Manual - Page 203
. The above named party is responsible for ensuring that the equipment complies with the standards of 47CFR §15.101 to §15.109. Product Name: PENTAX Digital Still Camera Model Number: Optio V20 Contact person: Customer Service Manager 9 Date and Place: April, 2008, Colorado Appendix 201 - Pentax 17191 | V20 Operating Manual - Page 204
Information on disposal for users 1. In the European Union If your product is marked with this symbol, it means that used electrical/electronic products should not be mixed with general household waste. There exists a separate collection system for these products. Used electric/electronic - Pentax 17191 | V20 Operating Manual - Page 205
Memo - Pentax 17191 | V20 Operating Manual - Page 206
Portrait 54 i Surf & Snow 54 \ Sport 54 9 EFHG Pet 54, 70 4 Digital SR (Blur Reduction 54, 65 P Digital SR (Camera Shake Reduction 122 H Kids 54 D Food 55 z Natural Skin Tone ......... 54 F Digital Panorama ........ 74 204 S Digital Wide 81 A AC adapter 26 Adding sound (Voice Memo 160 AE - Pentax 17191 | V20 Operating Manual - Page 207
G Green Button X ....45, 47, 57 Green Mode 9 63 Guide display 177 H Histogram 86 Hometown 38 I Infinity s 87 Installing a battery 23 Instant Review ...........41, 101 L Language 36, 169 M Macro q 87 Magnify y 118 Manual Focus 87 Manual K 94 Memory 106 3 button 45, 47 Movie SR (Movie - Pentax 17191 | V20 Operating Manual - Page 208
P PAL 172 Pan Focus 3 87 Panoramic Pictures 74 Photo processing lab ....... 149 PictBridge 152 Playback .......... 42, 115, 125, 159, 161 Playback Mode 35 Playback Mode Palette ...... 59 Playing back movies ........ 125 Playing back sounds ....... 159 Power Saving 174 Power switch ......... 34 - Pentax 17191 | V20 Operating Manual - Page 209
Z Zoom lever 44, 46 Zoom xw 78 9 207 Appendix - Pentax 17191 | V20 Operating Manual - Page 210
Memo - Pentax 17191 | V20 Operating Manual - Page 211
Memo - Pentax 17191 | V20 Operating Manual - Page 212
Scandinavia AB P.O. Box 650, 75127 Uppsala, SWEDEN (http://www.pentax.se) PENTAX Imaging Company A Division of PENTAX of America, Inc. (Headquarters) 600 12th Street, Suite 300 Golden, Colorado 80401, U.S.A. (PENTAX Service Department) 12000 Zuni Street, Suite 100B Westminster, Colorado 80234
-
 1
1 -
 2
2 -
 3
3 -
 4
4 -
 5
5 -
 6
6 -
 7
7 -
8
-
9
-
10
-
11
-
12
-
13
-
14
-
15
-
16
-
17
-
18
-
19
-
20
-
21
-
22
-
23
-
24
-
25
-
26
-
27
-
28
-
29
-
30
-
31
-
32
-
33
-
34
-
35
-
36
-
37
-
38
-
39
-
40
-
41
-
42
-
43
-
44
-
45
-
46
-
47
-
48
-
49
-
50
-
51
-
52
-
53
-
54
-
55
-
56
-
57
-
58
-
59
-
60
-
61
-
62
-
63
-
64
-
65
-
66
-
67
-
68
-
69
-
70
-
71
-
72
-
73
-
74
-
75
-
76
-
77
-
78
-
79
-
80
-
81
-
82
-
83
-
84
-
85
-
86
-
87
-
88
-
89
-
90
-
91
-
92
-
93
-
94
-
95
-
96
-
97
-
98
-
99
-
100
-
101
-
102
-
103
-
104
-
105
-
106
-
107
-
108
-
109
-
110
-
111
-
112
-
113
-
114
-
115
-
116
-
117
-
118
-
119
-
120
-
121
-
122
-
123
-
124
-
125
-
126
-
127
-
128
-
129
-
130
-
131
-
132
-
133
-
134
-
135
-
136
-
137
-
138
-
139
-
140
-
141
-
142
-
143
-
144
-
145
-
146
-
147
-
148
-
149
-
150
-
151
-
152
-
153
-
154
-
155
-
156
-
157
-
158
-
159
-
160
-
161
-
162
-
163
-
164
-
165
-
166
-
167
-
168
-
169
-
170
-
171
-
172
-
173
-
174
-
175
-
176
-
177
-
178
-
179
-
180
-
181
-
182
-
183
-
184
-
185
-
186
-
187
-
188
-
189
-
190
-
191
-
192
-
193
-
194
-
195
-
196
-
197
-
198
-
199
-
200
-
201
-
202
-
203
-
204
-
205
-
206
-
207
-
208
-
209
-
210
-
211
-
212
 |
 |
Digital Camera
Operating Manual
To ensure the best performance from
your camera, please read the Operating
Manual before using the camera.