Pfaff hobby 1022 Owner's Manual - Page 33
Sewing on buttons, Model 1022, 1032, Model 1042, Sewing on buttons with a thread shank
 |
View all Pfaff hobby 1022 manuals
Add to My Manuals
Save this manual to your list of manuals |
Page 33 highlights
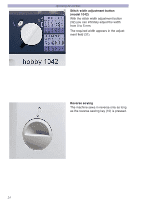
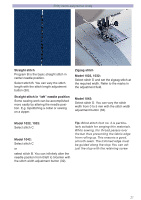
Utility stitches and practical sewing Sewing on buttons For sewing on buttons, the presser foot must be removed and the feed dog must be lowered (c.f. page 20). • Select the 4 mm zigzag stitch, stitch D. Model 1022, 1032: Select stitch D. Turn the stitch adjustment button (9) to the required width (refer to the marks). Sewing on buttons with a thread shank • Attach the presser foot. • Place a match between the holes in the button and sew as described in the left hand column on this page. • Remove the match and pull the fabric and the button apart. • Wrap the shank with the sewing thread and knot it. Model 1042 Select stitch D and set the stitch width adjustment button (32) at "4". • Turn the handwheel towards you and position the button so the needle enters the left hole in the button. • Lower the presser bar lifter. The button will be held in place by the shank of the foot. • Sew on the button. Take care to ensure that the needle also enters the right hand hole in the button. • Knot the thread ends on the reverse side. 29
-
 1
1 -
2
-
3
-
4
-
5
-
6
-
7
-
8
-
9
-
10
-
11
-
12
-
13
-
14
-
15
-
16
-
17
-
18
-
19
-
20
-
21
-
22
-
23
-
24
-
25
-
26
-
27
-
 28
28 -
 29
29 -
 30
30 -
 31
31 -
 32
32 -
 33
33 -
 34
34 -
 35
35 -
 36
36 -
 37
37 -
 38
38 -
39
-
40
-
41
-
42
-
43
-
44
-
45
-
46
-
47
-
48
-
49
-
50
-
51
-
52
-
53
-
54
-
55
-
56
-
57
-
58
-
59
-
60
-
61
-
62
-
63
-
64
-
65
-
66
-
67
-
68
-
69
-
70
-
71
-
72
 |
 |
