Philips 52PFL7432D User manual - Page 26
How to connect and operate accessory, devices
 |
UPC - 609585131477
View all Philips 52PFL7432D manuals
Add to My Manuals
Save this manual to your list of manuals |
Page 26 highlights
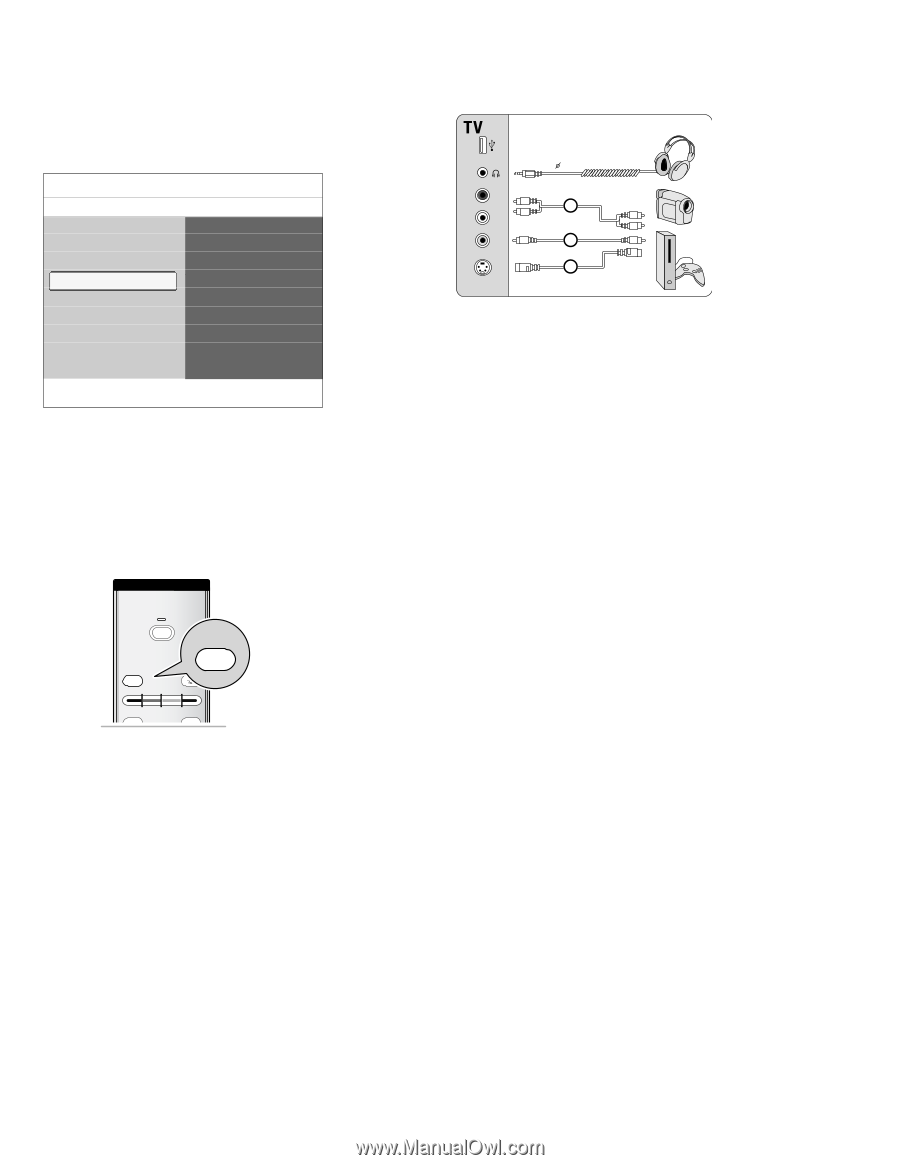
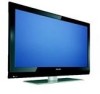
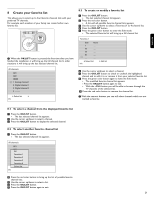
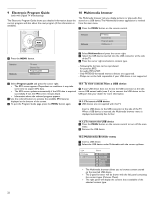
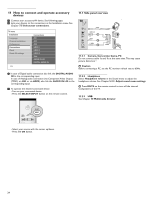
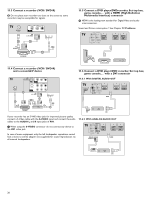
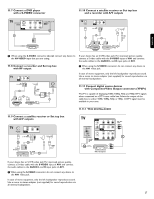
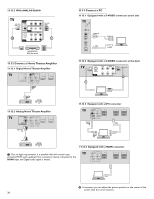
11 How to connect and operate accessory devices ‡ Connect your accessory AV device. See following pages. ® Link your devices to the connections in the Installation menu. See Chapter 7.5 Select your connections. TV menu Installation Language Channel installation Preferences Connections Clock Reset AV settings Info Connections AV1 AV2 AV3 HDMI 1 HDMI 2 HDMI 3 Side AUDIO IN L/R DIGITAL AUDIO IN ç In case of Digital audio connection also link the DIGITAL AUDIO IN to the corresponding input. In case of Analog audio connection (via Component Video Output (YPbPr) on AV3 or via HDMI), also link the AUDIO IN L/R to the corresponding input. Ò To operate the desired connected device: - Turn on your connected device. - Press the SELECT/INPUT button on the remote control. 11.1 Side panel overview USB R AUDIO L VIDEO S VIDEO 3.5 mm AUDIO L/R 2 VIDEO 1a S VIDEO 1b AUDIO L/R VIDEO S VIDEO 11.2.1 Camera, Camcorder, Game, PC Do not connect cable 1a and 1b at the same time.This may cause picture distortion ! ) Caution Before connecting a PC, set the PC monitor refresh rate to 60Hz. 11.2.2 Headphone Select Headphone volume in the Sound menu to adjust the headphone volume. See Chapter 5.2.3 Adjust sound menu settings. ) Press MUTE on the remote control to turn off the internal loudspeakers of the TV. 11.2.3 USB See Chapter 10 Multimedia browser. POWER SELECT INPUT SELECT INPUT DEMO OPTION INFO - Select your source with the cursor up/down. - Press the OK button. 24
-
 1
1 -
2
-
3
-
4
-
5
-
6
-
7
-
8
-
9
-
10
-
11
-
12
-
13
-
14
-
15
-
16
-
17
-
18
-
19
-
20
-
 21
21 -
 22
22 -
 23
23 -
 24
24 -
 25
25 -
 26
26 -
 27
27 -
 28
28 -
 29
29 -
 30
30 -
 31
31 -
32
-
33
-
34
-
35
-
36
-
37
-
38
-
39
-
40
 |
 |