Philips MCM8 User manual - Page 22
Preparation for recording, One touch recording, CD Synchronized start recording - 22
 |
View all Philips MCM8 manuals
Add to My Manuals
Save this manual to your list of manuals |
Page 22 highlights
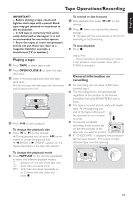
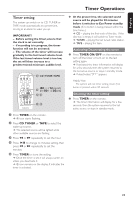
English Tape Operations/Recording IMPORTANT! Recording is permissible if copyright or other rights of third parties are not infringed upon. Preparation for recording 1 Press TAPE. 2 Load a recordable tape into the tape deck. 3 Press í or ë on the remote to select the recording tape side. ➜ A appears on the display for the reverse side. ➜ B appears on the display for the forward side. 4 Press TAPE A/R on the remote repeatedly to select a recording mode. ➜ å for recording on one side only. ➜ ∂ for recording on both sides. 5 Prepare the source to be recorded. CD - load the disc. TUNER - tune to the desired radio station. AUX - connect external equipment. When recording is in progress ➜ REC starts flashing. ● It is not possible to change tape side. ● It is not possible to listen to another source. ● It is not possible to activate the timer function. One touch recording 1 Press CD, TUNER or AUX to select the recording source. 2 Start playback of the selected source. 3 Press and hold REC until REC icon starts flashing on the display panel to start recording. To stop recording ● Press Ç on the system. Helpful Hint: - One Touch Recording is not possible in TAPE mode, "SELECT SOURCE" will appear. CD Synchronized start recording 1 Press CD. ● If you want to start recording from a desired track, press í or ë. ➜ You can program the tracks in the order you want them to be recorded (refer to "CD Operation - Programming the disc tracks".) 2 Press and hold REC to start recording. ➜ The disc will start playback automatically. To select another track during recording 1 Press ÉÅto interrupt recording. 2 Press í or ë to select the desired track. 3 Press ÉÅto resume recording. To stop recording ● Press Ç. ➜ Recording and disc playback will stop simultaneously. 22
-
 1
1 -
2
-
3
-
4
-
5
-
6
-
7
-
8
-
9
-
10
-
11
-
12
-
13
-
14
-
15
-
16
-
 17
17 -
 18
18 -
 19
19 -
 20
20 -
 21
21 -
 22
22 -
 23
23 -
 24
24 -
 25
25 -
 26
26 -
 27
27
 |
 |
