Pioneer DEH11E Owner's Manual - Page 4
Visit our website, Protecting your unit from, theft, Before You Start - owners manual
 |
UPC - 012562945255
View all Pioneer DEH11E manuals
Add to My Manuals
Save this manual to your list of manuals |
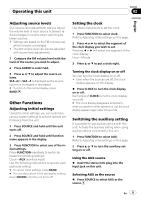
Page 4 highlights
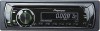
Section 01 Before You Start For warranty information please see the Limited Warranty sheet included with this unit. Visit our website Visit us at the following site: http://www.pioneerelectronics.com 1 Register your product. We will keep the details of your purchase on file to help you refer to this information in the event of an insurance claim such as loss or theft. 2 Receive updates on the latest products and technologies. 3 Download owner's manuals, order product catalogues, research new products, and much more. Protecting your unit from theft The front panel can be detached to deter theft. Important ! Handle gently when removing or attaching the front panel. ! Avoid subjecting the front panel to excessive shock. ! Keep the front panel out of direct sunlight and high temperatures. ! Before detaching, be sure to remove the AUX cable from the front panel. Otherwise, this unit, connected device or vehicle interior may be damaged. Attaching the front panel 1 Slide the front panel to the left until it clicks. Front panel and the head unit are jointed on the left side. Make sure that the front panel has been jointed to the head unit. 2 Press the right side of the front panel until it is firmly seated. # If you can't attach the front panel to the head unit successfully, try again. Front panel may be damaged if you attach the front panel forcedly. Removing the front panel 1 Press DETACH to release the front panel. 2 Grab the front panel and remove. 4 En
-
 1
1 -
 2
2 -
 3
3 -
 4
4 -
 5
5 -
 6
6 -
 7
7 -
 8
8 -
 9
9 -
 10
10 -
11
-
12
-
13
-
14
-
15
-
16
-
17
-
18
-
19
-
20
-
21
-
22
-
23
-
24
-
25
-
26
-
27
-
28
-
29
-
30
-
31
-
32
-
33
-
34
-
35
-
36
-
37
-
38
-
39
-
40
-
41
-
42
-
43
-
44
-
45
-
46
-
47
-
48
-
49
 |
 |
