Pioneer DEH11E Owner's Manual - Page 8
Audio Adjustments, Operating this unit
 |
UPC - 012562945255
View all Pioneer DEH11E manuals
Add to My Manuals
Save this manual to your list of manuals |
Page 8 highlights
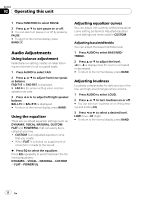
Section 02 Operating this unit 1 Press FUNCTION to select PAUSE. 2 Press a or b to turn pause on or off. # You can also turn pause on or off by pressing PAUSE. # To return to the normal display, press BAND. Audio Adjustments Using balance adjustment Fader/balance setting creates an ideal listening environment in all occupied seats. 1 Press AUDIO to select FAD. 2 Press a or b to adjust front/rear speaker balance. FAD F15 to FAD R15 is displayed. # FAD 0 is the proper setting when only two speakers are used. 3 Press c or d to adjust left/right speaker balance. BAL L15 to BAL R15 is displayed. # To return to the normal display, press BAND. Using the equalizer There are six stored equalizer settings such as DYNAMIC, VOCAL, NATURAL, CUSTOM, FLAT and POWERFUL that can easily be recalled at any time. ! CUSTOM is an adjusted equalizer curve that you create. ! When FLAT is selected no supplement or correction is made to the sound. % Press EQ to select the equalizer. Press EQ repeatedly to switch between the following equalizers: DYNAMIC-VOCAL-NATURAL-CUSTOM -FLAT-POWERFUL Adjusting equalizer curves You can adjust the currently selected equalizer curve setting as desired. Adjusted equalizer curve settings are memorized in CUSTOM. Adjusting bass/mid/treble You can adjust the bass/mid/treble level. 1 Press AUDIO to select BASS/MID/ TREBLE. 2 Press a or b to adjust the level. +6 to -6 is displayed as the level is increased or decreased. # To return to the normal display, press BAND. Adjusting loudness Loudness compensates for deficiencies in the low- and high-sound ranges at low volume. 1 Press AUDIO to select LOUD. 2 Press a or b to turn loudness on or off. # You can also turn loudness on or off by pressing and holding EQ. 3 Press c or d to select a desired level. LOW (low)-HI (high) # To return to the normal display, press BAND. 8 En
-
 1
1 -
2
-
 3
3 -
 4
4 -
 5
5 -
 6
6 -
 7
7 -
 8
8 -
 9
9 -
 10
10 -
 11
11 -
 12
12 -
 13
13 -
14
-
15
-
16
-
17
-
18
-
19
-
20
-
21
-
22
-
23
-
24
-
25
-
26
-
27
-
28
-
29
-
30
-
31
-
32
-
33
-
34
-
35
-
36
-
37
-
38
-
39
-
40
-
41
-
42
-
43
-
44
-
45
-
46
-
47
-
48
-
49
 |
 |