Pioneer SX-255R Service Manual - Page 28
Standby/on
 |
View all Pioneer SX-255R manuals
Add to My Manuals
Save this manual to your list of manuals |
Page 28 highlights
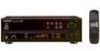
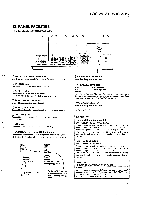
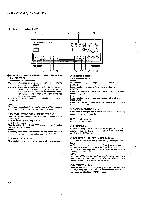
SX-255R, SX-205 • The illustration shows the SX-255R. 0 OD Pi 4 5 O 06 - . 04" ® POWER STANDBY/ON switch/STANDBY indica- tor (SX-255R) This is the switch for electric power. ON: When set to the ON position, power is supplied and the unit becomes operational. STANDBY: When set to the STANDBY position, the main power flow is cut and the unit is no longer fully operational. A minute flow of power feeds the unit to maintain opera- tion readiness. The STANDBY indicator is illuminated during standby mode. • The accessory remote control unit can also be used to operate STANDBY/ON. NOTE: When the power is initially turned ON, muting will be applied to prevent sound from being output for approx. 5 seconds. ® POWER switch/POWER indicator (SX-205) When this switch is pressed, power is supplied to the unit and the indicator lights up. Press the switch again to turn power OFF. [Timer ON/OFF possible] When the unit is switched ON, ON/OFF control can be performed by means of the optional timer. NOTE: When the power is initially turned ON, muting will be applied to prevent sound from being output for approx. 5 seconds. C) SUPER BASS button When this button is pressed, the bass sound will be emphasized. 1 16 1 © Function buttons Use to select playback source. [PHONOI Press when listening to record playback on a turntable. [TUNER] Press when listening to AM or FM broadcasts with a tuner. [LD/DVD] Press when listening to programs from a component connected to the LD/DVD jacks. [CD] Press when listening to compact disc playback with a CD player. [TAPE 1/VCR] Press when listening to tape playback on cassette deck 1 or on a video cassette recorder. ® TAPE 2 MONITOR button Press when listening to tape playback and monitor the recording sound with the cassette deck 2. © VOLUME control Use to adjust volume level. © PHONES jack Connect the plug on your headphones to this jack. To listen to a program through the headphones, set both SPEAKERS A and B switches to the OFF position. © SPEAKERS ( it OFF, SON) buttons These are used to select the speaker through which you wish to listen. A: When the speakers connected to the A terminals are in use. B: When the speakers connected to the B terminals are in use. • Turn both A and B speakers to the OFF position when only the headphones are in use. NOTE: No sound will be heard through the speakers when both A and B buttons are pressed if only one set of speakers has been connected to either A or B SPEAKERS terminals. ® MEMORY button When the unit is in the frequency display mode, pressing this button will result in the memorization of the current broadcast band, reception frequency, CLASS and FM MPX mode. 36
-
 1
1 -
2
-
3
-
4
-
5
-
6
-
7
-
8
-
9
-
10
-
11
-
12
-
13
-
14
-
15
-
16
-
17
-
18
-
19
-
20
-
21
-
22
-
 23
23 -
 24
24 -
 25
25 -
 26
26 -
 27
27 -
 28
28 -
 29
29
 |
 |
