Pioneer SX-255R Service Manual - Page 3
Sx-255r, Sx-205, Checking, Pattern, Mother
 |
View all Pioneer SX-255R manuals
Add to My Manuals
Save this manual to your list of manuals |
Page 3 highlights
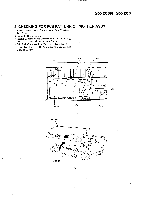
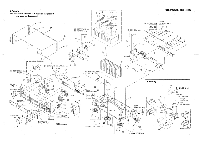
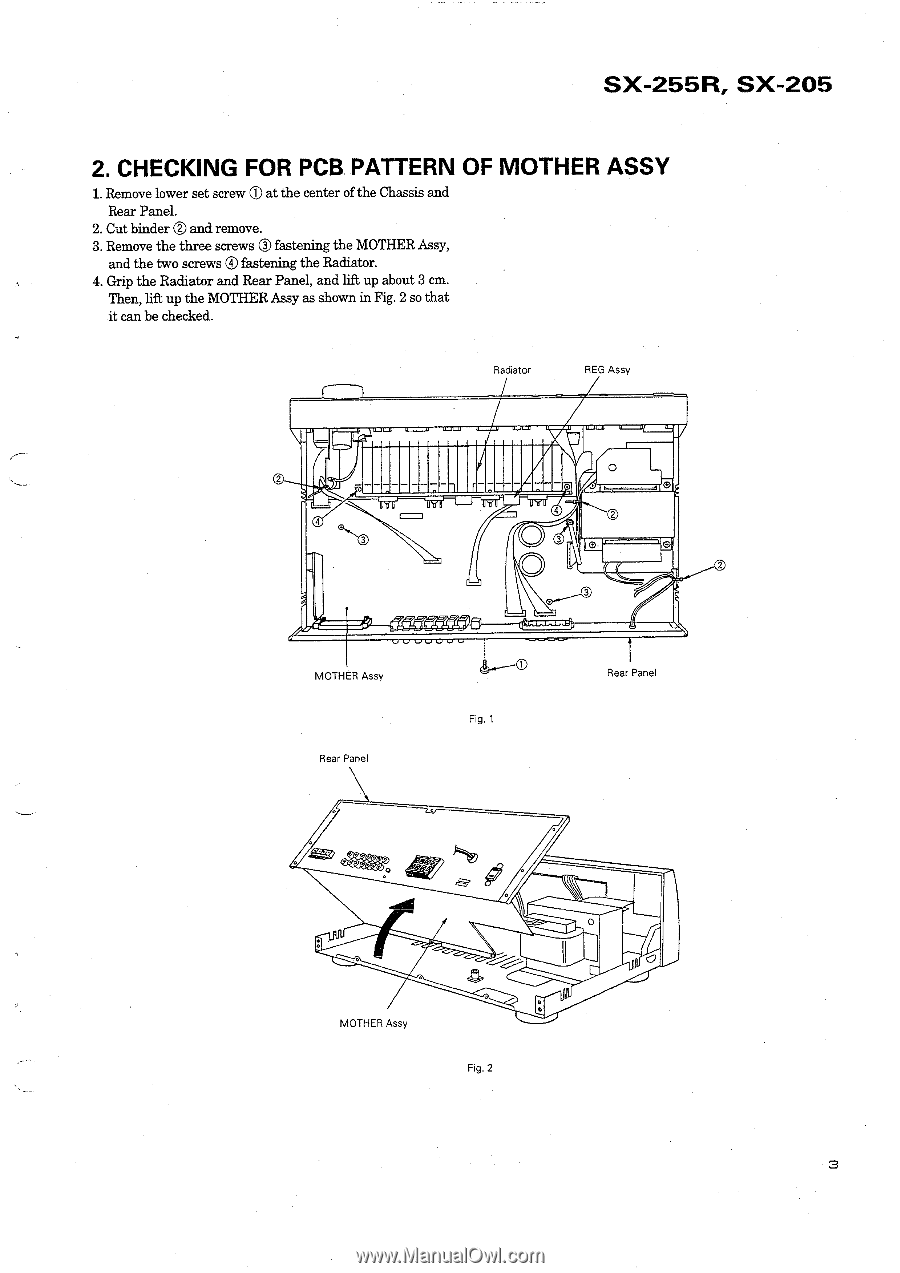
SX-255R, SX-205 2. CHECKING FOR PCB PATTERN OF MOTHER ASSY 1. Remove lower set screw at the center of the Chassis and Rear Panel. 2. Cut binder ® and remove. 3. Remove the three screws ® fastening the MOTHER Assy, and the two screws ® fastening the Radiator. 4. Grip the Radiator and Rear Panel, and lift up about 3 cm. Then, lift up the MOTHER Assy as shown in Fig. 2 so that it can be checked. Radiator REG Assy 4 MOTHER Assy Rear Panel O 4 02 0 3 0 2 3 Fig. 1 Rear Panel 4140 itt. MOTHER Assy 0 • II O Fig. 2 3
-
 1
1 -
 2
2 -
 3
3 -
 4
4 -
 5
5 -
 6
6 -
 7
7 -
 8
8 -
 9
9 -
10
-
11
-
12
-
13
-
14
-
15
-
16
-
17
-
18
-
19
-
20
-
21
-
22
-
23
-
24
-
25
-
26
-
27
-
28
-
29
 |
 |
SX-255R,
SX-205
2.
CHECKING
FOR
PCB
PATTERN
OF
MOTHER
ASSY
1.
Remove
lower
set
screw
at
the
center
of
the
Chassis
and
Rear
Panel.
2.
Cut
binder
®
and
remove.
3.
Remove
the
three
screws
®
fastening
the
MOTHER
Assy,
and
the
two
screws
®
fastening
the
Radiator.
4.
Grip
the
Radiator
and
Rear
Panel,
and
lift
up
about
3
cm.
Then,
lift
up
the
MOTHER
Assy
as
shown
in
Fig.
2
so
that
it
can
be
checked.
Radiator
REG
Assy
O
4
0
0
4
3
02
3
MOTHER
Assy
Rear
Panel
41
0
4itt.
MOTHER
Assy
Fig.
1
Fig.
2
II
•
0
Rear
Panel
O
2
3