Poulan 1400T User Manual - Page 10
starting
 |
View all Poulan 1400T manuals
Add to My Manuals
Save this manual to your list of manuals |
Page 10 highlights
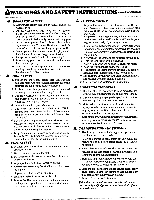
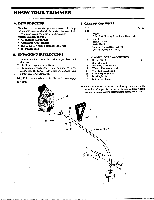
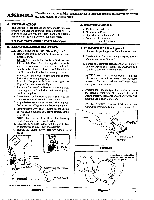
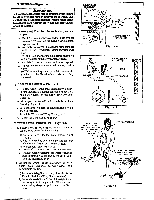
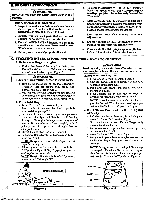
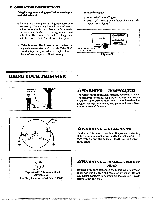
B. PRE-OPERATION CHECKS A WARNING Review all Warnings and Safety Instructions in this manual. Before operating your tool, always: 1. Inspect the entire tool before each use. Replace damaged parts. Check for fuel leaks and make sure all fasteners are in place and securely fastened. 2. Replace trimmer head parts that are cracked, chipped, or damaged before using this tool. 3. Use only WEED EATER® flexible, non-metallic, monofiLament trimming line ofthecorrect diameter. Never use wire or rope, string, etc. 4. Use only with the shield properly attached. 5. Use only the specified WEED EATER® trimmer head. See "Specifications." Makesurethetrimmer head isproperly installedandsecurelyfastened.See 'Assembly." 6. Makecarburetoradjustments with thedriveshaft housingsupported toprevent thetrimmerlinefrom contactinganyobject. Hold thetool by hand;do not use the optional shoulder strap for support. 7. Keep others away when making carburetor adjustments. 8. Use only WEED EATER® accessories as recommended for this tool by the manufacturer. 9. Clean theairfilter ifdirty beforeoperatingthe tool. Refer to "Specifications" for air filter location. C. STARTING INSTRUCTIONS (For location of controls, refer to "Specifications.") 1. Before starting the engine: a. Fuel engine. Move 10 feet away from fuelingsite. b. Extend line4-6 inches from Trimmer Head to pro- vide adequate load on engine. Figure 3. AWARNING Avoid any bodily contact with the muffler when starting a warm engine. A hot muffler can cause serious burns. A WARNING The trimmer head will turn as soon as engine starts. c. Rest engine and Shield on ground, supporting Trimmer Head off ground away from trees, bushes, onlookers, etc. Figure 7. d. With optional Shoulder Strap, place Shoulder Strap on your shoulder. Starr engine before lifting tool to operraingpositionorclipping ShoulderStmpto tool. 2. For a Cold Engine: a. Move Choke to "On" position. Figure 8. b. Grip rear handle and keep Throttle Trigger fully squeezed through step "f." c. Pull Starter Rope sharply until engine attempts to run, but no more than 8pullsat full choke toavoid flooding theengine. Theengine "attempttorun"may behard to hew: The operator must lister: cwfidly. After 8 pulls, proceed to step "cl!" even if engine has not attempted to run. d. Move Choke to "half' position. Figure 8. e. Pull Starter Rope sharply until engine runs, but no more than 5 pulls. NOTE:Ifengine has notstartedafter 5pulls, repeat steps "a" through "e." 3. For A Warm Engine: a. Move Choke to "half' position. Figure 8. b. Grip rear handle and keep Throttle Trigger fully squeezed until engine runs. c. Pull Starter Rope sharply until engine runs, but no more than 5 pulls. d. MoveChoke to "off' position. Figure 8. KeepTriggerfullysqueezed until engine runs smoothly NOTE: If engine does not run after 5 pulls, it is probablyflooded. Wait a fewminutesand repeat procedure with Choke at 'off' position. Figure 8. 4. ForA Warm Engine(After RunningOut of Fuel;) a. Refuel engine. Move 10 feet away from fueling site. b. Move Choke to "On" position. Figure 8. c. Grip rear handle and keep Throttle Trigger fully squeezed until engine runs. d. Pull Starter Rope sharply until engine attemps to run, but no more than 5 pulls. e. Move Choke to 'off' position. Figure 8. f. Pull Starter Rope until engine runs, but no more than 5 pulls. Keep Triggerfullysqueezeduntilengine runs smoothly. f. Allow engine to run 5 seconds, then push Choke to NOTE: If engine has not started, pull Starter Rope `off' position. Figure 8. Keep Triggerfullysqueezed 5 more pulls. Ifenginestill does not run, it is prob- until engine runs smoothly. NOTE: Ifenginedies with Chokeat "off- position, repeat steps "d" through "f." ably flooded. Wait a few minutes and repeat procedure with Choke at "off- position. Figure 8. STARTING POST ON /CI HALF • 10 Figure 7 ON ON Figure 8
-
 1
1 -
2
-
3
-
4
-
 5
5 -
 6
6 -
 7
7 -
 8
8 -
 9
9 -
 10
10 -
 11
11 -
 12
12 -
 13
13 -
 14
14 -
 15
15 -
16
-
17
-
18
-
19
-
20
 |
 |
