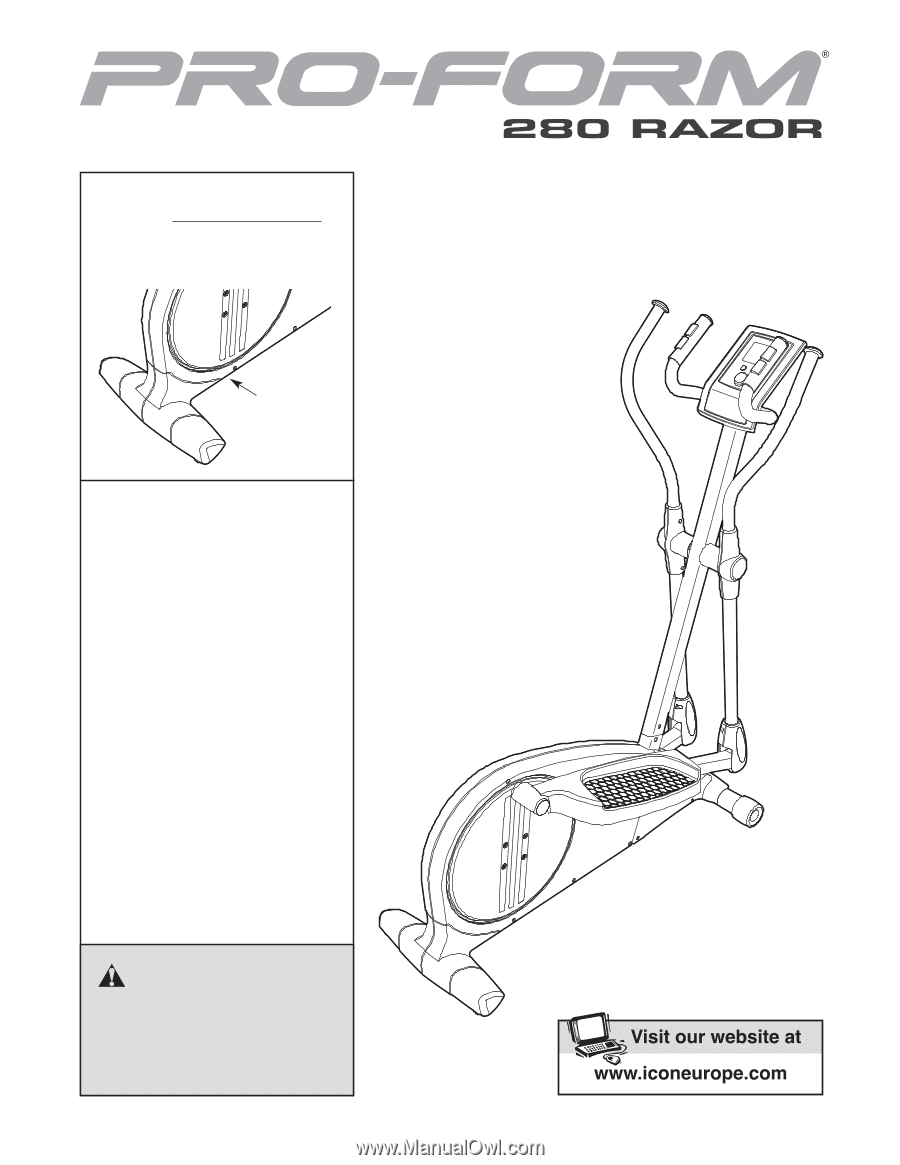
ProForm 280 Razor Instruction Manual
ProForm 280 Razor Manual
 |
View all ProForm 280 Razor manuals
Add to My Manuals
Save this manual to your list of manuals |
ProForm 280 Razor manual content summary:
- ProForm 280 Razor | Instruction Manual - Page 1
: [email protected] Write: ICON Health & Fitness, Ltd. Unit 4 Revie Road Industrial Estate Revie Road, Beeston Leeds, LS11 8JG UK CAUTION Read all precautions and instructions in this manual before using this equipment. Keep this - ProForm 280 Razor | Instruction Manual - Page 2
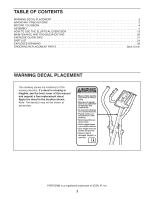
5 HOW TO USE THE ELLIPTICAL EXERCISER 13 MAINTENANCE AND TROUBLESHOOTING 20 EXERCISE GUIDELINES 21 PART LIST 24 EXPLODED DRAWING 26 If a decal is missing or illegible, see the front cover of this manual and request a free replacement decal. Apply the decal in the location shown. Note: - ProForm 280 Razor | Instruction Manual - Page 3
risk of serious injury, read all important precautions and instructions in this manual and all warnings on your elliptical exerciser before using important for persons over the age of 35 or persons with pre-existing health problems. 2. It is the responsibility of the owner to ensure that all users of - ProForm 280 Razor | Instruction Manual - Page 4
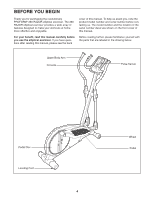
Thank you for purchasing the revolutionary PROFORM® 280 RAZOR elliptical exerciser. The 280 RAZOR elliptical exerciser provides a wide array of features designed to make your workouts at home more effective and enjoyable. For your benefit, read this manual carefully before you use the elliptical - ProForm 280 Razor | Instruction Manual - Page 5
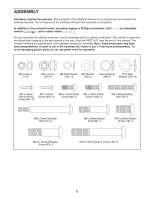
small parts. The number in parentheses below each drawing is the key number of the part, from the PART LIST near the end of this manual. The number following the parentheses is the quantity needed for assembly. Note: Some small parts may have been preassembled. If a part is not in the - ProForm 280 Razor | Instruction Manual - Page 6
1. To make assembly easier, read the 1 information on page 5 before you begin assembling the elliptical exerciser. Identify the Left and Right Frame Covers (48, 49), which are marked with "Left" and "Right" stickers. Orient the Left and Right Frame Covers (48, 49) with the rounded sides in the - ProForm 280 Razor | Instruction Manual - Page 7
3. Tip: Avoid pinching the Wire Harness (86). Start all screws before tightening any of them. Have another person hold the Upright (2) near the Frame (1). Locate the wire tie in the Upright (2). Tie the lower end of the wire tie to the Wire Harness (86). Next, pull the upper end of the wire tie - ProForm 280 Razor | Instruction Manual - Page 8
5. Identify the Left and Right Pulse Bars (5, 16), 5 which are marked with "Left" and "Right" stick- ers. Have another person hold the Right Pulse Bar (16) near the Console Bracket (3). Locate the wire tie in the Console Bracket (3). Tie the lower end of the wire tie to the right Pulse Wire (37 - ProForm 280 Razor | Instruction Manual - Page 9
8. While another person holds the Console (4) near the Console Bracket (3), connect the console wire to the Wire Harness (86). Then, connect the console pulse wires to the Pulse Wires (37). Insert the excess wires downward into the Upright (2). Tip: Avoid pinching the wires. Attach the Console (4) - ProForm 280 Razor | Instruction Manual - Page 10
10. Identify the Left Pedal (12), which is marked with a "Left" sticker, and orient it as shown. Attach the Left Pedal (12) to the left Pedal Arm (14) with three M10 x 70mm Button Screws (75), three M10 Split Washers (78), and an M4 x 16mm Screw (94). Repeat this step for the Right Pedal (13) and - ProForm 280 Razor | Instruction Manual - Page 11
12. Apply a generous amount of the included grease to the axles on the Upright (2). Then, 12 apply a small amount of grease to two Wave Washers (88). Orient an Inner Arm Cover (22) and the right Upper Body Leg (6) as shown. Slide the Inner Arm Cover (22) and the right Upper Body Leg (6) onto - ProForm 280 Razor | Instruction Manual - Page 12
14. Apply a small amount of grease to the barrel of an M6 x 72mm Shoulder Bolt (21). 14 Have another person hold the right Pedal Arm (14) inside the bracket on the right Upper Body Leg (6). Attach the right Pedal Arm (14) to the right Upper Body Leg (6) with the M6 x 72mm Shoulder Bolt (21), an - ProForm 280 Razor | Instruction Manual - Page 13
HOW TO USE THE ELLIPTICAL EXERCISER HOW TO MOVE THE ELLIPTICAL EXERCISER HOW TO LEVEL THE ELLIPTICAL EXERCISER To move the elliptical exerciser, stand in front of it, place one foot against one of the wheels, and firmly hold the upper end of the upright. Pull the upright forward until you can - ProForm 280 Razor | Instruction Manual - Page 14
HOW TO EXERCISE ON THE ELLIPTICAL EXERCISER To mount the elliptical exerciser, hold the upper body arms and step onto the pedal that is in the lowest position. Next, step onto the other pedal. Push the pedals until they begin to move with a continuous motion. Note: The crank arms can turn in either - ProForm 280 Razor | Instruction Manual - Page 15
and prompts you to increase or decrease your pedaling pace as it guides you through an effective workout. IMPORTANT: Before you use the console for CONSOLE SETTINGS on page 16.) To enter console settings, see page 16. To use the manual mode, see page 17. To use a preset workout, see page 19. Note: - ProForm 280 Razor | Instruction Manual - Page 16
HOW TO ENTER CONSOLE SETTINGS 1. Begin pedaling or press any button on the console to turn on the console. A moment after you begin pedaling or press a button, the display will light. 2. Select the user mode. The user mode allows you to select the type of product that the console is operating, - ProForm 280 Razor | Instruction Manual - Page 17
or press a button, the display will light. 2. Select the manual mode. Each time you turn on the console, the manual mode will be selected. If you have selected a workout, reselect the manual mode by pressing the Workout button repeatedly until the word MANUAL appears in the lower left corner of the - ProForm 280 Razor | Instruction Manual - Page 18
5. Measure your heart rate if desired. If there are sheets of clear plastic on Contacts the metal con- tacts on the hand- grip pulse sensor, remove the plas- tic. To measure your heart rate, hold the handgrip pulse sensor with your palms resting against the metal contacts. Avoid moving - ProForm 280 Razor | Instruction Manual - Page 19
pedal at a pace that is comfortable for you. If the resistance level for the current segment is too high or too low, you can manually override the setting by turning the resistance dial. IMPORTANT: When the current segment of the workout ends, the pedals will automatically adjust to the resistance - ProForm 280 Razor | Instruction Manual - Page 20
and keep the console out of direct sunlight. CONSOLE TROUBLESHOOTING If the console displays become dim, the batteries should be replaced; most console problems are the result of low batteries. See assembly step 7 on page 8 for replacement instructions. If the handgrip pulse sensor does not function - ProForm 280 Razor | Instruction Manual - Page 21
to achieving results. You can use your heart rate as a guide to find the proper intensity level. The chart below shows recommended heart Stretching increases the flexibility of your muscles and helps to prevent post-exercise problems. To find the proper intensity level, find your age at the bottom - ProForm 280 Razor | Instruction Manual - Page 22
SUGGESTED STRETCHES The correct form for several basic stretches is shown at the right. Move slowly as you stretch-never bounce. 1. Toe Touch Stretch Stand with your knees bent slightly and slowly bend forward from your hips. Allow your back and shoulders to relax as you reach down toward your - ProForm 280 Razor | Instruction Manual - Page 23
NOTES 23 - ProForm 280 Razor | Instruction Manual - Page 24
PART LIST-Model No. PFEVEL73008.0 R0808A Key No. Qty. Description Key No. Qty. Description 1 1 Frame 2 1 Upright 3 1 Console Bracket 4 1 Console 5 1 Left Pulse Bar 6 2 Upper Body Leg 7 1 Idler Wheel 8 1 Left Upper Body Arm 9 1 Right Upper Body Arm 10 2 Foam Grip 11 - ProForm 280 Razor | Instruction Manual - Page 25
97 4 98 4 99 2 100 1 101 4 M4 x 20mm Screw M8 x 38mm Button Bolt M8 Washer Ground Screw M6 Split Washer 102 4 * - * - * - M6 x 18mm Patch Screw Userʼs Manual Assembly Tool Grease Packet Note: Specifications are subject to change without notice. See the back cover of this - ProForm 280 Razor | Instruction Manual - Page 26
EXPLODED DRAWING A-Model No. PFEVEL73008.0 R0808A 26 11 28 10 8 19 17 4 11 10 20 80 76 35 88 18 12 29 98 5 97 77 82 36 6 22 94 37 102 101 102 94 94 28 3 17 19 96 94 98 76 97 94 84 16 82 22 36 102 101 37 84 102 32 86 2 84 9 77 18 88 80 35 20 6 34 99 90 33 94 - ProForm 280 Razor | Instruction Manual - Page 27
EXPLODED DRAWING B-Model No. PFEVEL73008.0 R0808A 27 92 93 92 42 91 26 73 41 41 83 91 92 93 44 92 50 63 71 64 51 85 70 54 85 55 52 82 69 7 87 59 24 53 83 35 95 56 57 94 72 83 58 83 35 95 66 83 35 38 95 95 39 65 100 82 38 25 40 1 45 93 92 49 43 47 74 67 68 60 - ProForm 280 Razor | Instruction Manual - Page 28
information when contacting us: • the model number and serial number of the product (see the front cover of this manual) • the name of the product (see the front cover of this manual) • the key number and description of the replacement part(s) (see the PART LIST and the EXPLODED DRAWING near the
-
 1
1 -
 2
2 -
 3
3 -
 4
4 -
 5
5 -
 6
6 -
 7
7 -
8
-
9
-
10
-
11
-
12
-
13
-
14
-
15
-
16
-
17
-
18
-
19
-
20
-
21
-
22
-
23
-
24
-
25
-
26
-
27
-
28
 |
 |
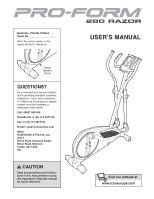
CAUTION
Read all precautions and instruc-
tions in this manual before using
this equipment. Keep this manual
for future reference.
Model No. PFEVEL73008.0
Serial No.
Write the serial number in the
space above for reference.
USERʼS MANUAL
QUESTIONS?
As a manufacturer, we are commit-
ted to providing complete customer
satisfaction. If you have questions,
or if there are missing parts, please
contact us at the numbers or
addresses listed below:
Call: 08457 089 009
Outside UK: 0 (44) 113 3877133
Fax: 0 (44) 113 3877125
E-mail: [email protected]
Write:
ICON Health & Fitness, Ltd.
Unit 4
Revie Road Industrial Estate
Revie Road, Beeston
Leeds, LS11 8JG
UK
Serial
Number
Decal