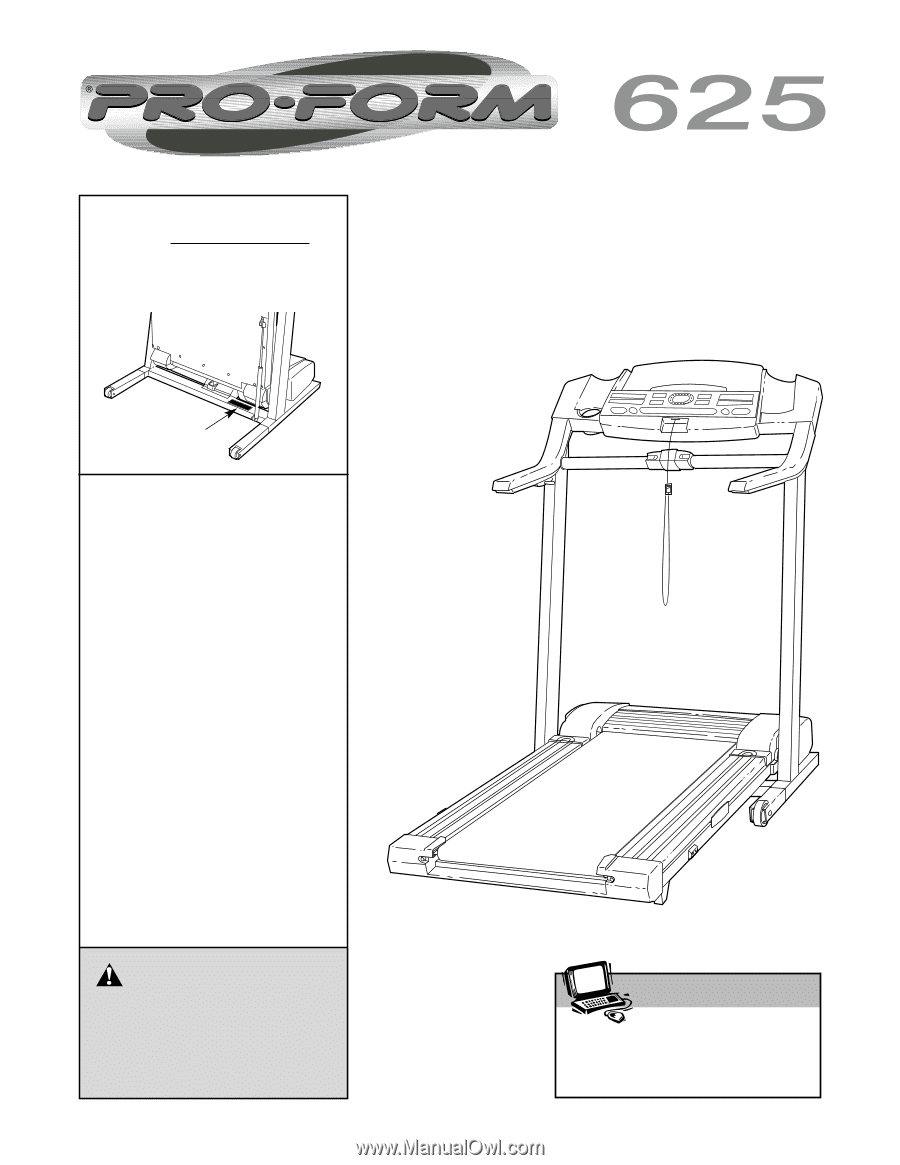
ProForm 625 Treadmill User Manual
ProForm 625 Treadmill Manual
 |
View all ProForm 625 Treadmill manuals
Add to My Manuals
Save this manual to your list of manuals |
ProForm 625 Treadmill manual content summary:
- ProForm 625 Treadmill | User Manual - Page 1
? If you have questions, or if there are missing parts, we will guarantee complete satisfaction through direct assistance from our instructions in this manual before using this equipment. Save this manual for future reference. USER'S MANUAL Patent Pending Visit our website at www.proform.com new - ProForm 625 Treadmill | User Manual - Page 2
YOU BEGIN 5 ASSEMBLY 6 OPERATION AND ADJUSTMENT 9 HOW TO FOLD AND MOVE THE TREADMILL 15 TROUBLESHOOTING 17 CONDITIONING GUIDELINES 19 PART LIST 22 ORDERING REPLACEMENT PARTS Back Cover LIMITED WARRANTY Back Cover Note: An EXPLODED DRAWING is attached in the center of this manual. PROFORM is - ProForm 625 Treadmill | User Manual - Page 3
while you are standing on the walking belt. Always hold the handrails while using the treadmill. 16. The treadmill is capable of high speeds. Adjust the speed in small increments to avoid sudden jumps in speed. 7. The treadmill should not be used by persons weighing more than 250 pounds. 8. Never - ProForm 625 Treadmill | User Manual - Page 4
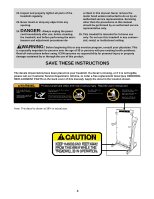
the power cord immediately after use, before cleaning the treadmill, and before performing the main- tenance and adjustment procedures de- scribed in this manual. Never remove the motor hood unless instructed to do so by an authorized service representative. Servicing other than the procedures - ProForm 625 Treadmill | User Manual - Page 5
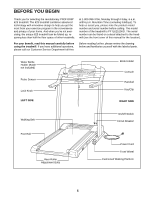
, please review the drawing below and familiarize yourself with the labeled parts. Water Bottle Holder (Bottle not included) Pulse Sensor Lock Knob LEFT SIDE Book Holder Console Handrail Key/Clip RIGHT SIDE Walking Belt On/Off Switch Circuit Breaker Foot Rail Rear Roller Adjustment Bolts Power - ProForm 625 Treadmill | User Manual - Page 6
condition and does not affect treadmill performance. If there is lubricant on top of the walking belt, simply wipe off the lubricant with a soft cloth and a mild, non-abrasive cleaner. 1. Note: Use the PART IDENTIFICATION CHART on page 23 to identify small parts used during assembly. Do not plug in - ProForm 625 Treadmill | User Manual - Page 7
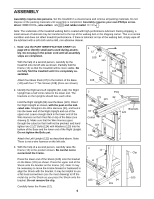
sensors on top as shown. Attach the Pulse Bar between the Uprights with two 3 1/2" Bolts (107). Do not to pinch the wires. 5. Attach the Latch Assembly (9) and the Latch Spacer (56) to the Left Upright (122) with two 3/4" Tek Screws (101) 5 as shown. 34 Wire Hole 109 107 82 56 9 122 - ProForm 625 Treadmill | User Manual - Page 8
on the Console Base to prevent the Wire Harness from slipping. Then, cut off the end of the plastic tie. parts are properly tightened before you use the treadmill. Note: Extra screws may be included. Keep the included allen wrench in a secure place. The allen wrench is used to adjust the walking belt - ProForm 625 Treadmill | User Manual - Page 9
to indicate whether it is functioning properly. Failure to use a properly functioning surge suppressor could result in damage to the control system of the treadmill. If the control system is damaged, the walking belt may change speed or stop unexpectedly, which may result in a fall and serious - ProForm 625 Treadmill | User Manual - Page 10
Key on the face of the console, remove it. Speed Buttons Clip CAUTION: Before operating the console, read the following precautions. • Do not stand on the walking belt when turning on the power. • Always wear the clip (see the drawing above) while operating the treadmill. • Adjust the speed - ProForm 625 Treadmill | User Manual - Page 11
in increments of 0.5 mph. To change the speed setting quickly, press the QUICK SPEED buttons. Note: After the buttons are pressed, it will take a moment for the treadmill to reach the selected speed setting. To stop the walking belt, press the STOP button. The TIME/INCLINE/SEG. TIME display will - ProForm 625 Treadmill | User Manual - Page 12
you become familiar with it. Remember to stand still while measuring your heart rate. 7 When you are finished exercising, remove the key. Step onto the foot rails, press the STOP button, and adjust the incline of the treadmill to the lowest level. The incline must be at the lowest level when the - ProForm 625 Treadmill | User Manual - Page 13
The walking belt will then slow to a stop. If the speed or incline setting for the current segment is too high or too low, you can manually override the setting by pressing the SPEED or INCLINE buttons on the console. However, when the next segment begins, the treadmill will automatically adjust to - ProForm 625 Treadmill | User Manual - Page 14
number of miles that the walking belt has moved. The TIME/INCLINE/SEG. TIME display will show the total number of hours that the treadmill has been used. An E, for English miles, or an M, for metric kilometers, will appear in the SPEED/MINMILE display. Press the SPEED v button to change the unit of - ProForm 625 Treadmill | User Manual - Page 15
TREADMILL HOW TO FOLD THE TREADMILL FOR STORAGE Before folding the treadmill, adjust the incline to the lowest position. If this is not done, the treadmill may and hold the treadmill firmly. Using your left hand, pull the latch knob to the left and hold it. Raise the treadmill until the latch - ProForm 625 Treadmill | User Manual - Page 16
LOWER THE TREADMILL FOR USE 1. Hold the upper end of the treadmill with your right hand as shown. Using your left hand, pull the latch knob to the left and hold it. Pivot the treadmill down until the frame is past the latch pin. Slowly release the latch knob. 2. Hold the treadmill firmly with both - ProForm 625 Treadmill | User Manual - Page 17
on/off switch is in the on position. e. If the treadmill still will not run, please call our Customer Service Department, toll-free. PROBLEM: The speed display on the console does not function properly SOLUTION: a. Remove the key from the console and unplug the a power cord. Remove the screws - ProForm 625 Treadmill | User Manual - Page 18
the key, and run the treadmill for a few minutes. Repeat until the walking belt is properly tightened. b 3"-4" Rear Roller Adjustment Bolts c. If the walking belt still slows when walked on, call our Customer Service Department, toll-free. PROBLEM: The walking belt is off-center or slips when - ProForm 625 Treadmill | User Manual - Page 19
key to achieving the desired results is to exercise with the proper intensity. The proper intensity level can be found by using your heart rate as a guide use stored fat calories for energy. If your goal is to burn fat, adjust the speed and incline of the treadmill post-exercise problems. EXERCISE - ProForm 625 Treadmill | User Manual - Page 20
SUGGESTED STRETCHES The correct form for several basic stretches is shown at the right. Move slowly as you stretch-never bounce. 1. Toe Touch Stretch Stand with your knees bent slightly - ProForm 625 Treadmill | User Manual - Page 21
NOTES 21 - ProForm 625 Treadmill | User Manual - Page 22
49 2 50 1 Description Motor Belt Pulley/Flywheel/Fan Motor Nut Motor/Pulley/ Flywheel/Fan Incline Motor Bolt Small Nut Incline Motor Stop Bracket Latch Assembly Hood Bracket Plate Rear Foot Spacer Frame Interface Bracket Incline Motor Pivot Bolt Incline Motor Nut/Wheel Nut Guide Screw Plastic Stand - ProForm 625 Treadmill | User Manual - Page 23
Wire, F/Ring #1 8" Green Wire, 2 Ring #1 4" Red Wire, M/F #1 User's Manual # These parts are not illustrated * Includes all parts shown in the box PART IDENTIFICATION CHART Use the drawings below to identify small parts used during the assembly process (see pages 6-9). 3/4" Tek Screw (101 - ProForm 625 Treadmill | User Manual - Page 24
36 65 100 12 59 60 65 36 75 46 45 89 70 49 16 44 1 2 3 39 40 41 80 46 32 68 71 4* 37 5 7 8 102 6 66 3 78 98 84 112 17 30 118 15 113 18 30 15 30 74 93 10 21 22 19 88 15 33 39 92 38 14 81 15 15 35 52 23 30 62 29 27 28 26 30 25 24 31 30 43 41 75 16 42 15 33 - ProForm 625 Treadmill | User Manual - Page 25
76 110 107 76 85 56 9 101 122 103 20 86 95 97 15 101 72 90 117 87 50 79 117 77 34 109 76 76 107 48 76 85 82 83 104 89 89 79 91 96 97 101 30 123 124 62 78 34 99 105 15 20 95 86 101 83 104 97 115 101 103 97 123 101 124 116 46 89 121 46 46 46 46 101 16 16 111 94 101 - ProForm 625 Treadmill | User Manual - Page 26
NAME OF THE PRODUCT (PROFORM® 625 treadmill) • The SERIAL NUMBER OF THE PRODUCT (see the front cover of this manual) • The KEY NUMBER AND DESCRIPTION OF THE PART(S) (see the EXPLODED DRAWING attached in the center of this manual and the PART LIST on page 22) LIMITED WARRANTY ICON Health & Fitness
-
 1
1 -
 2
2 -
 3
3 -
 4
4 -
 5
5 -
 6
6 -
 7
7 -
8
-
9
-
10
-
11
-
12
-
13
-
14
-
15
-
16
-
17
-
18
-
19
-
20
-
21
-
22
-
23
-
24
-
25
-
26
 |
 |
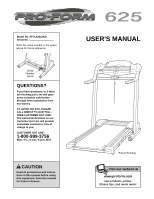
USER'S MANUAL
Visit our website at
www.proform.com
new products, prizes,
fitness tips, and much more!
Patent Pending
CAUTION
Read all precautions and instruc-
tions in this manual before using
this equipment. Save this manual
for future reference.
Model No. PFTL62510KD
Serial No.
QUESTIONS?
If you have questions, or if there
are missing parts, we will guar-
antee complete satisfaction
through direct assistance from
our factory.
TO AVOID DELAYS, PLEASE
CALL DIRECT TO OUR TOLL-
FREE CUSTOMER HOT LINE.
The trained technicians on our
Customer Hot Line will provide
immediate assistance, free of
charge to you.
CUSTOMER HOT LINE:
1-800-999-3756
Mon.–Fri., 6 a.m.–6 p.m. MST
Serial
Number
Decal
Write the serial number in the space
above for future reference.