ProForm 690 Hr Elliptical Uk Manual
ProForm 690 Hr Elliptical Manual
 |
View all ProForm 690 Hr Elliptical manuals
Add to My Manuals
Save this manual to your list of manuals |
ProForm 690 Hr Elliptical manual content summary:
- ProForm 690 Hr Elliptical | Uk Manual - Page 1
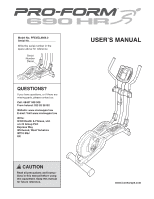
: Visit www.iconsupport.eu Write: ICON Health & Fitness, Ltd. c/o HI Group PLC Express Way Whitwood, West Yorkshire WF10 5QJ UK CAUTION Read all precautions and instructions in this manual before using this equipment. Keep this manual for future reference. USERʼS MANUAL www.iconeurope.com - ProForm 690 Hr Elliptical | Uk Manual - Page 2
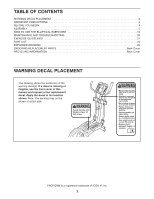
5 HOW TO USE THE ELLIPTICAL EXERCISER 12 MAINTENANCE AND TROUBLESHOOTING 20 EXERCISE GUIDELINES 21 PART LIST 24 cover of this manual and request a free replacement decal. Apply the decal in the location shown. Note: The decal(s) may not be shown at actual size. PROFORM is a registered - ProForm 690 Hr Elliptical | Uk Manual - Page 3
WARNING: To reduce the risk of serious injury, read all important precautions and instructions in this manual and all warnings on your elliptical exerciser before using your elliptical exerciser. ICON assumes no responsibility for personal injury or property damage sustained by or through - ProForm 690 Hr Elliptical | Uk Manual - Page 4
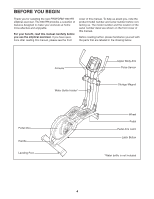
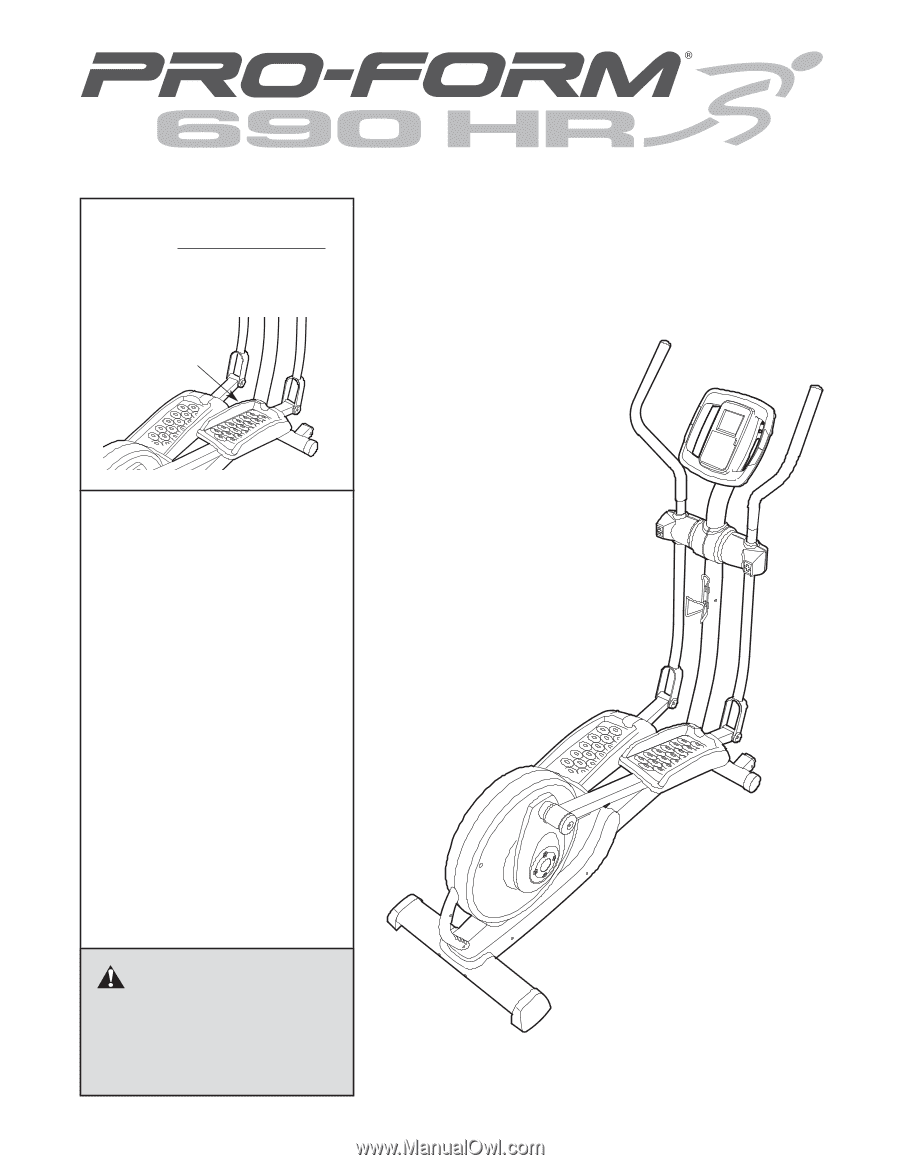
Thank you for selecting the new PROFORM® 690 HR elliptical exerciser. The 690 HR provides a selection of features designed to make your workouts at home more effective and enjoyable. For your benefit, read this manual carefully before you use the elliptical exerciser. If you have questions after - ProForm 690 Hr Elliptical | Uk Manual - Page 5
mallet . , an adjustable As you assemble the elliptical exerciser, use the drawings below to identify small parts. The number in parentheses below each drawing is the key number of the part, from the PART LIST near the end of this manual - ProForm 690 Hr Elliptical | Uk Manual - Page 6
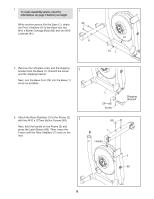
1. To make assembly easier, read the information on page 5 before you begin. While another person lifts the Base (1), attach the Front Stabilizer (6) to the Base with two M10 x 80mm Carriage Bolts (82) and two M10 Locknuts (81). 1 82 6 81 81 1 2. Remove the indicated screw and the shipping - ProForm 690 Hr Elliptical | Uk Manual - Page 7
Screw across from the first Hub Screw. Then, tighten the remaining two Hub Screws. 36 75 Repeat this step on the right side of the elliptical 87 exerciser; make sure that the Crank Arms (36) are oriented so the Crank Bushing Sleeves (43) are in the positions shown. 87 Note: There are - ProForm 690 Hr Elliptical | Uk Manual - Page 8
6. The Console (5) requires four 1.5V D batteries (not included); alkaline batteries are recom- 6 mended. Press the tab on the battery cover and remove the battery cover. Next, insert four bat- teries into the Console. Make sure that the batteries are oriented as shown by the dia- gram inside - ProForm 690 Hr Elliptical | Uk Manual - Page 9
9. Identify the Left Upper Body Arm (8) and the Left Upper Body Leg (11), which are marked 9 with "Left" stickers. Orient the Left Upper Body Arm (8) and the Left Upper Body Leg (11) as shown. Insert the Left Upper Body Arm into the Left Upper Body Leg. 9 8 Attach the Left Upper Body Arm (8) - ProForm 690 Hr Elliptical | Uk Manual - Page 10
11. Hold the Left Front Arm Cover (18) and the Left Rear Arm Cover (19) around the Left Upper Body Leg (11). Attach the Arm Covers with three M4 x 32mm Round Head Screws (105). Attach the Right Front Arm Cover (20) and the Right Rear Arm Cover (21) around the Right Upper Body Leg (12) in the same - ProForm 690 Hr Elliptical | Uk Manual - Page 11
the M8 x 69mm Button Bolt (80) and the two M8 x 23mm Button Screws (84). 14 Latch 43 15. Make sure that all parts of the elliptical exerciser are properly tightened. Note: Some hardware may be left over after assembly is completed. To protect the floor or carpet from damage, place a mat under - ProForm 690 Hr Elliptical | Uk Manual - Page 12
, and lift the pedal arms off the sleeves on the crank arms. HOW TO MOVE THE ELLIPTICAL EXERCISER To move the elliptical exerciser, first fold it as described at the left. Next, stand in front of the elliptical exerciser, hold the handle on the upright, and place one foot against the center of the - ProForm 690 Hr Elliptical | Uk Manual - Page 13
the arrow; however, for variety you can turn the crank arms in the opposite direction. To dismount the elliptical exerciser, wait until the pedals come to a complete stop. Note: The elliptical exerciser does not have a free wheel; the pedals will continue to move until the flywheel stops. When the - ProForm 690 Hr Elliptical | Uk Manual - Page 14
a selection of features designed to make your workouts more effective. When you use the manual mode of the console, you can change the resistance of the pedals with the touch of a button. As you exercise, the console will display continuous exercise feedback. You can even measure your heart rate - ProForm 690 Hr Elliptical | Uk Manual - Page 15
on the console. A moment after you begin pedaling, the display will light. 2. Select the manual mode. Each time you turn on the console, the manual mode will be selected. If you have selected a program, reselect the manual mode by pressing the Smart Programs button or the Heart Rate Programs button - ProForm 690 Hr Elliptical | Uk Manual - Page 16
performance, clean the metal contacts using a soft cloth; never use alcohol, abrasives, or chemicals to clean the contacts. 6. When you are finished exercising, the console will turn off automatically. If the pedals do not move for several seconds, a tone will sound and the console will pause. If - ProForm 690 Hr Elliptical | Uk Manual - Page 17
of the display for a few seconds. As you exercise, you will be prompted to keep your pedaling pace is too high or too low, you can manually override the setting by pressing the decrease and the profile represents the current segment of the workout. The height of the flashing segment indicates - ProForm 690 Hr Elliptical | Uk Manual - Page 18
for consecutive segments. During the program, the profile will show your progress. The flashing segment of the profile represents the current segment of the workout. The height of the flashing segment indicates the target heart rate setting for the current segment. At the end of each segment of the - ProForm 690 Hr Elliptical | Uk Manual - Page 19
, decrease your pace. When no arrows appear in the display, maintain your current pace. IMPORTANT: Make sure to exercise at a pace that is comfortable for you. Note: You can manually override the resistance levels; however, if you change the resistance levels, you might not maintain the target heart - ProForm 690 Hr Elliptical | Uk Manual - Page 20
displays become dim, the batteries should be replaced; most console problems are the result of low batteries. See assembly step 6 on page 8 for replacement instructions. HOW TO LEVEL THE ELLIPTICAL EXERCISER If the elliptical exerciser rocks slightly on your floor during use, turn one or both - ProForm 690 Hr Elliptical | Uk Manual - Page 21
exercising at the proper intensity is the key to achieving results. You can use your heart rate as a guide exercise, adjust the intensity of your exercise until your heart rate is near the highest number in your training zone. WORKOUT and helps to prevent post-exercise problems. To find the proper - ProForm 690 Hr Elliptical | Uk Manual - Page 22
SUGGESTED STRETCHES The correct form for several basic stretches is shown at the right. Move slowly as you stretch-never bounce. 1. Toe Touch Stretch Stand with your knees bent slightly - ProForm 690 Hr Elliptical | Uk Manual - Page 23
NOTES 23 - ProForm 690 Hr Elliptical | Uk Manual - Page 24
PART LIST-Model No. PFEVEL4986.0 R1010A Key No. Qty. 1 1 2 1 3 1 4 1 5 1 6 1 7 1 8 1 9 1 10 2 11 1 12 1 13 1 14 1 15 1 16 1 17 2 18 1 19 1 20 1 21 1 22 1 23 2 24 2 25 2 26 1 27 2 28 1 29 1 30 6 31 4 32 2 33 4 34 1 35 2 36 2 - ProForm 690 Hr Elliptical | Uk Manual - Page 25
* - M4 Split Washer M10 Washer M6 Nut M8 x 23mm Shoulder Screw Transport Handle Transport Handle Screw Bearing Spacer Assembly Tool Grease Packet Userʼs Manual Note: Specifications are subject to change without notice. For information about ordering replacement parts, see the back cover of this - ProForm 690 Hr Elliptical | Uk Manual - Page 26
EXPLODED DRAWING A-Model No. PFEVEL4986.0 R1010A 10 8 4 116 117 101 5 117 3 30 105 20 74 101 79 30 10 111 88 84 30 78 21 9 101 12 18 105 17 30 101 17 48 79 30 49 105 80 111 88 84 30 101 78 79 90 90 84 15 73 90 19 84 11 104 22 31 118 115 32 88 33 73 118 31 16 - ProForm 690 Hr Elliptical | Uk Manual - Page 27
EXPLODED DRAWING B-Model No. PFEVEL4986.0 R1010A 29 103 54 93 91 92 52 94 77 79 110 57 100 103 94 77 55 51 53 56 107 72 110 79 71 102 103 100 103 59 60 103 50 103 85 63 58 96 61 62 95 64 28 114 67 66 97 113 66 65 103 70 102 2 38 44 47 45 63 62 68 46 44 69 98 47 - ProForm 690 Hr Elliptical | Uk Manual - Page 28
) • the key number and description of the replacement part(s) (see the PART LIST and the EXPLODED DRAWING near the end of this manual) RECYCLING INFORMATION This electronic product must not be disposed of in municipal waste. To preserve the environment, this product must be recycled after its useful
-
 1
1 -
 2
2 -
 3
3 -
 4
4 -
 5
5 -
 6
6 -
 7
7 -
8
-
9
-
10
-
11
-
12
-
13
-
14
-
15
-
16
-
17
-
18
-
19
-
20
-
21
-
22
-
23
-
24
-
25
-
26
-
27
-
28
 |
 |
Serial
Number
Decal
USERʼS MANUAL
www.iconeurope.com
QUESTIONS?
If you have questions, or if there are
missing parts, please contact us:
Call: 08457 089 009
From Ireland: 053 92 36102
Website: www.iconsupport.eu
E-mail: Visit www.iconsupport.eu
Write:
ICON Health & Fitness, Ltd.
c/o HI Group PLC
Express Way
Whitwood, West Yorkshire
WF10 5QJ
UK
CAUTION
Read all precautions and instruc-
tions in this manual before using
this equipment. Keep this manual
for future reference.
Model No. PFEVEL4986.0
Serial No.
Write the serial number in the
space above for reference.