ProForm 735 English Manual - Page 11
Next, slide the Carriage Stop 24 onto the Lat Tower
 |
View all ProForm 735 manuals
Add to My Manuals
Save this manual to your list of manuals |
Page 11 highlights
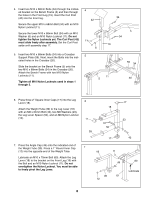
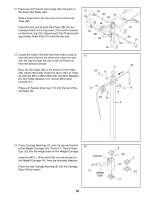
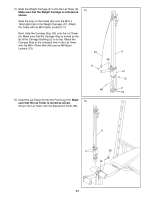
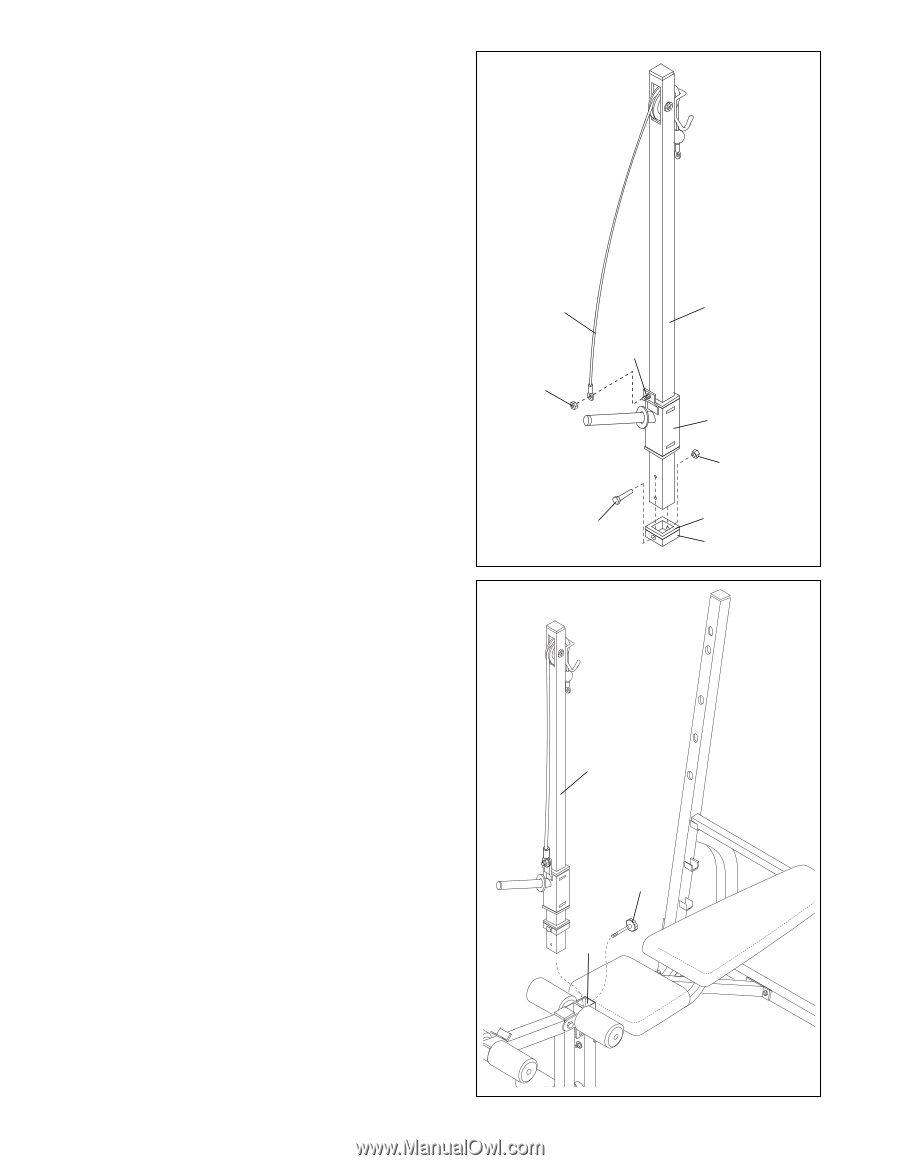
15. Slide the Weight Carriage (47) onto the Lat Tower (9). 15 Make sure that the Weight Carriage is oriented as shown. Slide the loop on the Cable (45) onto the M10 x 19mm Bolt (46) in the Weight Carriage (47). Attach the Cable with an M10 Nylon Locknut (11). Next, slide the Carriage Stop (24) onto the Lat Tower (9). Make sure that the Carriage Stop is turned so the lip of the Carriage Bushing (2) is on top. Attach the Carriage Stop to the indicated hole in the Lat Tower with the M8 x 70mm Bolt (48) and an M8 Nylon Locknut (13). 45 46 11 48 16. Insert the Lat Tower (9) into the Front Leg (19). Make 16 sure that the Lat Tower is turned as shown. Secure the Lat Tower with the Adjustment Knob (36). 9 47 13 2 24 9 36 19 11
-
 1
1 -
2
-
3
-
4
-
5
-
 6
6 -
 7
7 -
 8
8 -
 9
9 -
 10
10 -
 11
11 -
 12
12 -
 13
13 -
 14
14 -
 15
15 -
 16
16 -
17
-
18
-
19
-
20
-
21
-
22
 |
 |
11
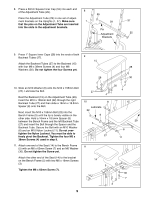
16.
Insert the Lat Tower (9) into the Front Leg (19).
Make
sure that the Lat Tower is turned as shown.
Secure the Lat Tower with the Adjustment Knob (36).
16
9
19
36
15.
Slide the Weight Carriage (47) onto the Lat Tower (9).
Make sure that the Weight Carriage is oriented as
shown.
Slide the loop on the Cable (45) onto the M10 x
19mm Bolt (46) in the Weight Carriage (47). Attach
the Cable with an M10 Nylon Locknut (11).
Next, slide the Carriage Stop (24) onto the Lat Tower
(9). Make sure that the Carriage Stop is turned so the
lip of the Carriage Bushing (2) is on top. Attach the
Carriage Stop to the indicated hole in the Lat Tower
with the M8 x 70mm Bolt (48) and an M8 Nylon
Locknut (13).
15
47
46
48
13
24
2
11
45
9