ProForm 785 Watts Bike Uk Manual - Page 8
Seat Post. Then, adjust the Seat Carriage to
 |
View all ProForm 785 Watts Bike manuals
Add to My Manuals
Save this manual to your list of manuals |
Page 8 highlights
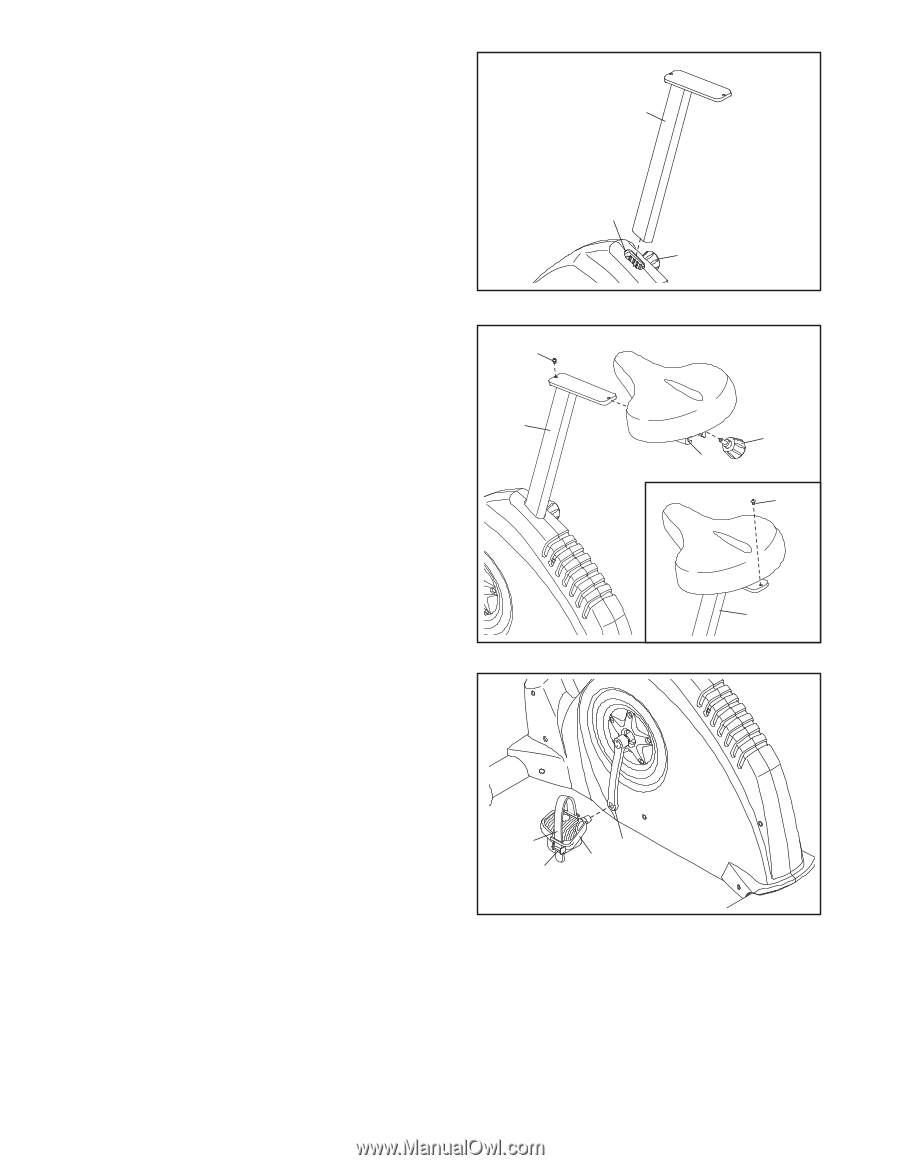
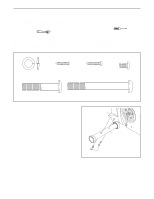
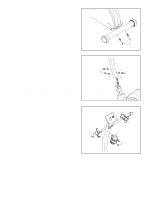
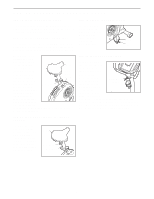
7. Turn the Seat Post Knob (20) counterclockwise sev- 7 eral turns to loosen it. Next, pull the Seat Post Knob outward, and insert the Seat Post (11) into the Frame (1). Slide the Seat Post upward or downward to the desired position, and release the Seat Post Knob. Move the Seat Post upward or downward slightly to make sure that the Seat Post Knob is engaged in one of the adjustment holes in the Seat Post. Then, turn the Seat Post Knob clockwise to tighten it. 11 1 20 8. Attach an M6 x 10mm Screw (46) to the Seat Post (11). Next, slide the Seat Carriage (19) onto the Seat Post. Then, adjust the Seat Carriage to the desired position and tighten the Seat Knob (31) into the Seat Carriage. See the inset drawing. Attach another M6 x 10mm Screw (46) to the Seat Post (11). 8 46 11 31 19 46 11 9. Identify the Left Pedal (24), which is marked with a "Left" sticker. Using an adjustable wrench, firmly tighten the Left Pedal counterclockwise into the Left Crank Arm (15). Tighten the Right Pedal (not shown) clockwise into the Right Crank Arm (not shown). IMPORTANT: Tighten both Pedals as firmly as possible. After using the exercise cycle for one week, retighten the Pedals. For best performance, keep the Pedals tightened. Press the tab on the side of the Left Pedal (24) and adjust the pedal strap to the desired position. Adjust the other pedal strap (not shown) in the same way. 9 Strap Tab 15 24 10. Make sure that all parts are properly tightened before you use the exercise cycle. Note: Some hardware may be left over after assembly is completed. Place a mat under the exercise cycle to protect the floor or carpet. Note: If you purchased the optional chest pulse sensor, see page 19 for instructions on how to install the receiver for the optional chest pulse sensor. 8
-
 1
1 -
2
-
 3
3 -
 4
4 -
 5
5 -
 6
6 -
 7
7 -
 8
8 -
 9
9 -
 10
10 -
 11
11 -
 12
12 -
 13
13 -
14
-
15
-
16
-
17
-
18
-
19
-
20
-
21
-
22
-
23
-
24
 |
 |