Ricoh 411402 Printer Guide
Ricoh 411402 - EFI Fiery EB-105EX Controller Manual
 |
View all Ricoh 411402 manuals
Add to My Manuals
Save this manual to your list of manuals |
Ricoh 411402 manual content summary:
- Ricoh 411402 | Printer Guide - Page 1
Printer Controller EB-105EX Printing Guide For use with the following copiers: Ricoh Aficio 2090/2105 Savin 4090/40105 Gestetner 9002/10512 nashuatec 9005/10515 Rex Rotary 9008/10518 Lanier LD090/LD0105 infotec 2090/2105 - Ricoh 411402 | Printer Guide - Page 2
Printer Controller EB-105EX for the supported platforms and network environments. It also includes guidelines for setting up UNIX, Windows NT 4.0/ 2000, and Novell NetWare servers to provide printing services to users. • The Printing Guide describes the printing features of the Printer Controller EB - Ricoh 411402 | Printer Guide - Page 3
may only be used or copied in accordance with the terms of the Software license set forth below. The Prints, Fiery Spark, NetWise, PrintMe, PrintMe Enterprise, PrintMe Networks All other terms and product names may be trademarks or application or in the user documentation may not match PANTONE- - Ricoh 411402 | Printer Guide - Page 4
maintain compliance with FCC regulations, shielded cables must be used with this equipment. Operation with non-approved equipment or unshielded cables is likely the approval of manufacturer could void the user's authority to operate this equipment. Industry Canada Class B Notice This Class B digital - Ricoh 411402 | Printer Guide - Page 5
, service bureau, or similar arrangement. You may not make or have made, or permit to be made, any copies of the Software or portions thereof, except one (1) copy for backup or archive purposes in support of your use of the Software as permitted hereunder. You may not copy the Documentation. You - Ricoh 411402 | Printer Guide - Page 6
SUCH DAMAGE. YOU ACKNOWLEDGE THAT THE PRICE OF THE PRODUCT REFLECTS THIS ALLOCATION OF Use, duplication, or disclosure of the Software by the United States Government is subject to restrictions as set or equivalent regulation shall apply. The name of the Contractor is Electronics for Imaging - Ricoh 411402 | Printer Guide - Page 7
Contents About the Documentation Introduction About this manual xi Chapter 1: Printing from Windows Computers Printing from applications 1-1 Setting options and printing from Windows computers 1-2 Using job templates 1-6 Using Shortcuts 1-10 Defining and printing custom page sizes 1-11 - Ricoh 411402 | Printer Guide - Page 8
master with the variable document 5-5 Using FreeForm 5-7 Printing variable data documents with FreeForm 2 5-11 Chapter 6: Scanning Fiery Remote Scan components 6-1 Scanning from the copier operation panel 6-2 Preparing for scanning from the copier operation panel 6-2 Performing a scan - Ricoh 411402 | Printer Guide - Page 9
Service How Fiery E-mail Service works 8-1 Printing using an E-mail Client 8-2 Job Control 8-4 Appendix A: Print Options About printer drivers and printer description files A-1 Where to set print options A-2 Print option override hierarchy A-2 Default settings A-2 More about print - Ricoh 411402 | Printer Guide - Page 10
x Contents Appendix C: Troubleshooting Maintaining optimal system performance C-1 Troubleshooting C-1 General printing problems C-2 Problems with print quality C-4 Problems with Fiery Downloader C-4 Problems with scanning C-6 Problems with Fiery Remote Scan C-6 Problems with Fiery - Ricoh 411402 | Printer Guide - Page 11
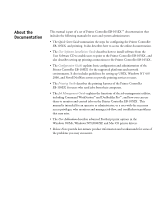
Guide. About this manual This manual is intended for remote users who send jobs via the network and the EB-105EX. It covers the following topics: • Printing from a Windows computer • Printing from a Mac OS computer • Printing from a UNIX workstation • Downloading files and fonts using Fiery - Ricoh 411402 | Printer Guide - Page 12
- Ricoh 411402 | Printer Guide - Page 13
User Software Installation Guide. For basic instructions and details on using Fiery Downloader or Fiery WebDownloader, see Chapter 4. For basic instructions on using the Fiery E-mail Service, see Chapter 8. NOTE: For information on setting up the Windows environment for printing with Windows servers - Ricoh 411402 | Printer Guide - Page 14
can also set default print settings using the driver. To print from Windows applications by connecting your computer to a print server via the network, a Novell NetWare, Windows NT 4.0, or UNIX server is required. For more information, see the Configuration Guide. To print from Windows applications - Ricoh 411402 | Printer Guide - Page 15
to hide all print options The Fiery Printing tab serves as the control center for all frequently used printing functions. NOTE: Supported tabs and print options may vary between Windows 9x/Me, Windows NT 4.0, and Windows 2000/XP PostScript drivers. For a complete list of print options, see Appendix - Ricoh 411402 | Printer Guide - Page 16
on configuring installable options, see the User Software Installation Guide. For more information about job management tools, see the Job Management Guide. If you choose Printer's default, the job prints according to the settings specified in Setup. For more information, see Appendix A. NOTE: If - Ricoh 411402 | Printer Guide - Page 17
ALL WINDOWS PRINT JOBS USING THE ADOBE OR MICROSOFT POSTSCRIPT PRINTER DRIVER 1. Click Start, choose Settings, and then choose Printers (Windows 9x/Me/NT/2000) or Printers and Faxes (Windows XP). 2. Right-click the EB-105EX icon and choose Properties (Windows 9x/Me), Document Defaults (Windows NT - Ricoh 411402 | Printer Guide - Page 18
share templates over a network, using the Import and Export features. TO CREATE A JOB TEMPLATE 1. Make sure that Default Job Template appears in the Job Templates menu, and then configure options from the print option bars. As soon as you change any settings, the Job Templates menu displays Untitled - Ricoh 411402 | Printer Guide - Page 19
applications TO LOAD JOB TEMPLATES 1. From the Fiery Printing tab, click the Job Templates menu. 2. Choose the settings you want to use for your template. The options are automatically configured. TO DELETE JOB TEMPLATES 1. From the Fiery Printing tab, click the Job Templates button. 2. Choose the - Ricoh 411402 | Printer Guide - Page 20
11-8 Printing from Windows Computers TO EXPORT SAVED TEMPLATES 1. From the Fiery Printing tab, click the Job Templates button. 2. Choose the Job Templates you want to export and click Export. 3. Browse to the location in which to save the file, enter a file name, and then click OK. NOTE: The file name - Ricoh 411402 | Printer Guide - Page 21
applications TO IMPORT SAVED TEMPLATES 1. From the Fiery Printing tab, click the Job Templates button. 2. Click templates, they appear in the Job Templates menu under the Job Template, not the file name. In the preceding examples, the file present.sav (file name) was imported, but it appears in the - Ricoh 411402 | Printer Guide - Page 22
11-10 Printing from Windows Computers Using Shortcuts The Shortcuts area of the driver interface displays the current settings for some of the most commonly used print options. You can access and change these settings quickly and easily using the Shortcuts. You can also access some page layout and fi - Ricoh 411402 | Printer Guide - Page 23
in the application. Portrait Landscape Height Width Height Width NOTE: Custom page sizes are not supported with Imposition jobs. NOTE: Custom page sizes for Windows NT and Windows 2000/XP cannot be set using the Fiery Printing tab. For more information, see "Working with custom page sizes in - Ricoh 411402 | Printer Guide - Page 24
page size, you can use it from within an application without redefining it each time you print. NOTE: The copier must be set to print custom page sizes. TO DEFINE A CUSTOM PAGE SIZE WITH THE WINDOWS 9X/ME POSTSCRIPT PRINTER DRIVER 1. Click Start, choose Settings, and then choose Printers. 2. Right - Ricoh 411402 | Printer Guide - Page 25
option to swap Width and Length dimensions to correspond to the paper feed direction of the print job. Paper name-Enter a name for your custom page size. The new custom paper name appears in the Page Size menu. 6. Click OK. 7. To define the unprintable area of the custom page, click Unprintable Area - Ricoh 411402 | Printer Guide - Page 26
4. Choose the name of the custom page you want to edit from the Page Size menu. 5. Click Custom. The Enter Custom Paper Size dialog box appears. 6. Edit the settings, as described on page 1-13, and click OK. TO PRINT A CUSTOM PAGE SIZE WITH THE WINDOWS 9X/ME POSTSCRIPT PRINTER DRIVER NOTE: Make sure - Ricoh 411402 | Printer Guide - Page 27
you print. NOTE: The copier must be set to print custom page sizes. TO DEFINE A CUSTOM PAGE SIZE WITH THE WINDOWS NT 4.0 POSTSCRIPT PRINTER DRIVER 1. Click Start, choose Settings, and then choose Printers. 2. Right-click the EB-105EX PS icon and choose Document Defaults. 3. Click the Page Setup tab - Ricoh 411402 | Printer Guide - Page 28
11-16 Printing from Windows Computers 4. Choose PostScript Custom Page Size from the Paper Size menu. The PostScript Custom Page Size Definition dialog box appears. 5. Specify options to define the custom page size. Custom Page Size Dimensions-Enter the width and height of the print job. Unit-Select a - Ricoh 411402 | Printer Guide - Page 29
11-17 Defining and printing custom page sizes TO EDIT A CUSTOM PAGE SIZE WITH THE WINDOWS NT 4.0 POSTSCRIPT PRINTER DRIVER 1. Click Start, choose Settings, and then choose Printers. 2. Right-click the EB-105EX PS icon and choose Document Defaults. 3. Click the Advanced tab and select Paper Size from - Ricoh 411402 | Printer Guide - Page 30
time you print. NOTE: Windows 2000 and Windows XP have a similar interface when setting options and printing. The following procedures use Windows 2000 illustrations, with Windows XP differences noted. TO DEFINE A CUSTOM PAGE SIZE WITH THE WINDOWS 2000/XP POSTSCRIPT PRINTER DRIVER 1. Click Start - Ricoh 411402 | Printer Guide - Page 31
11-19 Defining and printing custom page sizes 4. Click Advanced. 5. Choose PostScript Custom Page Size from the Paper Size menu. The PostScript Custom Page Size Definition dialog box appears. - Ricoh 411402 | Printer Guide - Page 32
DRIVER 1. Click Start, choose Settings, and then choose Printers (Windows 2000) or Printers and Faxes (Windows XP). 2. Right-click the EB-105EX PS icon and choose Printing Preferences. 3. Click the Paper/Quality tab. 4. Click Advanced. 5. Choose PostScript Custom Page Size from the Paper Size menu - Ricoh 411402 | Printer Guide - Page 33
files to take to a service bureau or other location, print the final files to the File port (as opposed to one of the local ports). You can also print to the File port to create a file to download using Fiery Downloader. For instructions on printing to the File port, see your Windows documentation. - Ricoh 411402 | Printer Guide - Page 34
- Ricoh 411402 | Printer Guide - Page 35
Tagged Image File Format (TIFF), or Portable Document Format (PDF) files using Fiery Downloader or WebDownloader. For supported file versions, see the User Software Installation Guide. For details on using Fiery Downloader or WebDownloader, see Chapter 4. Printing from applications with Mac OS 9 and - Ricoh 411402 | Printer Guide - Page 36
from Mac OS Computers TO SET PRINT OPTIONS AND PRINT WITH THE ADOBEPS PRINTER DRIVER 1. Choose Page Setup from the application's File menu. 2. Choose Page Attributes in the dialog box that appears. Select the EB-105EX as your printer. NOTE: Page Setup dialog boxes vary across applications. 3. Select - Ricoh 411402 | Printer Guide - Page 37
or Mac OS X (Classic mode) 6. Select the EB-105EX as your printer and specify settings for the print options displayed. Choose Job Notes NOTE: Print dialog boxes vary across applications. From the Paper Source menu, choose the paper tray for the job. For example, you can specify that the job be - Ricoh 411402 | Printer Guide - Page 38
operator. 8. Choose Printer Specific Options and specify the appropriate settings for your print job. Choose Printer Specific Options These print options are specific to the EB-105EX and the copier. To see all the options, you may have to scroll. They override settings in EB-105EX Printer Setup, but - Ricoh 411402 | Printer Guide - Page 39
Follow the on-screen instructions to solve the conflict. 9. To make the new settings the default settings, click Save Settings. 10. Click Print. Defining custom page sizes With custom page sizes, you can define page dimensions and margins. After you define a custom page size, you can use it from within - Ricoh 411402 | Printer Guide - Page 40
SAVED CUSTOM PAGE SIZE 1. Choose Page Setup from the application's File menu. 2. Choose Custom Page Default. 3. Select the Custom Page Size name. 4. Edit the page dimensions and margins. 5. Click Add. 6. Replace the existing Custom Page name and click OK. TO PRINT A CUSTOM PAGE SIZE NOTE: Make sure - Ricoh 411402 | Printer Guide - Page 41
Some default print options are set by the administrator during Setup. For information on the current server default settings, contact the administrator or operator. TO PRINT OPTIONS AND PRINT WITH THE ADOBEPS PRINTER DRIVER 1. Open a file and choose Page Setup from the application's File menu. 2. In - Ricoh 411402 | Printer Guide - Page 42
Select the Page settings for your print job. 4. Click OK. 5. Choose Print from the application's File menu. 6. Select the EB-105EX as your printer and choose an option category from the pop-up menu. You can change the print option settings for each category. Choose a print option category 7. Choose - Ricoh 411402 | Printer Guide - Page 43
the Printer Features menu. The application or Adobe PS printer driver may not set up the file properly for printing on the EB-105EX, which may cause an unexpected printing error and take longer to process. NOTE: If you select an invalid setting or combination of settings when printing a document, no - Ricoh 411402 | Printer Guide - Page 44
- Ricoh 411402 | Printer Guide - Page 45
Guide. The queue name and EB-105EX printer name are determined by your system administrator. For the names of your queues, contact your system administrator. For information about setting up printing from TCP/IP, see your UNIX system documentation. Printing to the EB-105EX You can use UNIX - Ricoh 411402 | Printer Guide - Page 46
LIST OF JOBS IN THE QUEUE • On a system running a BSD-based variant, use the lpq command to see printer jobs in the queue, as follows: lpq For example, if the Print queue of your EB-105EX is named print_Server, type: lpq -Pprint_Server Your workstation displays the contents of the queue - Ricoh 411402 | Printer Guide - Page 47
example, to remove job number 123 from the Print queue of your EB-105EX named print_Server, type: lprm -Pprint_Server 123 The lprm command reports the names of any files it removes. • On a system running Solaris 9 or any System V implementation of UNIX, use the cancel command to remove jobs from the - Ricoh 411402 | Printer Guide - Page 48
- Ricoh 411402 | Printer Guide - Page 49
connection. For information on installing and configuring Fiery Downloader and WebDownloader on supported networking protocols, see the User Software Installation Guide. NOTE: The Windows and Mac OS version of Fiery Downloader and WebDownloader are fundamentally the same. Differences are noted - Ricoh 411402 | Printer Guide - Page 50
menu. 2. Select the EB-105EX in the Chooser window and click OK (Windows) or Connect (Mac OS). The Fiery Downloader Status window appears, displaying the Fiery Downloader toolbar, menus, and status bar. Displays server status and user and document name of the job currently printing Displays server - Ricoh 411402 | Printer Guide - Page 51
44-3 Using Fiery Downloader or WebDownloader Buttons for some menu functions appear in the toolbar at the top of the window. Open Click to connect to a different EB-105EX. Download Click to download a file or font to the EB-105EX. Status Font List About Fiery Downloader (Windows only) If you - Ricoh 411402 | Printer Guide - Page 52
file types, as well as fonts, to the EB-105EX. You can also specify a limited number of print option settings for the files you download. TO DOWNLOAD A FILE OR FONT WITH FIERY DOWNLOADER 1. Use your application to generate a file. You can save a PostScript or PDF file by selecting the appropriate option - Ricoh 411402 | Printer Guide - Page 53
the Direct connection, the job is spooled to the Print queue and then printed. If the Print queue is not enabled, the job is spooled to the Hold queue and must be released for printing by the operator. NOTE: To download fonts, you must use the Direct connection (make sure the Direct connection is - Ricoh 411402 | Printer Guide - Page 54
then Shift-click the last file. Control-click to select multiple non-sequential files. If you change your mind about a file, select the file name in the Files to Download list and click Remove File(s) (Windows) or Remove (Mac OS). Click Remove All (Mac OS) to remove all files from the Files to - Ricoh 411402 | Printer Guide - Page 55
you to specify density settings for an image. If the file you are printing includes transfer functions, the Fiery Downloader Brightness option has no effect. For more information on using transfer functions, see the documentation for your application. 'showpage' after EPS files (Windows) or 'showpage - Ricoh 411402 | Printer Guide - Page 56
Folder (Mac). 4. Click OK. The font backup file is saved. TO RESTORE FONTS 1. Start Fiery Downloader. 2. Choose Restore fonts from the File menu. 3. Open the font backup file from the saved location, and click OK (Windows) or Select this folder (Mac), This replaces all the user fonts on the EB-105EX. - Ricoh 411402 | Printer Guide - Page 57
before printing. To convert to Adobe Type 1 fonts for Windows 9x/Me, click the Fonts tab in the Adobe PS printer driver and setup the Font Substitution Table. For Windows NT 4.0/2000/XP, click the PostScript tab of the EB-105EX Document Defaults dialog box and select TrueType Font Setting >Download - Ricoh 411402 | Printer Guide - Page 58
OS computer. If you are using these fonts in documents you print on a LaserWriter, they are probably already installed. If not, you must install them. For more information, see the User Software Installation Guide. Occasionally, you may want to use Adobe Type 1 (Windows) or PostScript (Mac OS) fonts - Ricoh 411402 | Printer Guide - Page 59
Using Fiery Downloader or WebDownloader TO VIEW FONT INFORMATION, UPDATE, PRINT, AND DELETE FONTS • Choose Font List from the File menu Guide or consult your administrator. The Font List dialog box includes Update, Print the name and cannot be deleted. Click to print the Font List to the Print queue - Ricoh 411402 | Printer Guide - Page 60
- Ricoh 411402 | Printer Guide - Page 61
data printing is typically used for direct-mail advertising or other targeted mailings. It involves combining a set of master elements that are common across copies of a document with a set of variable elements that change from copy to copy. An example is a brochure that greets customers by name and - Ricoh 411402 | Printer Guide - Page 62
, a page layout application that supports scripting, or a database application. FreeForm functions are controlled with two print options: Create Master and Use Master. You can set these options in the printer driver when you send a job, or instruct the operator to set them with job overrides from - Ricoh 411402 | Printer Guide - Page 63
elements Master document When you have finalized the design of the master document, print it driver interface, Fiery WebSpooler, and Fiery Spooler allow you to select numbers 1 through 15 only. To create a FreeForm master with a number greater than 15, the operator must set the Create Master and Use - Ricoh 411402 | Printer Guide - Page 64
page layout application that supports scripting. In all cases, information is taken from a list or database and merged into an existing document that is set up to accept the information. Each application has different controls for this function. For detailed instructions, see the specific application - Ricoh 411402 | Printer Guide - Page 65
Fiery WebSpooler. For more information about soft-proofing and thumbnail windows of Command WorkStation, see the Job Management Guide. Combined document A master document can include more than one page. When you print a variable document and specify a FreeForm master that contains multiple pages, the - Ricoh 411402 | Printer Guide - Page 66
master pages then starts over, and Pages 3 and 4 of the variable document are combined respectively with Pages 1 and 2, again, of the master document. This pattern continues for each subsequent set of pages in the variable document. Multiple-page master document Variable document Combined document - Ricoh 411402 | Printer Guide - Page 67
are reassigned, or you want to refer to another job in the Job Notes or Instructions fields. • For restrictions on print option settings when using FreeForm, see Appendix A. The following settings for the master document and variable document must match: Document Size Duplex Orientation Punch Staple - Ricoh 411402 | Printer Guide - Page 68
Tray Media Type Punch Staple Use Slip Sheet NOTE: The Duplex print option, Open to Top, has no effect when printing using FreeForm. TO PRINT VARIABLE DATA DOCUMENTS 1. Create a master document. The following example shows one page of a master document for a tri-fold brochure that was created with - Ricoh 411402 | Printer Guide - Page 69
one page of the variable document for the tri-fold brochure. The data in this document can be as simple as a name and address, or as complex as multiple graphics and photographic elements. 4. Print the variable document to the EB-105EX with the Use Master print option set to the appropriate FreeForm - Ricoh 411402 | Printer Guide - Page 70
55-10 Printing Variable Data Documents FreeForm master numbers can be overridden from Command WorkStation, Fiery Spooler, or Fiery WebSpooler. Check with the operator to make sure that the FreeForm master number you specify is the correct one for the FreeForm master you want to use. If you want to - Ricoh 411402 | Printer Guide - Page 71
creating page conditions, see the documentation that came with the third-party printing software. For instructions on creating a variable data job or printing variable data jobs using FreeForm 2 and the third-party variable data printing software, see the documentation that came with the third-party - Ricoh 411402 | Printer Guide - Page 72
- Ricoh 411402 | Printer Guide - Page 73
requirements and constraints apply: • Fiery Remote Scan cannot be used over the parallel port. Icopier operation panelt requires a network connection. For information on supported networking protocols, see the User Software Installation Guide. • Fiery Remote Scan must be installed as described in - Ricoh 411402 | Printer Guide - Page 74
send the scan to a hard disk drive using a mailbox, or FTP site. NOTE: To send the scan to an FTP server, you must have FTP Service enabled at the EB-105EX Setup. For more information, see the Configuration Guide. Preparing for scanning from the copier operation panel Before you initiate a scan, you - Ricoh 411402 | Printer Guide - Page 75
is 600. 11. Specify the Binding Direction of your scan job. The default for the Binding Direction option is Left Side. Performing a scan After you select your scan settings, you can scan a document using the copier operation panel. Every time you initiate the scan, you must select where to send - Ricoh 411402 | Printer Guide - Page 76
one of the following as the scan destination, and then specify the subsequent settings accordingly. • Send to Hold Queue (See page 6-4) • Send to the file name of your scan job and press OK. The file name can be up to 19 characters. You can also use an automatically generated file name. 9. Select Guide. - Ricoh 411402 | Printer Guide - Page 77
copier operation panel TO SEND A SCAN FILE TO THE MAILBOX 1. Select Add Destination and then go to Send to Mailbox. 2. Enter the mailbox number (0-9999) or mailbox name Addresses and enter the e-mail address by the specifying the user and domain name, or select Fiery Address Book to choose the e-mail - Ricoh 411402 | Printer Guide - Page 78
Enter the FTP server name for Server Name. 3. Enter the default download folder for Path Name. 4. Specify the FTP port number. NOTE: The default port number is "21". If you change the port number, you also need to change the port number setting for FTP Setup in Network Setup>Service Setup. For more - Ricoh 411402 | Printer Guide - Page 79
Windows and Mac OS versions are similar. The following procedures use Windows illustrations with any Mac OS differences noted. TO INITIATE A SCAN USING EB-105EX. For instructions, see the User Software Installation Guide. 3. If you are scanning a single original, place it on the copier glass. If you - Ricoh 411402 | Printer Guide - Page 80
66-8 Scanning 4. Select the Initiate tab. Fiery Remote Scan Application Fiery Remote Scan TWAIN plug-in 5. Select the appropriate scan settings and click Send (Fiery Remote Scan Application) or Acquire (Fiery Remote Scan TWAIN plug-in module). - Ricoh 411402 | Printer Guide - Page 81
scan job to a specific destination" on page 6-11. Retrieving scans using Fiery Remote Scan To retrieve a scan, scan the image to a mailbox using the copier's display window or initiate the scan using Fiery Remote Scan. Then upload the scanned document into Photoshop, save it to the Hold queue or your - Ricoh 411402 | Printer Guide - Page 82
66-10 Scanning 3. Select the Retrieve tab. Fiery Remote Scan Application Fiery Remote Scan TWAIN plug-in 4. Enter the appropriate Mailbox number and click OK. - Ricoh 411402 | Printer Guide - Page 83
Using can select where to send the scan file. After selecting the appropriate settings for your scan job, you can specify the location to send the scan e-mail Service enabled at the EB-105EX Setup. Also, to send the scan to an FTP server, you must have FTP Service enabled at the EB-105EX Setup. For - Ricoh 411402 | Printer Guide - Page 84
Fiery Hold Queue. The scan job appears in the Spool area of the Command WorkStation Queues window. 3. To send the scan job to a mailbox, click Fiery Mailbox and enter a mailbox number (0000-9999) or mailbox name. 4. To send the scan job to a disk drive, click Save to Disk, select the file format - Ricoh 411402 | Printer Guide - Page 85
66-13 Using Fiery Remote Scan 5. To send the scan job via e-mail, select Email and click Edit Email. The Email message window appears. Enter an e-mail address in the To: field, or browse the list of e-mail addresses in the Address Book by clicking To:, Cc:, or - Ricoh 411402 | Printer Guide - Page 86
FTP settings and click OK. If the proxy server has been enabled, click Proxy Enable and enter the information for the proxy server. NOTE: The default port number is 21. The Proxy Server Port Number configured at Setup must be the same number. For more information, see the Configuration Guide. Indicate - Ricoh 411402 | Printer Guide - Page 87
from the server. TO RETRIEVE SCAN FILES USING WEBSCAN 1. Click the WebScan WebTool in the Fiery WebTools menu on the EB105EX home page. For instructions on how All scanned documents in the Mailbox are displayed. WebScan lists the following information about each scanned job: File name, Date, Pages - Ricoh 411402 | Printer Guide - Page 88
you choose JPEG from the File Format menu. If you want to open all Click Save As. NOTE: Depending on the browser you are using, you may be asked to indicate whether you want to open to view a scanned PDF. 6. To print the job, choose Print from the File menu. To delete a scanned image from the EB - Ricoh 411402 | Printer Guide - Page 89
, but other tools are available to all users. • Command WorkStation, Fiery WebSpooler, and Fiery Spooler all provide the capability to view and control the flow of print jobs to the EB-105EX. If the administrator has set Administrator and Operator passwords in Setup, you must have one of these - Ricoh 411402 | Printer Guide - Page 90
Guide. 2. Type the IP address or the DNS name of the EB-105EX. For this information, contact the operator or administrator. 3. If a Log In dialog box appears, select Guest and click OK. The Log In dialog box appears only if the administrator has set a password. Guest access is sufficient to use - Ricoh 411402 | Printer Guide - Page 91
and alerts you to any EB-105EX or copier errors that interfere with printing. NOTE: If you are running Windows 9x/Me, Job Monitor only tracks jobs sent to the EB-105EX from your workstation. Jobs sent from other workstations are not monitored. By default, Job Monitor automatically starts in the - Ricoh 411402 | Printer Guide - Page 92
have installed and configured printer drivers for more than one EB-105EX, Job Monitor automatically establishes connections to all the EB-105EXs. Server bar Tabs at the bottom of the window allow you to switch between monitoring active jobs, printed jobs, and copier status. Each connected EB-105EX is - Ricoh 411402 | Printer Guide - Page 93
highlighted in red, right-click the server bar and choose Reconnect to Server from the menu. Job Monitor attempts to reestablish the connection to the EB-105EX. TO MONITOR ACTIVE JOBS 1. To monitor jobs that are currently in the Hold queue, or processing or printing on the EB-105EX, click the - Ricoh 411402 | Printer Guide - Page 94
EB-105EX or the copier, the server bar appears highlighted in red and displays details about the error. Paper Tray Level-Displays the amount of paper remaining in each paper tray of the copier. Toner Levels-Displays the ink or toner levels remaining on the copier. Print Traffic-Displays the number - Ricoh 411402 | Printer Guide - Page 95
mail attachments. You can use Fiery E-mail Service in the following ways: • Print using an E-mail Client • Scan using Scan to E-mail How Fiery E-mail Service works In order to use the E-mail services, you must set up Fiery E-mail Service as described in the Configuration Guide To print with an E-mail - Ricoh 411402 | Printer Guide - Page 96
an e-mail with an attachment, Fiery E-mail Service extracts the file and sends it to the EB-105EX Print queue. The file format must be one supported by the EB-105EX. By default, anyone can print with an E-mail Client, unless the Print address book has been set up by the Administrator. If your e-mail - Ricoh 411402 | Printer Guide - Page 97
jobs with Job Control (see the following section). The e-mail notification indicates any current error at the copier. Once the job has been printed, you receive a second e-mail notification that indicates the job printed successfully. To check the status of your job, use Job Control to see if the job - Ricoh 411402 | Printer Guide - Page 98
88-4 Using Fiery E-mail Service Job Control Job Control allows you to manage print jobs by submitting commands to the EB-105EX via e-mail. You can cancel a job, check job status, and inquire help on a job. Once you send a command, the EB-105EX returns an e-mail response. TO MANAGE PRINT JOBS WITH - Ricoh 411402 | Printer Guide - Page 99
each print option and its default setting, and provides information on any constraints or requirements in effect. About printer drivers and printer description files The EB-105EX receives files from computers on the network, processes (RIPs) them, and then sends them to the copier. Windows and - Ricoh 411402 | Printer Guide - Page 100
set print options • During Setup Some settings are specified during Setup by the administrator. For information on the current default server settings, contact the administrator or the operator. • From applications With the Adobe PostScript printer drivers, you can specify job settings when you print - Ricoh 411402 | Printer Guide - Page 101
that can be configured in Setup from the copier operation panel, Command WorkStation, or WebSetup, choosing Printer's Default results in the EB-105EX printing the job with the Setup setting specified. For options that cannot be configured in Setup, the EB-105EX prints the job with a pre-configured - Ricoh 411402 | Printer Guide - Page 102
be printed when the correct password is entered at the copier operation panel. This option is not available in the Mac OS X (Native Mode) printer driver or Adobe PageMaker. See page A-10 for more information. Enter a file name to distinguish a job from other Document Server jobs. The file name can - Ricoh 411402 | Printer Guide - Page 103
AA-5 Print Options Option and settings (default setting is underlined) Description Requirements, constraints, and information Document Server User Name Enter your user name to distinguish from other user. The user name can contain up to 16 alphanumeric characters. This option is not available - Ricoh 411402 | Printer Guide - Page 104
/Perfect/Double Print/ Speed Print If Printing Groups is enabled, the administrator has assigned users to print groups, and passwords to each group. Enter the appropriate Group Name for the print job. This option is not available in the Mac OS X (Native Mode) printer driver or Adobe PageMaker - Ricoh 411402 | Printer Guide - Page 105
Print Options Option and settings (default setting is underlined) Instructions Layout 1-up/2-up/4-up/6-up/9-up/16-up Description Requirements, constraints, and information Enter instructions for the operator driver or Adobe PageMaker. Specify the orientation of the document the document Use this - Ricoh 411402 | Printer Guide - Page 106
available from Mac OS and Windows 2000/XP. For Windows 9x/Me/NT, use the Orientation option. Depending on the application you are using, your landscape job might print with the incorrect orientation. If this occurs, or if you select a Stapler Mode (other than Off ) and the staple is inserted in the - Ricoh 411402 | Printer Guide - Page 107
AA-9 Print Options Option and settings (default setting is underlined) Staple Off/Top Left Auto/Top Right Auto/ Top Let Slant/Top Right Slant/ 2 at Left/2 at Right/2 at Top/ Top Left Horizontal/ Top Right Horizontal/ - Ricoh 411402 | Printer Guide - Page 108
Document Server in the printer driver, the Collate, Duplex, Punch, and Staple print options are restricted to the Off setting, and the Input Tray print option is restricted to the Auto Tray Select setting. These settings, and additional print job settings may be specified from the copier operation - Ricoh 411402 | Printer Guide - Page 109
eld by default. Use this name, or enter another name in the User Code field. 8. Click OK. The Document Server job is saved to the printer's hard disk drive. NOTE: You can save up to 250 Document Server jobs. TO PRINT A DOCUMENT SERVER JOB 1. Click the Document Server key on the copier operation panel - Ricoh 411402 | Printer Guide - Page 110
, click on the printer driver's Consumables tab. Trays that support duplex printing appear with "duplex on" next to their names. TO PRINT DUPLEX PAGES 1. Choose Print in your application and locate the Duplex print option. 2. Choose one of the Duplex settings: Open to Left-Prints the top of the - Ricoh 411402 | Printer Guide - Page 111
AA-13 Print Options Punch Setting 2 holes (Available for UK and US version.) Punch and Punch Holes The following table describes the number of holes and punch positions. NOTE: Punch positions - Ricoh 411402 | Printer Guide - Page 112
is applied to any scaling value already set in the active job. For example, if a user sends a job with a scaling value of 50% and the operator specifies a Scale override of 200%, the job is printed at 100% of the original document size, that is, 50% of 200%. Staple The following table describes the - Ricoh 411402 | Printer Guide - Page 113
AA-15 Print Options Staple Setting Top Left Horizontal Portrait Top Left Vertical 2 at Center Landscape - Ricoh 411402 | Printer Guide - Page 114
- Ricoh 411402 | Printer Guide - Page 115
User Software CD. For instructions, see the User Software Installation Guide. Adobe Type 1 fonts The EB-105EX includes 126 Adobe Type 1 fonts: • The Mac OS column lists the name as it appears on the Font menu on a Mac OS computer. For example, in most applications, to use Italic Windows menu name, - Ricoh 411402 | Printer Guide - Page 116
Courier Oblique Courier-BoldOblique Courier BoldOblique Eurostile Eurostile Eurostile-Bold Eurostile Bold Eurostile-ExtendedTwo Eurostile ExtendedTwo Windows menu name, style Arial AvantGarde AvantGarde, Bold AvantGarde, Italic AvantGarde, Bold Italic Bodoni Bodoni, Bold Bodoni, Italic - Ricoh 411402 | Printer Guide - Page 117
Helvetica Bold Helvetica Oblique Helvetica BoldOblique Helvetica Narrow Helvetica Narrow Bold Helvetica Narrow Oblique Helvetica Narrow BoldObl Windows menu name, style Eurostile ExtendedTwo, Bold GillSans GillSans, Bold GillSans, Italic GillSans, Bold Italic GillSans Light GillSans Light, Italic - Ricoh 411402 | Printer Guide - Page 118
BB-4 Font List PostScript name Mac OS menu name Windows menu name, style JoannaMT JoannaMT-Bold JoannaMT-Italic Joanna MT Joanna MT Bd Joanna MT It Joanna MT Joanna MT, Bold Joanna MT, Italic JoannaMT-BoldItalic LetterGothic - Ricoh 411402 | Printer Guide - Page 119
BB-5 Font List PostScript name Mac OS menu name Windows menu name, style StempelGaramond-Italic StempelGaramond-BoldItalic Symbol StempelGaramond Italic StempelGaramond BoldItalic Symbol StempelGaramond Roman, Italic StempelGaramond Roman, Bold Italic Symbol Tekton Times-Roman Times-Bold - Ricoh 411402 | Printer Guide - Page 120
Univers 57 Condensed, Italic ZapfChancery ZapfDingbats Windows menu name, style Apple Chancery Chicago Geneva Hoefler Text Black Hoefler Text Black, Italic Hoefler Text, Italic Hoefler Text Monaco New York Wingdings PCL printer fonts The following 81 PCL fonts are resident on the Fiery: • Albertus - Ricoh 411402 | Printer Guide - Page 121
BB-7 Font List • Coronet • Courier, Courier Bold, Courier Italic, Courier Bold Italic, CourierPS, CourierPS Bold, CourierPS Oblique, CourierPS Bold Oblique • Garamond Antiqua, Garamond Halbfett, Garamond Kursiv, Garamond Kursiv Halbfett • Helvetica, Helvetica Bold, Helvetica Oblique, Helvetica Bold - Ricoh 411402 | Printer Guide - Page 122
- Ricoh 411402 | Printer Guide - Page 123
output and paper specifications together, to minimize paper changes. Also, print routine jobs while you prepare to print jobs with special instructions or special media. • Reduce unnecessary server connections to Command WorkStation. If you use a second or third EB-105EX on an occasional basis, you - Ricoh 411402 | Printer Guide - Page 124
this • Request that your system administrator enable the queue in Setup. • Make sure the connection is configured correctly. For instructions, see the User Software Installation Guide. • Print to a queue instead of to the Direct connection. When you print to a queue, the job is stored on the EB-105EX - Ricoh 411402 | Printer Guide - Page 125
CC-3 Troubleshooting If this happens The EB-105EX does not respond to a Print command. You cannot print with QuarkXPress 3.32 using the PSPrinter 8.7.2 driver on a Mac OS computer. Try this • Make sure the copier was not disconnected. If the administrator or operator has selected Suspend Printing - Ricoh 411402 | Printer Guide - Page 126
about installing this file, see the User Software Installation Guide. QuickDraw fill patterns print as solids. • Use the Adobe PostScript Printer driver (or the Apple LaserWriter 8.3 or later printer driver). Problems with Fiery Downloader If this happens General problems Try this • Make sure you - Ricoh 411402 | Printer Guide - Page 127
CC-5 Troubleshooting If this happens You cannot print an EPS file using Fiery Downloader. You have problems downloading a font with Fiery Downloader. An extra blank page prints after a Fiery Downloader job. Try this • Try printing using the 'showpage' after EPS files (Windows) or 'showpage' (Mac OS) - Ricoh 411402 | Printer Guide - Page 128
steps: 1. Remove the original from the ADF and the platen glass. 2. Press Menu/Cancel on the copier operation panel. 3. Set the original in the ADF again. 4. Follow the scanning procedure described in page 6-3. Problems with Fiery Remote Scan If this happens Fiery Remote Scan does not display - Ricoh 411402 | Printer Guide - Page 129
Setup settings 1-4 Create Master option 5-2 Custom Page Sizes defining for Windows 2000/XP 1-18 defining for Windows NT 4.0 1-11, 1-12, 1-15, 1-18 Custom Paper Sizes defining for Mac OS 2-5 D Destination option A-4 Direct connection downloading fonts 4-9 required to download fonts C-5 Document Server - Ricoh 411402 | Printer Guide - Page 130
printer setup 2-2 to 2-5 Printer Specific Options menu 2-4 printing 2-1 screen fonts 4-10 Media Type option A-7 N Notes fields Mac OS 2-4 Windows 1-4 O Orientation option A-7 overrides, of job settings A-2 Owner Information 1-3 P Page Range option A-2 Paper Source menu Mac OS 2-3 PDF files downloading - Ricoh 411402 | Printer Guide - Page 131
, problems with C-4 Print Size option A-8 printer default settings where to set A-2 Windows 1-4 printer setup Mac OS 2-2 to 2-5 Windows 1-2 to 1-4 Printer Specific Options menu 2-4 printing duplex pages A-12 font list 4-3 Mac OS 2-1 to File port 1-21 troubleshooting C-2 to C-3 Windows 1-2 Punch print - Ricoh 411402 | Printer Guide - Page 132
-
 1
1 -
 2
2 -
 3
3 -
 4
4 -
 5
5 -
 6
6 -
 7
7 -
8
-
9
-
10
-
11
-
12
-
13
-
14
-
15
-
16
-
17
-
18
-
19
-
20
-
21
-
22
-
23
-
24
-
25
-
26
-
27
-
28
-
29
-
30
-
31
-
32
-
33
-
34
-
35
-
36
-
37
-
38
-
39
-
40
-
41
-
42
-
43
-
44
-
45
-
46
-
47
-
48
-
49
-
50
-
51
-
52
-
53
-
54
-
55
-
56
-
57
-
58
-
59
-
60
-
61
-
62
-
63
-
64
-
65
-
66
-
67
-
68
-
69
-
70
-
71
-
72
-
73
-
74
-
75
-
76
-
77
-
78
-
79
-
80
-
81
-
82
-
83
-
84
-
85
-
86
-
87
-
88
-
89
-
90
-
91
-
92
-
93
-
94
-
95
-
96
-
97
-
98
-
99
-
100
-
101
-
102
-
103
-
104
-
105
-
106
-
107
-
108
-
109
-
110
-
111
-
112
-
113
-
114
-
115
-
116
-
117
-
118
-
119
-
120
-
121
-
122
-
123
-
124
-
125
-
126
-
127
-
128
-
129
-
130
-
131
-
132
 |
 |

Printer Controller EB-105EX
Printing Guide
For use with the following copiers:
Ricoh Aficio 2090/2105
Savin 4090/40105
Gestetner 9002/10512
nashuatec 9005/10515
Rex Rotary 9008/10518
Lanier LD090/LD0105
infotec 2090/2105